Bull Eye Marks
Imposition Wizard lets you add bull eye marks to imposed pages. You can specify your own artwork for them or use the built-in one.
To add a bull eye mark click the "+" button at the top of the “Marks” panel and select the “Bull Eye” option in the popup menu:
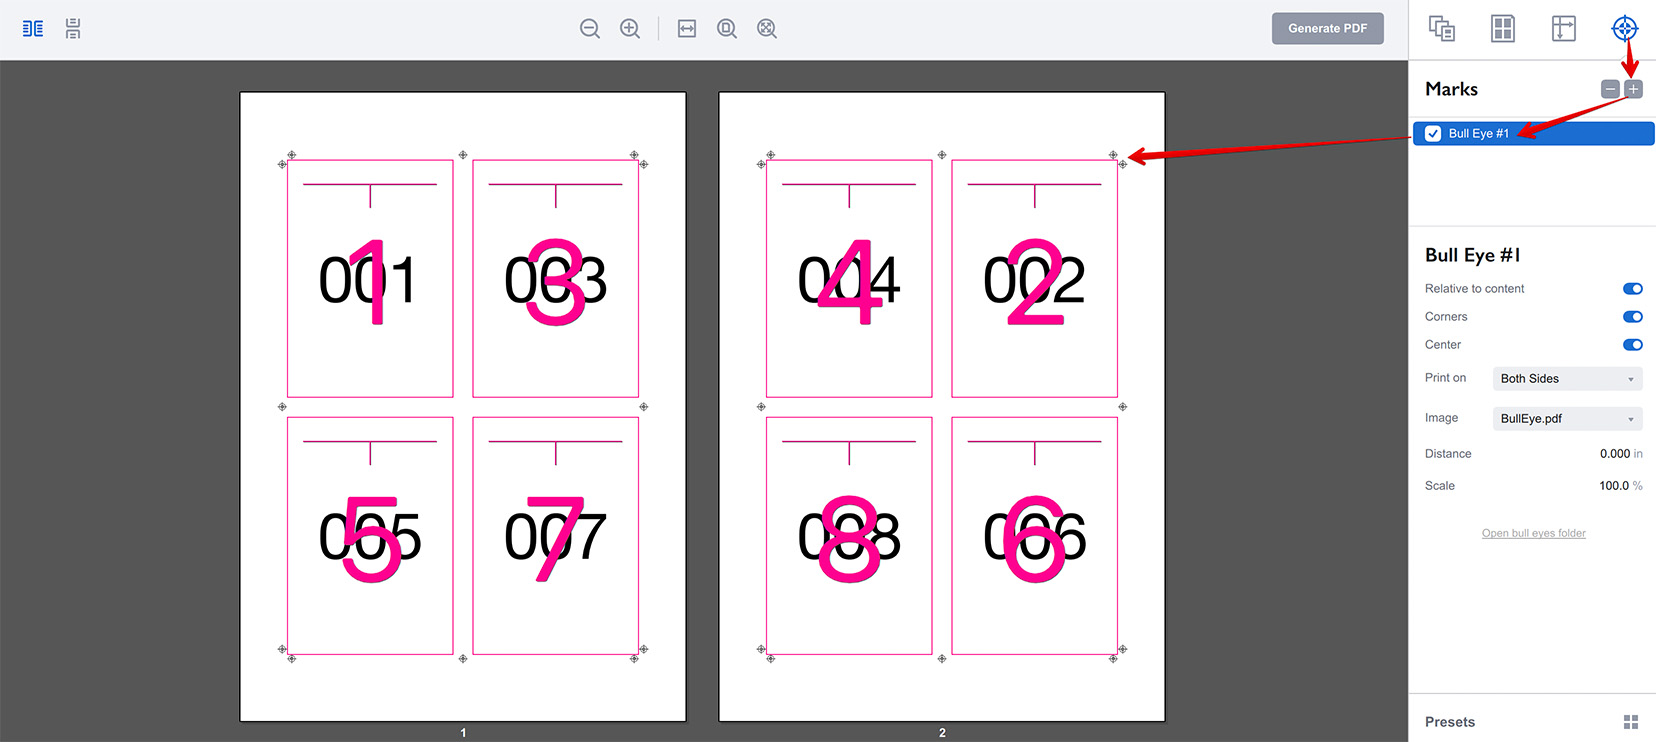
The parameters of the bull eye marks are displayed on the right:
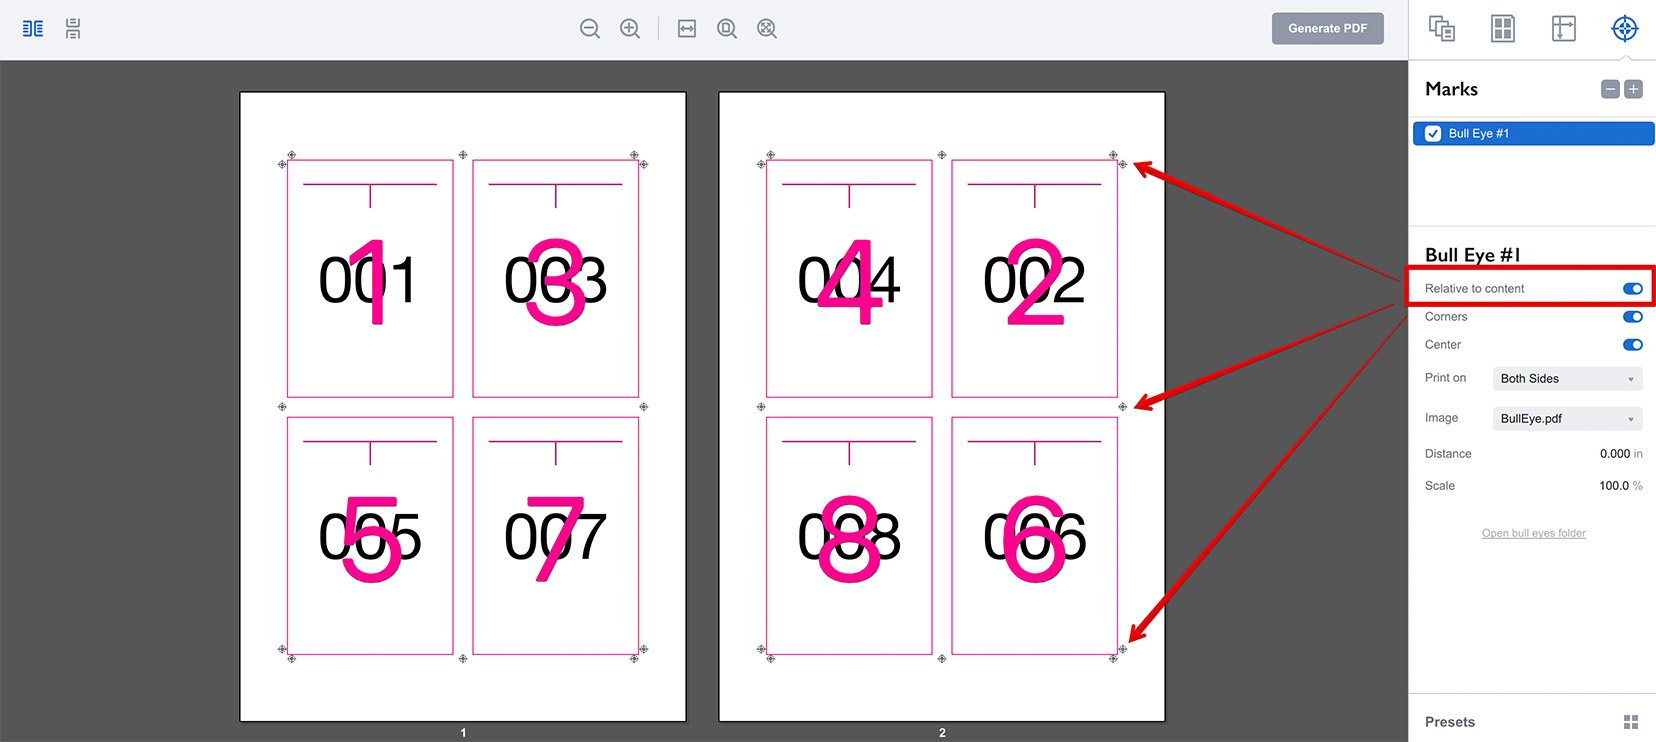
- Relative to content — lets you switch between adding the marks around pages or next to the edges of sheets (see below);
- Corners — if enabled, the marks are added to the sheet corners or around the page corners (depending on the option above);
- Center — if enabled, the marks are added at the middle of the sheet sides or in the middle of the page block (depending on the option above);
- Print on — lets you choose if you want to print the marks on front or back side of the sheets, or both. This only works in duplex mode, otherwise the marks are always printed;
- Image — allows you to select the pre-defined bull eye mark image to use (see below);
- Distance — defines the distance between the marks and the page block or sheet edges, depending on the Relative to content option;
- Scale — lets you adjust the size of the marks.
Relative to Content
This option lets you choose between placing the bull eye marks around the pages block:
or next to the edges of the sheet:
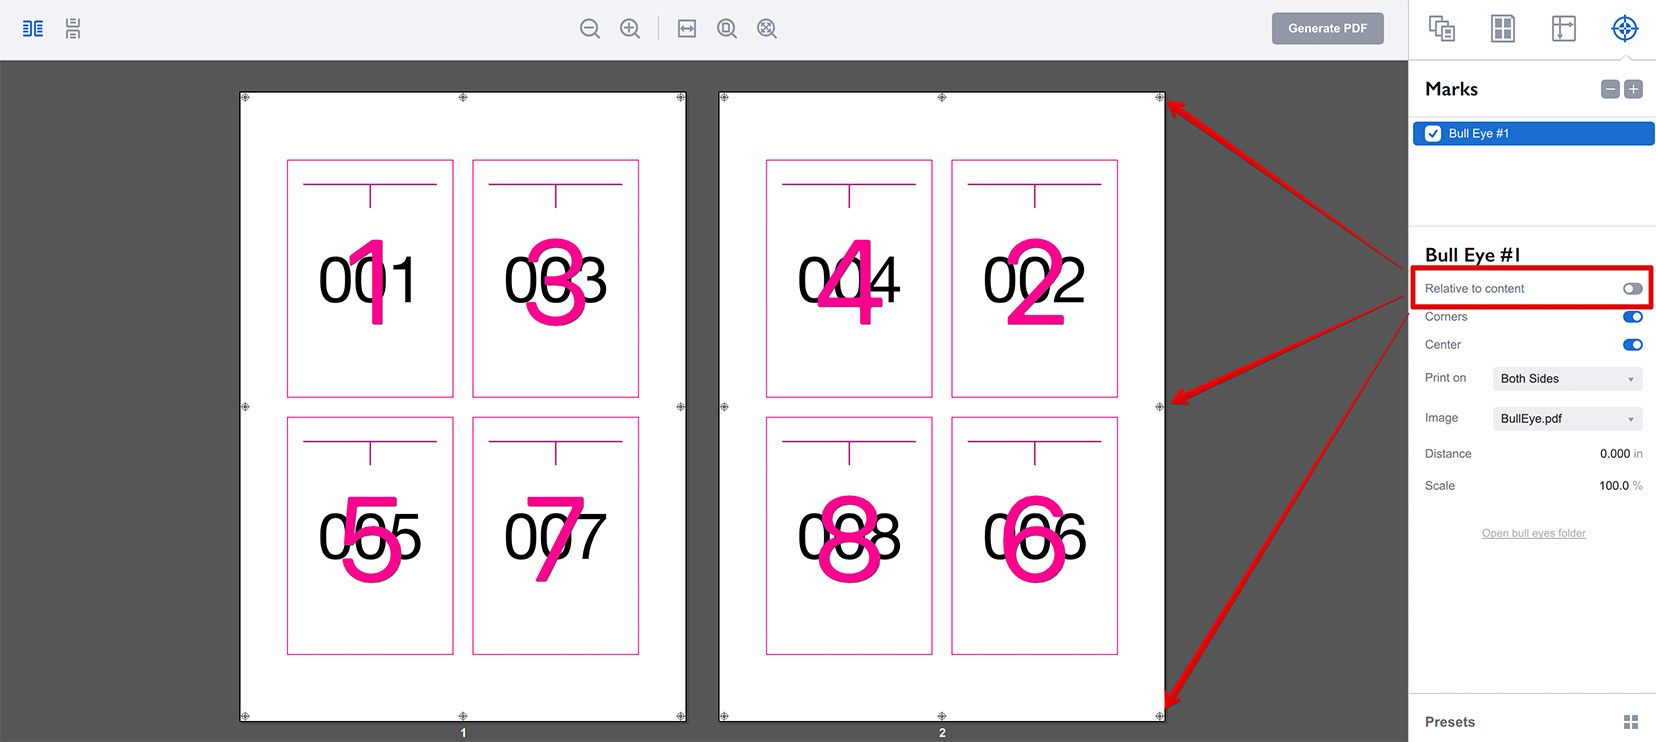
If the marks are placed next to the sheet edges, only one mark is placed at the corners.
The Distance parameter works the opposite way depending on the selected mode, effectively pushing the marks away of the element they are attached to.
Bull Eye Images
Imposition Wizard comes with a single bull eye mark image pre-installed and you can add your own images if needed.
Click the Open bull eyes folder link at the bottom of the right panel to open the folder with the images:
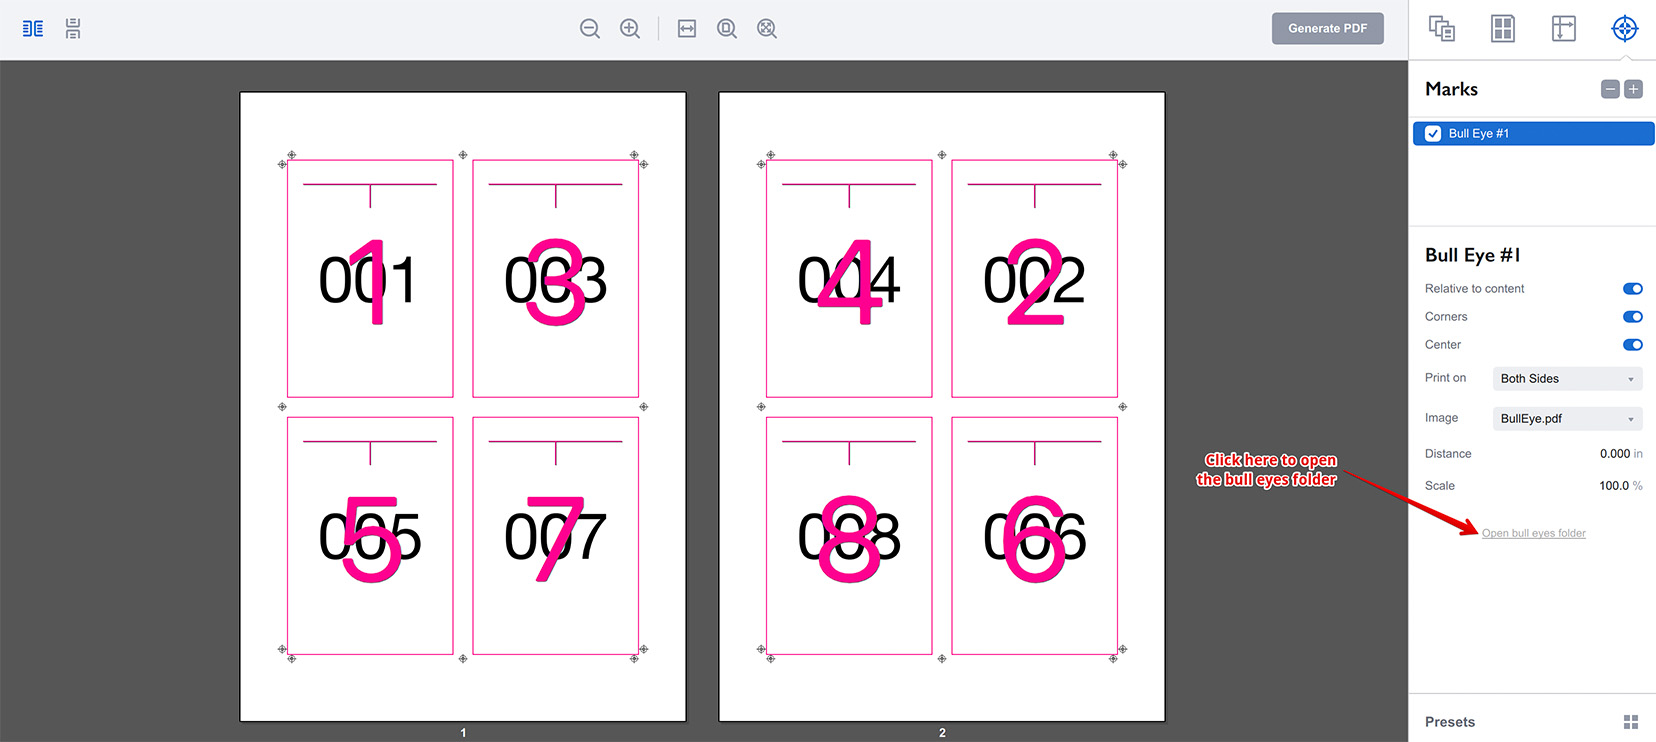
You can also click File → Useful Folders → Bull Eyes item in the main menu of Imposition Wizard. A Finder or Explorer window will pop up with the bull eyes folder. Copy your bull eye PDF files there and restart Imposition Wizard. Then you will be able to select your files from the drop-down list of the Images parameter.
More Imposition Wizard Tutorials
Installation
- Installation — how to install Imposition Wizard;
- License Activation — how to activate Imposition Wizard with a license key;
- Acrobat Plugin Problems — what to do if the plugin doesn’t work.
Basics
- User Interface — how to run Imposition Wizard and make the first steps;
- Pages Grid — how pages are placed across the sheets in Imposition Wizard;
- Presets — how to save and re–use imposition layouts;
- Preflight — how to check for errors before your print.
Layouts
- N–Up — a very simple, yet customizable layout;
- Step and Repeat — perfect layout for business cards;
- Cut Stack — flexible layout with pages flow options;
- Booklet — lots of options for fine–tuning the imposition process;
- Shuffle — manual imposition mode where you control the flow;
- Dutch Cut — save paper by printing more pages on the same sheet.
Imposition Parameters
- Preprocessors — change the document before processing it;
- Page Gaps — configuring gaps between pages;
- Sheet Panel — output sheet size, content position and more;
- Duplex Printing — duplex printing support;
- Registration Marks — adding and configuring marks, custom texts etc;
- Bleeds — configuring bleeds;
- Flipping Rules — how to flip pages in most layouts.
Registration Marks
- Angle Mark — angle mark for image drift compensation;
- Barcode — encoding job details with barcodes;
- Bull Eye — placing bull eye marks around the pages;
- Color Bar — adding color bars to imposed files;
- Crop Marks — configuring crop marks for easier trimming;
- Custom Mark — adding ad–hoc graphics where needed;
- Custom Text — adding text elements with imposition details;
- Gap Crop Marks — adding crop marks in the middle of the page gaps;
- Folding Marks — marking the middle of booklet spreads;
- Perforation Marks — make complex perforation or folding marks;
- Star Target — placing star target marks around the pages;
- Trim Line — marking page boundaries to simplify trimming;
Automation
- Batch Processing — impose multiple files at once;
- Hot Folders — monitor folders and run imposition on changes.
Command Line
- Basic Imposition — basic command line imposition example.
Advanced
- Custom Sheet Sizes — how to extend the built–in list;
- Output File Names — configuring paths and names of imposed files;
- Translation — translate Imposition Wizard to your language.