Crop Marks
Imposition Wizard lets you add crop marks to imposed pages and configure they look to match your needs. To add crop marks click the "+" button at the top of the “Marks” panel and select the “Crop Marks” option in the popup menu:
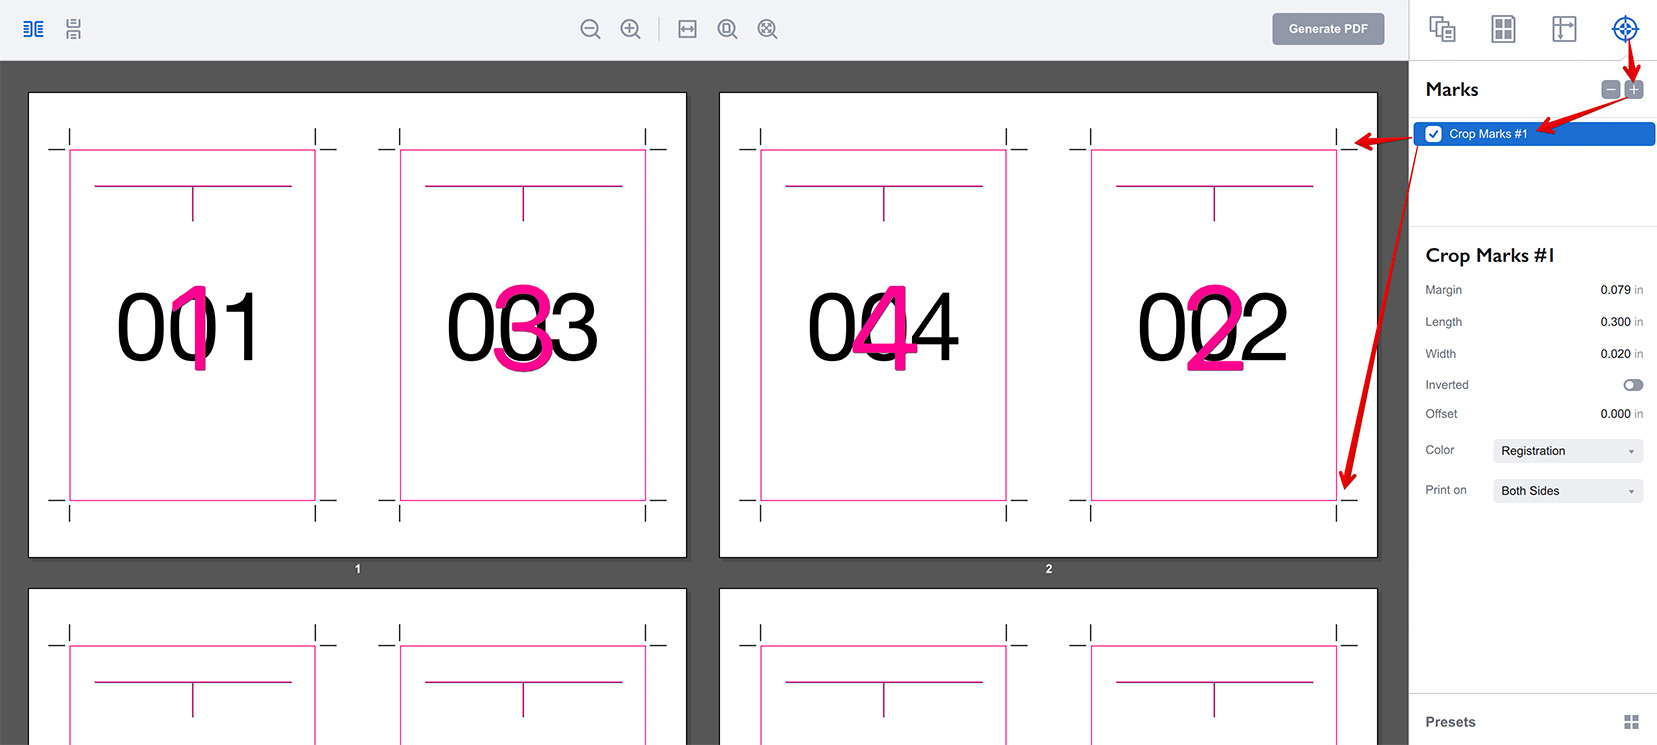
The crop marks are now added around the pages and their parameters are displayed in the right panel:
- Margin — the distance between the page boundaries and the crop marks;
- Length — the length of the crop marks;
- Width — the width (thickness) of the crop mark lines;
- Inverted — lets the marks go inside or outside the pages (see below);
- Offset — adjusts the page trim box being used to place crop marks (see the similar parameter in the trim line mark);
- Color — lets you choose one of the pre-defined colors to display the crop marks;
- Print on — configures where to print the crop marks: on front or back side of the sheets, or on both. This only works in duplex mode, otherwise the marks are always printed.
Inverted Marks
Inverted crop marks go inside the pages, here is an example of the inverted marks:
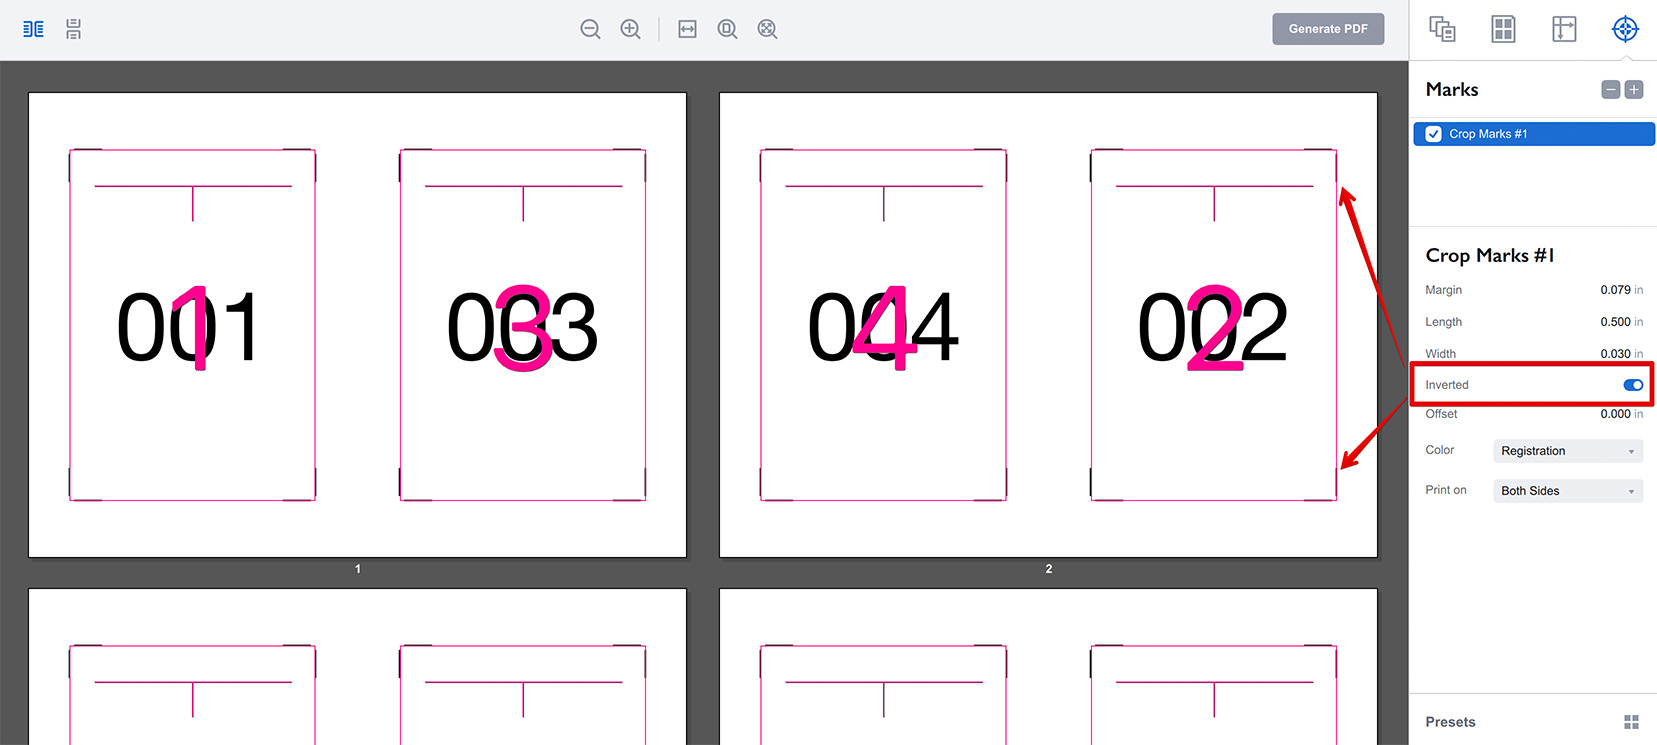
Note that the marks are now within the bounds of the pages, not outside of them.
Marks and Gaps
Imposition Wizard only displays crop marks if it have enough space for them. If there is no space for a mark (say another page is too close), the mark is not displayed:
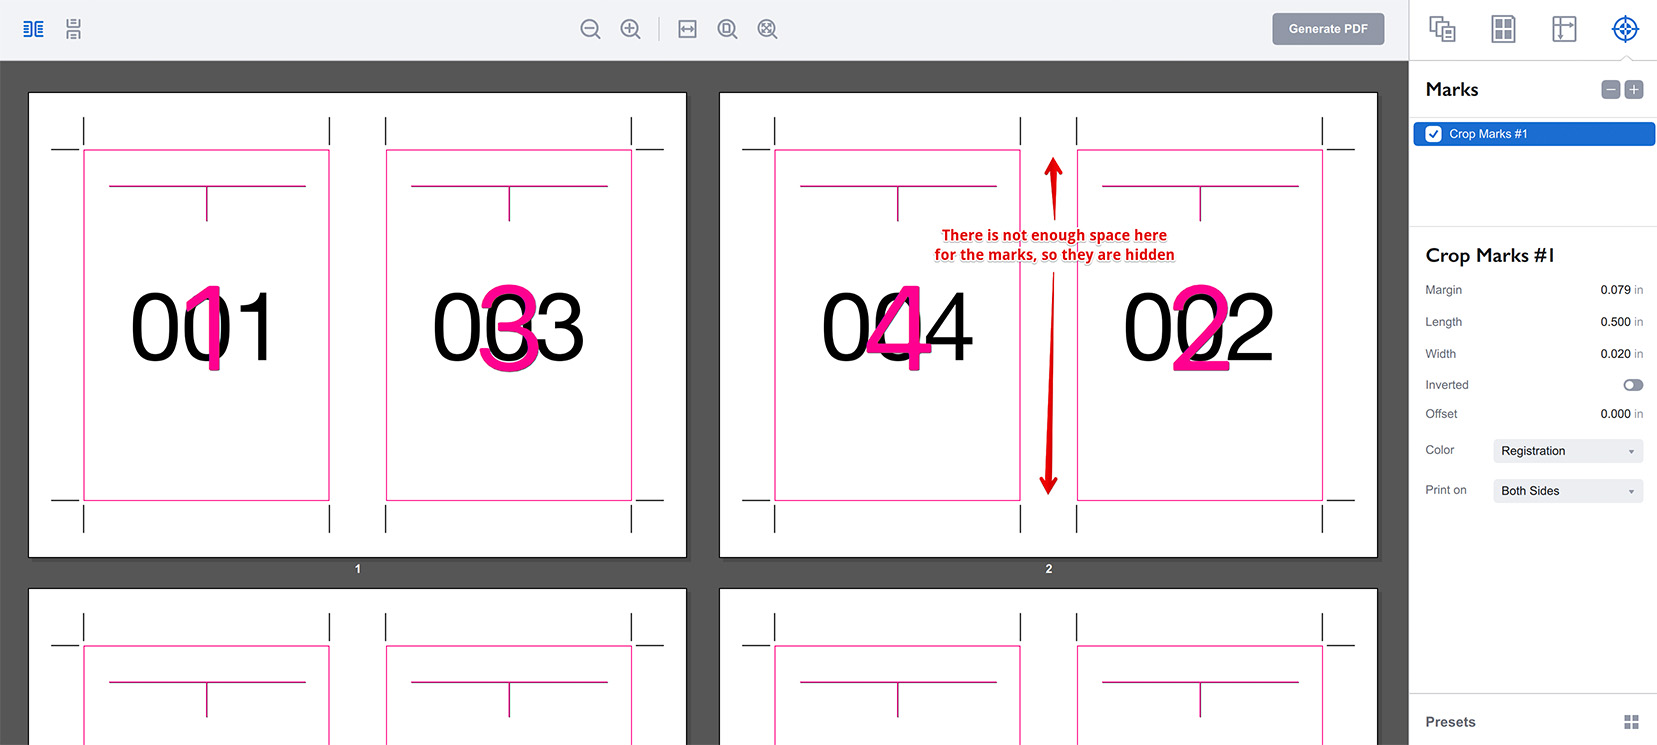
The layout above has not enough space to fit the crop marks between the pages, so they are not displayed there. Consider making the marks shorter or reducing the margin in order to have them there.
If you need the marks in the middle of the gaps, consider using gap crop marks instead.
Marks and Missing Pages
If the document has not enough pages to fill the pages grid and some cells are left unused, the marks are not added there:
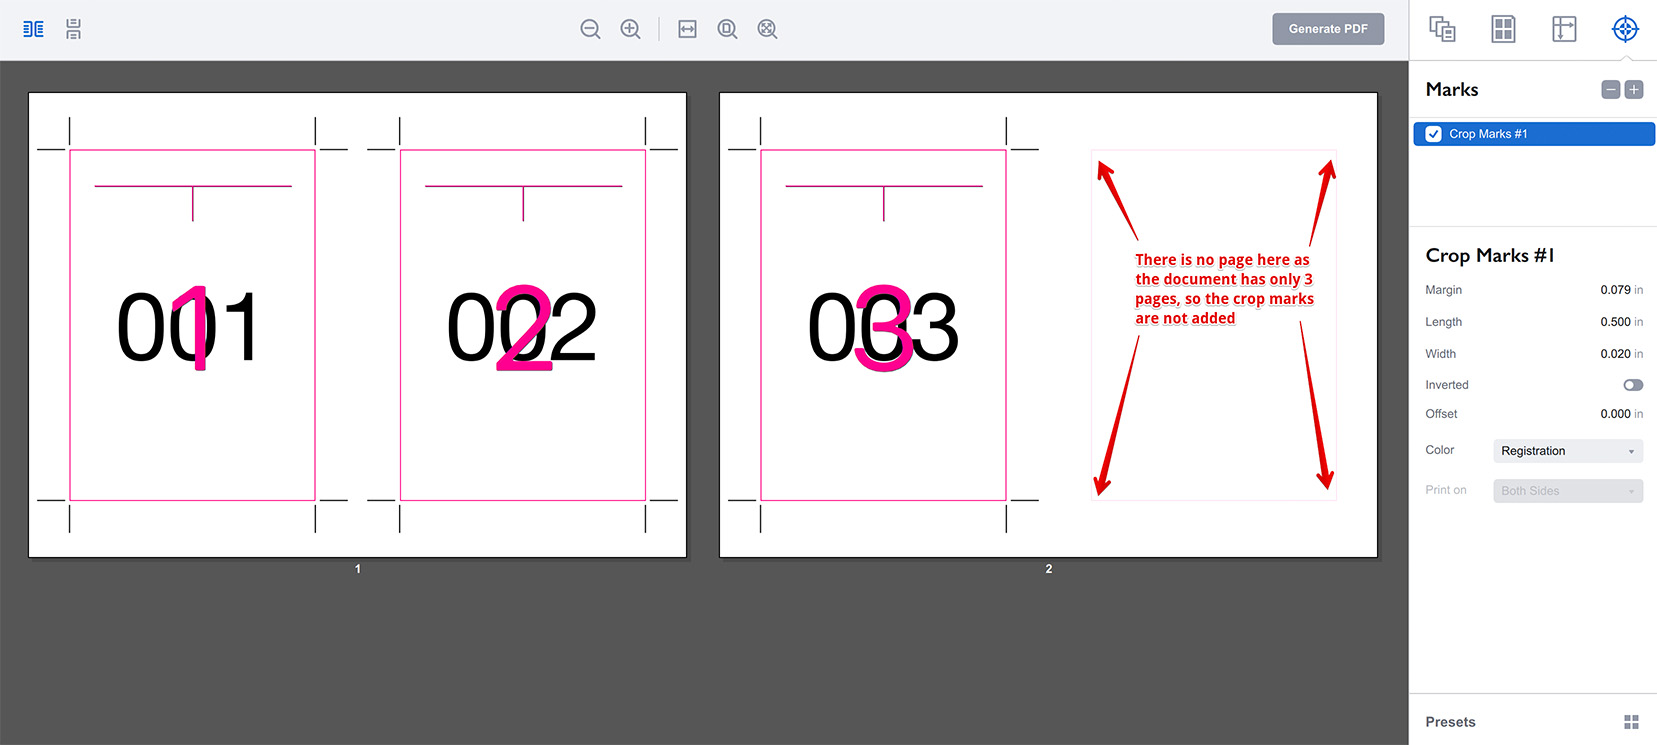
The same applies to duplex printing if the source document has only one page. The backside is then left empty without pages added, so the crop marks are not added there, too.
More Imposition Wizard Tutorials
Installation
- Installation — how to install Imposition Wizard;
- License Activation — how to activate Imposition Wizard with a license key;
- Acrobat Plugin Problems — what to do if the plugin doesn’t work.
Basics
- User Interface — how to run Imposition Wizard and make the first steps;
- Pages Grid — how pages are placed across the sheets in Imposition Wizard;
- Presets — how to save and re–use imposition layouts;
- Preflight — how to check for errors before your print.
Layouts
- N–Up — a very simple, yet customizable layout;
- Step and Repeat — perfect layout for business cards;
- Cut Stack — flexible layout with pages flow options;
- Booklet — lots of options for fine–tuning the imposition process;
- Shuffle — manual imposition mode where you control the flow;
- Dutch Cut — save paper by printing more pages on the same sheet.
Imposition Parameters
- Preprocessors — change the document before processing it;
- Page Gaps — configuring gaps between pages;
- Sheet Panel — output sheet size, content position and more;
- Duplex Printing — duplex printing support;
- Registration Marks — adding and configuring marks, custom texts etc;
- Bleeds — configuring bleeds;
- Flipping Rules — how to flip pages in most layouts.
Registration Marks
- Angle Mark — angle mark for image drift compensation;
- Barcode — encoding job details with barcodes;
- Bull Eye — placing bull eye marks around the pages;
- Color Bar — adding color bars to imposed files;
- Crop Marks — configuring crop marks for easier trimming;
- Custom Mark — adding ad–hoc graphics where needed;
- Custom Text — adding text elements with imposition details;
- Gap Crop Marks — adding crop marks in the middle of the page gaps;
- Folding Marks — marking the middle of booklet spreads;
- Perforation Marks — make complex perforation or folding marks;
- Star Target — placing star target marks around the pages;
- Trim Line — marking page boundaries to simplify trimming;
Automation
- Batch Processing — impose multiple files at once;
- Hot Folders — monitor folders and run imposition on changes.
Command Line
- Basic Imposition — basic command line imposition example.
Advanced
- Custom Sheet Sizes — how to extend the built–in list;
- Output File Names — configuring paths and names of imposed files;
- Translation — translate Imposition Wizard to your language.