Setting Up Bleeds
A properly defined bleed is critical for any print project that has artwork extending to the edge of the page, ensuring there are no unprinted slivers after trimming. Imposition Wizard provides a non-destructive way to configure or correct a document’s bleed settings directly through its preprocessing system, without needing to edit the source file in a page layout application.
To begin, add the Setup Bleeds preprocessor from the Preprocessors tab on the right side of the interface. A new rule will appear in the list, and you will see its configuration panel:
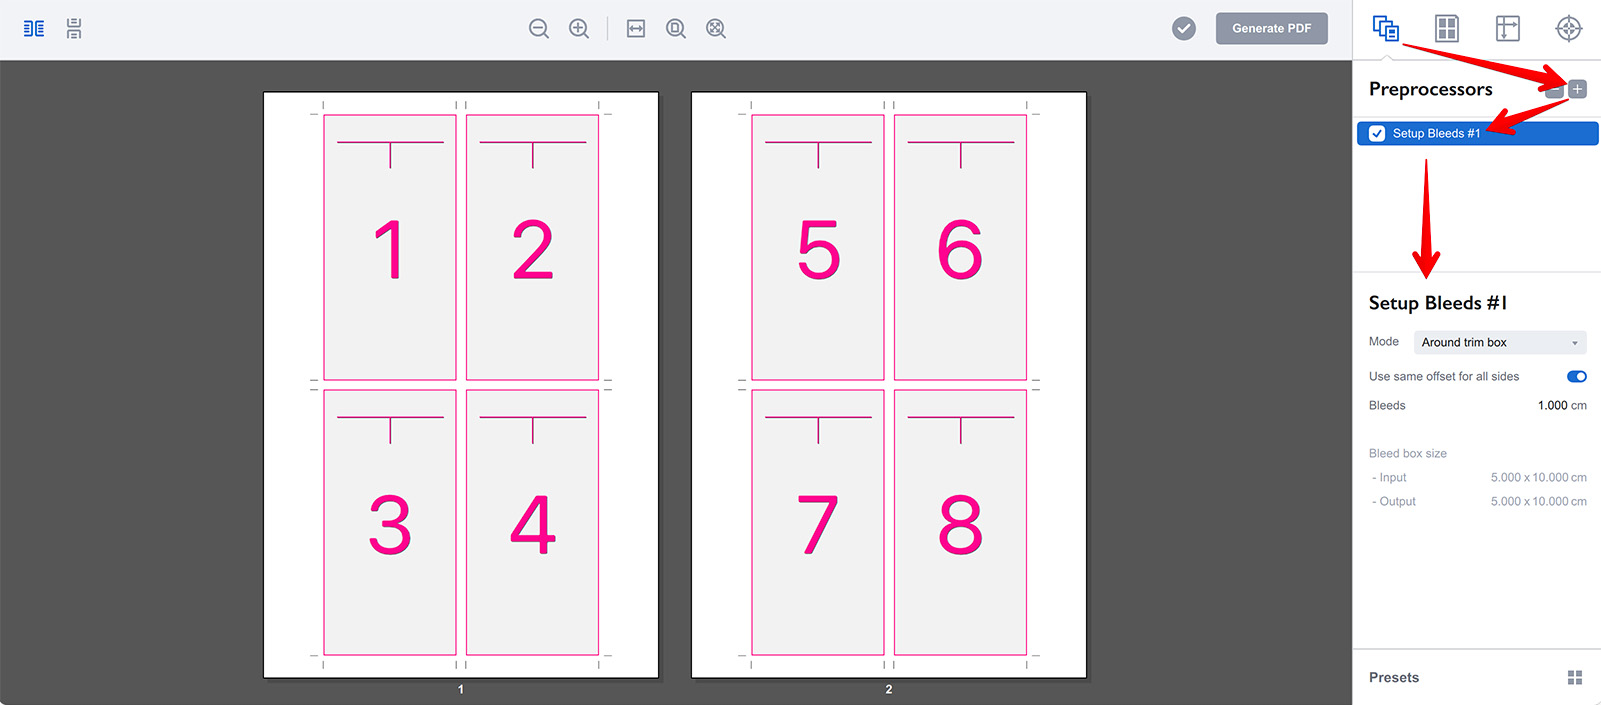
The preprocessor parameters are displayed on the right. From top to bottom, they are:
- Mode — This dropdown lets you choose the fundamental logic for creating the bleed. You can either add bleeds outwards around the existing Trim Box or shrink the Trim Box inwards, which carves out a bleed area from the current page content.
- Use same offset for all sides — When checked, you define a single, uniform bleed value. Unchecking this allows you to set four side-specific values for projects with asymmetric requirements.
- Bleeds — The amount of bleed, expressed as either one value or four individual values, depending on the state of the previous checkbox.
Beneath these controls is the Bleed Box Size section, a live readout that shows you the calculated dimensions of the bleed box both before and after the preprocessor is applied, giving you immediate numerical feedback.
Changing Bleeds
You might notice that the preview shows no visible bleeds even though the preprocessor is enabled, and the input and output sizes on the right are identical. The reason for this is that the Mode parameter is set to Around Trim Box. With this setting, the 1 cm bleed configured on the screenshot is being added around the outer edge of the Trim Box. Because the page itself is 5x10 cm, this newly added bleed area is effectively hidden, as it falls outside the boundary of the Crop Box, which for this specific file is also set to exactly 5x10 cm and masks everything beyond it.
To make the bleeds visible, we need to switch the Mode parameter to Inside Trim Box. Let’s do that now:
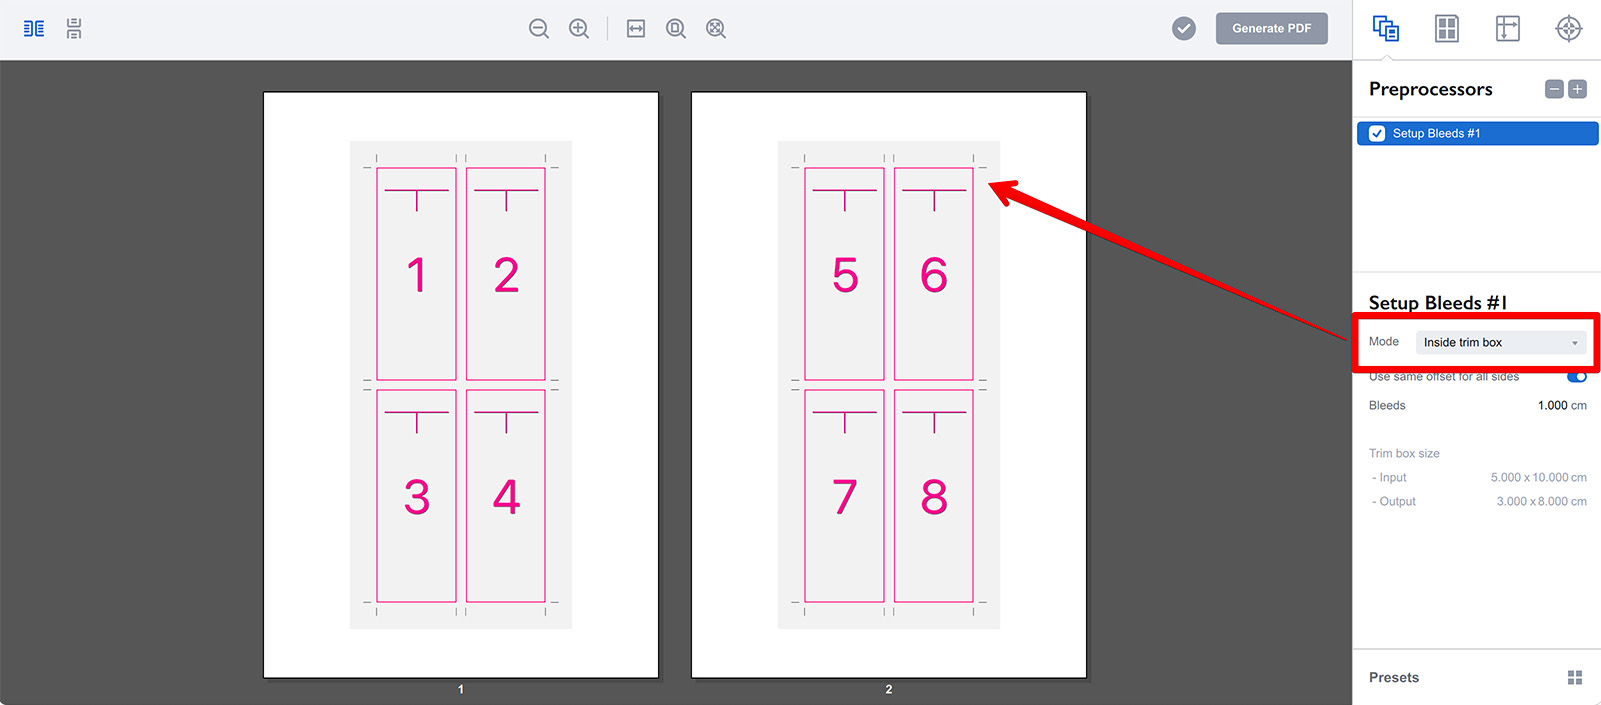
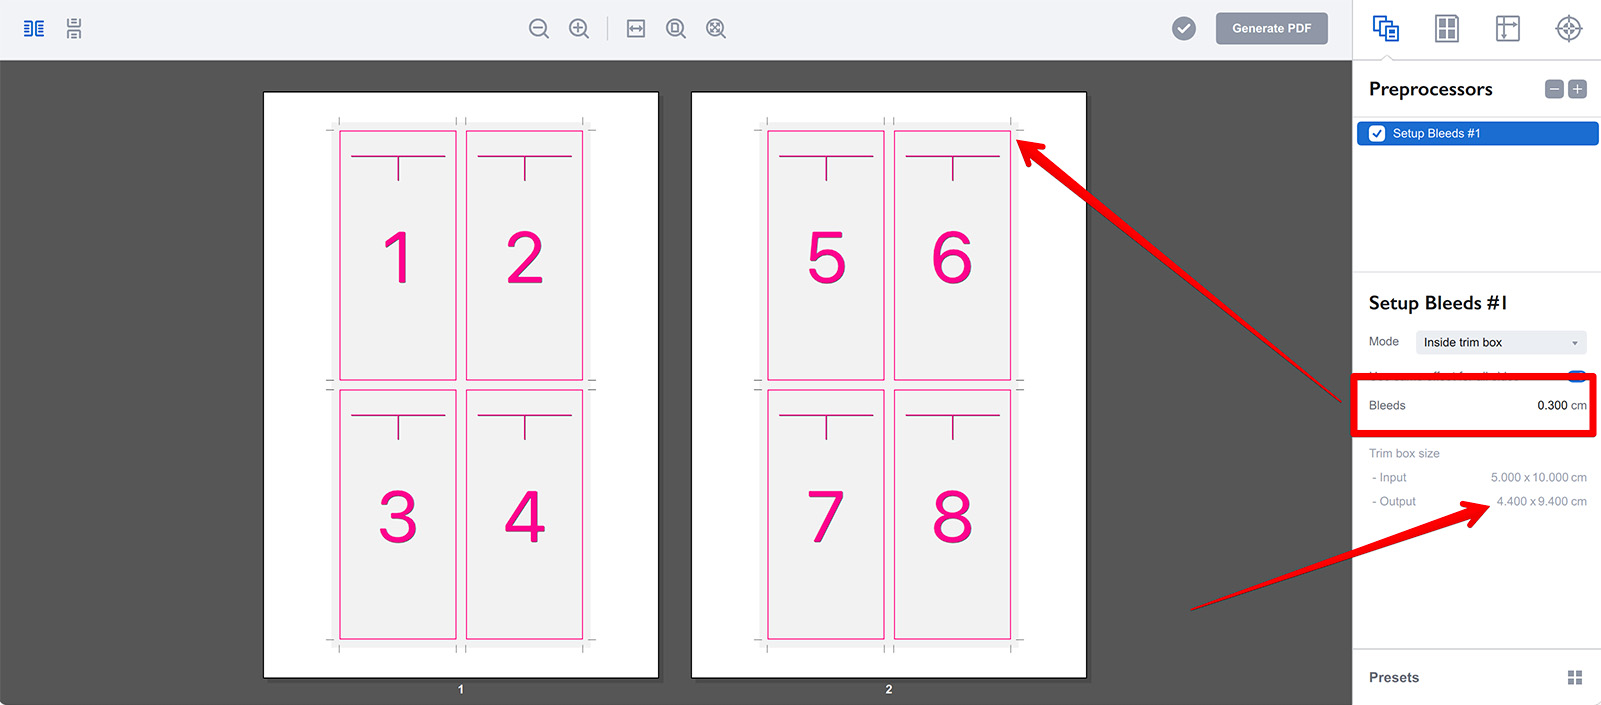
Once this mode is selected, the bleeds immediately appear in the preview, indicated by the page frames and crop marks cutting into the page content. Let’s now refine their size to a more standard 3 mm:
Thank you for the correction. Here’s the updated section with the accurate terminology:
Notice how the rendered bleed area in the preview becomes noticeably smaller. Also, observe the Trim Box Size section’s Output value – it has now changed and is exactly 6 mm smaller than the Input value, which is the doubled value of the 3 mm bleed you applied. The section is called Trim Box Size in Inside Trim Box mode as this mode changes the trim box, it is called Bleed Box Size in Around Trim Box mode as it changes the bleed box then.
Complex Bleeds
There are many imposition scenarios where you need different bleed amounts on different sides. To define bleeds on a per-side basis, uncheck the Use same offset for all sides box:
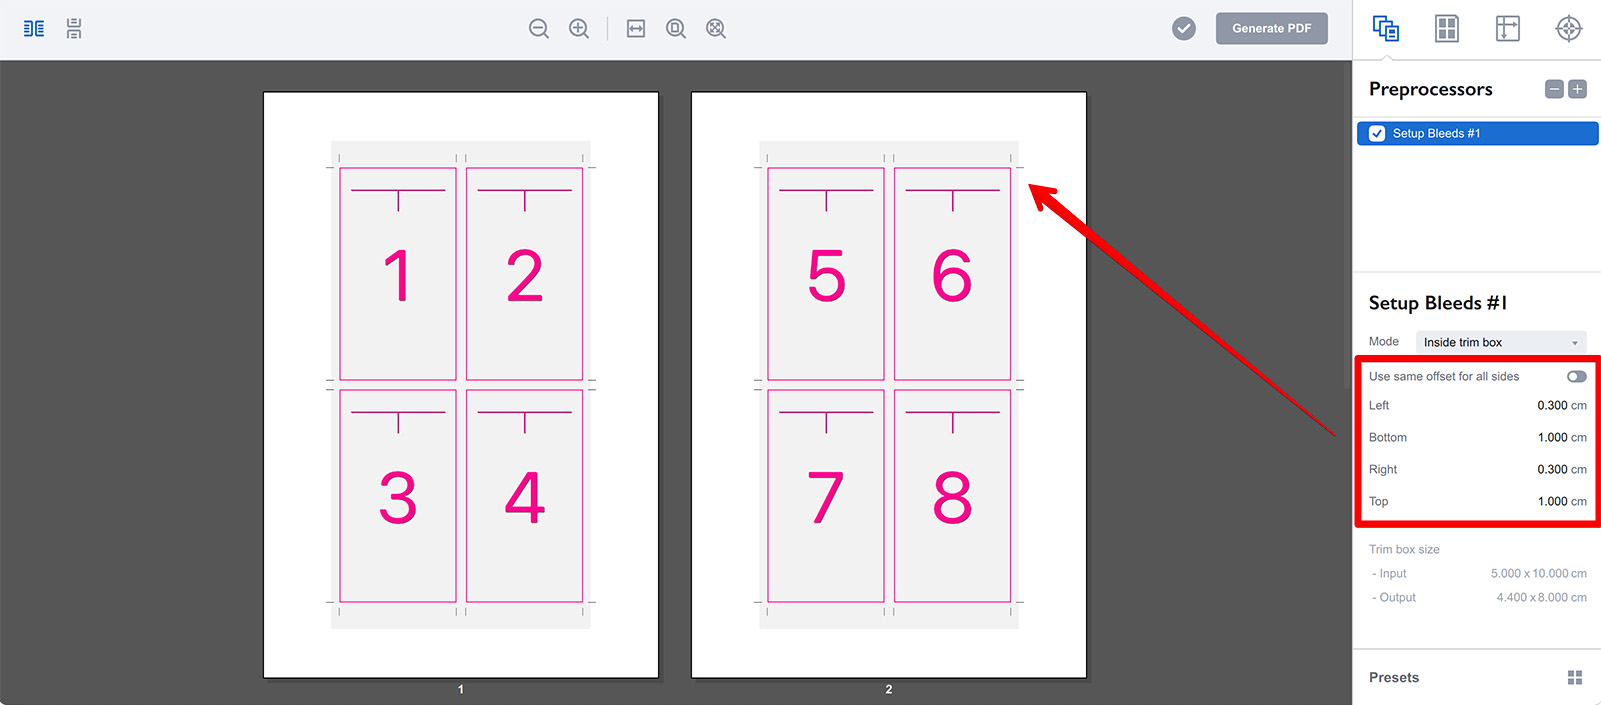
Here, I have changed the Left and Right bleeds to 3 mm, while the Top and Bottom bleeds are set to a non-standard 1 cm simply to make their differing sizes more visible in the preview. As expected, the output size of the bleed box in the readout dynamically reflects these asymmetric changes.
When to use “Around Trim Box”?
The Around Trim Box mode is specifically designed for a different starting condition. Use it when your source document already has a meaningful bleed and trim structure, meaning its Trim Box is smaller than its Crop and Bleed Boxes. In this case, Imposition Wizard can read the existing Trim Box, take the bleed values you provide, and extend the Bleed Box outward from that clean trim boundary. This is perfect for simply enlarging or standardizing a pre-existing bleed on a professionally prepared file.
Under the Hood
To truly master bleeds, it’s helpful to understand the anatomy of a PDF page. A page contains several defining “boxes”. The main one is the Crop Box, which defines the visible area of the page; anything outside it is invisible. Inside that is the Trim Box, the intended final physical size of the page after cutting. There is also the Bleed Box, which is typically slightly larger than the Trim Box but smaller than or equal to the Crop Box, and it defines the extent of the printable bleed area.
Most PDF files, especially those not created with a professional print workflow in mind, have all these boxes set to the exact same dimensions. To add bleeds to such a file, Imposition Wizard must either extend the Crop Box outward or shrink the Trim Box inward. The software supports the latter method. This is why you need to switch the mode to Inside the Trim Box.
In this mode, Imposition Wizard takes the original Trim Box definition and shrinks it down by the bleed values you enter. The Bleed Box remains unchanged, so the difference in size between the old and new Trim Box creates the visual bleed area.
In the Around Trim Box mode, the logic is reversed. Imposition Wizard takes the Trim Box as the basis for the new Bleed Box. It then expands this boundary outward by the bleed values you provide, effectively adding a bleed area around the trim, hence the name.
Override Box Preprocessor
If the logic explained in the previous section is clear, you are ready to use a more powerful tool: the Override Box preprocessor. Think of it as Setup Bleeds on steroids, as it gives you granular control to modify Trim and Bleed boxes directly, using any other box as a reference baseline.
Here is the exact same bleed configuration we made earlier, but this time achieved using the Override Box preprocessor:
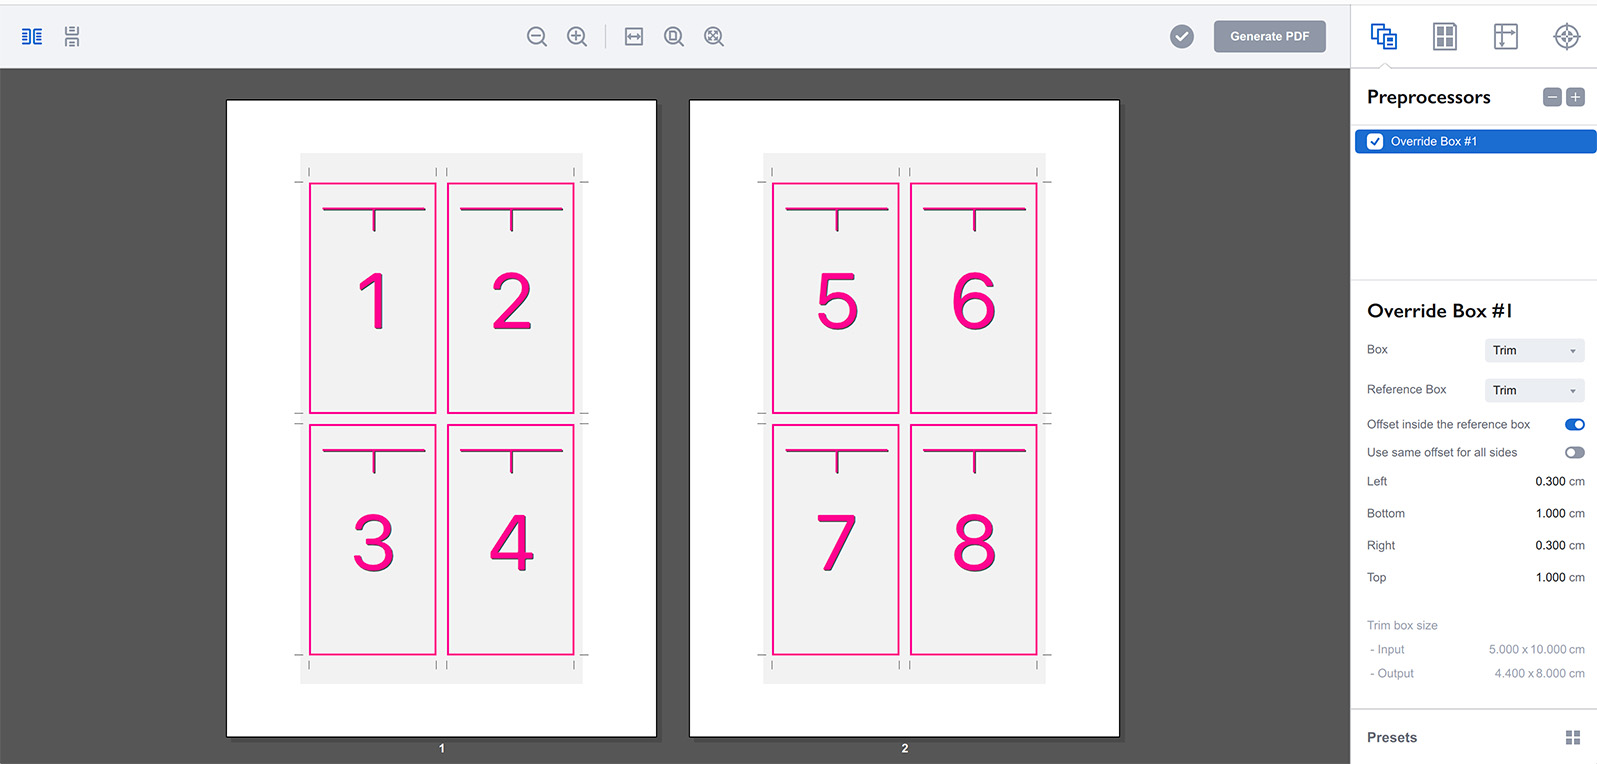
It follows a similar logic but with more explicit controls, letting you choose the box to change and the reference box from which to take measurements. In this example, we are changing the Trim Box and using its own original value as the reference. The settings instruct Imposition Wizard to take the page’s current Trim Box, reduce it by 0.3 cm and 1.0 cm, and use that shrunken result as the new Trim Box. Since the Bleed Box remains intact and is still the same size as the original Trim Box, we effectively create a visible bleed.
Trying “Around Trim Box” mode
Now that we have a page with a properly shrunken Trim Box and a Bleed Box that is consequently too large, we can test the Around Trim Box mode we discussed earlier. Add a second preprocessor, this time a Setup Bleeds rule, placing it below the Override Box one in the list, and configure it as shown:
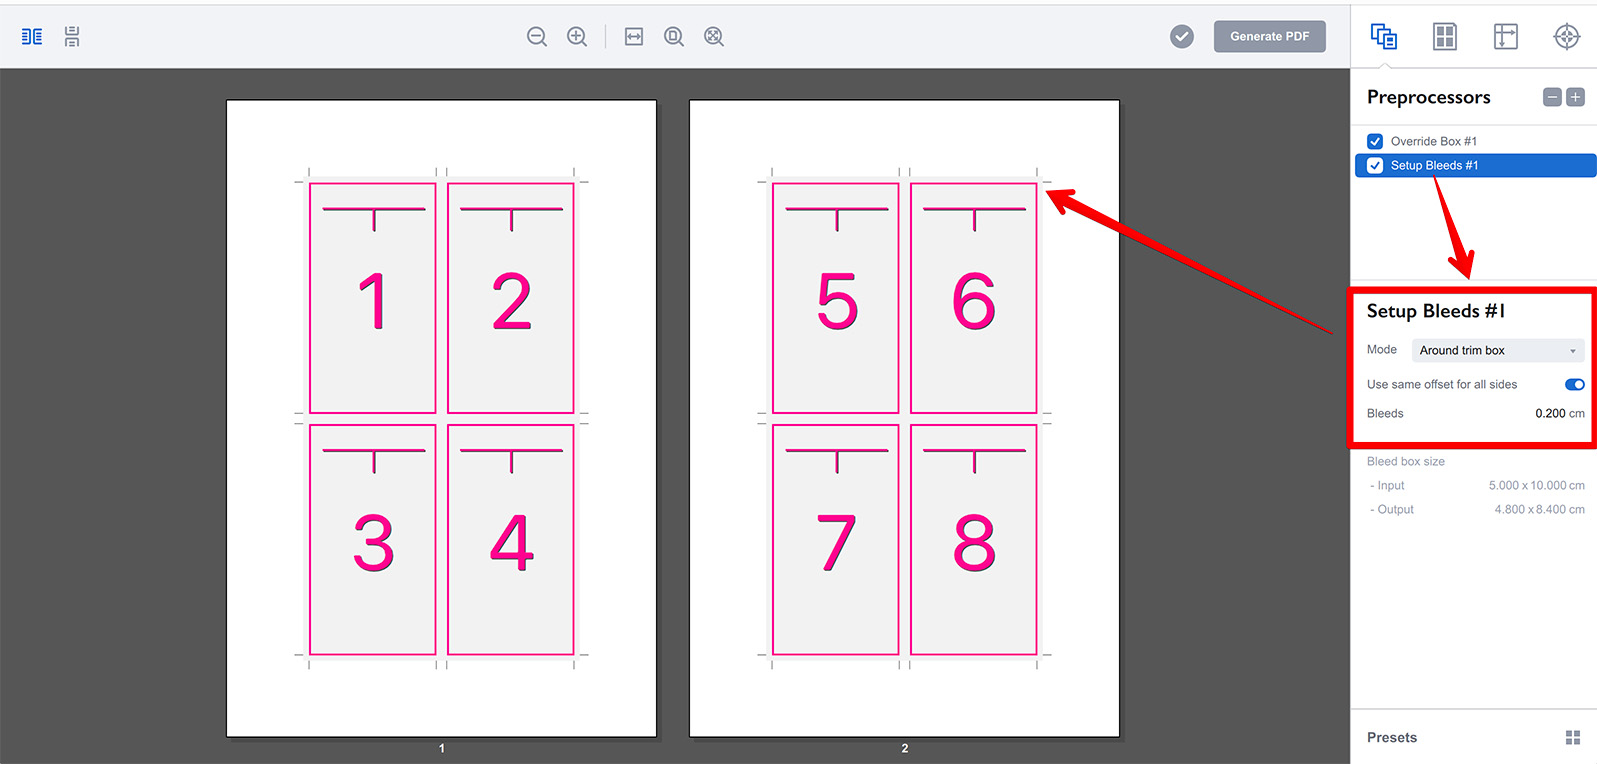
This second preprocessor takes the new, smaller Trim Box created by the first preprocessor and adds a 2 mm bleed around it to define a new, precise Bleed Box. In the preview, you can now see the bleeds have changed and are a uniform 2 mm on all sides.
You can achieve this identical result using the Override Box preprocessor as well. Here, I have replaced the second preprocessor with an Override Box one to perform the exact same operation:
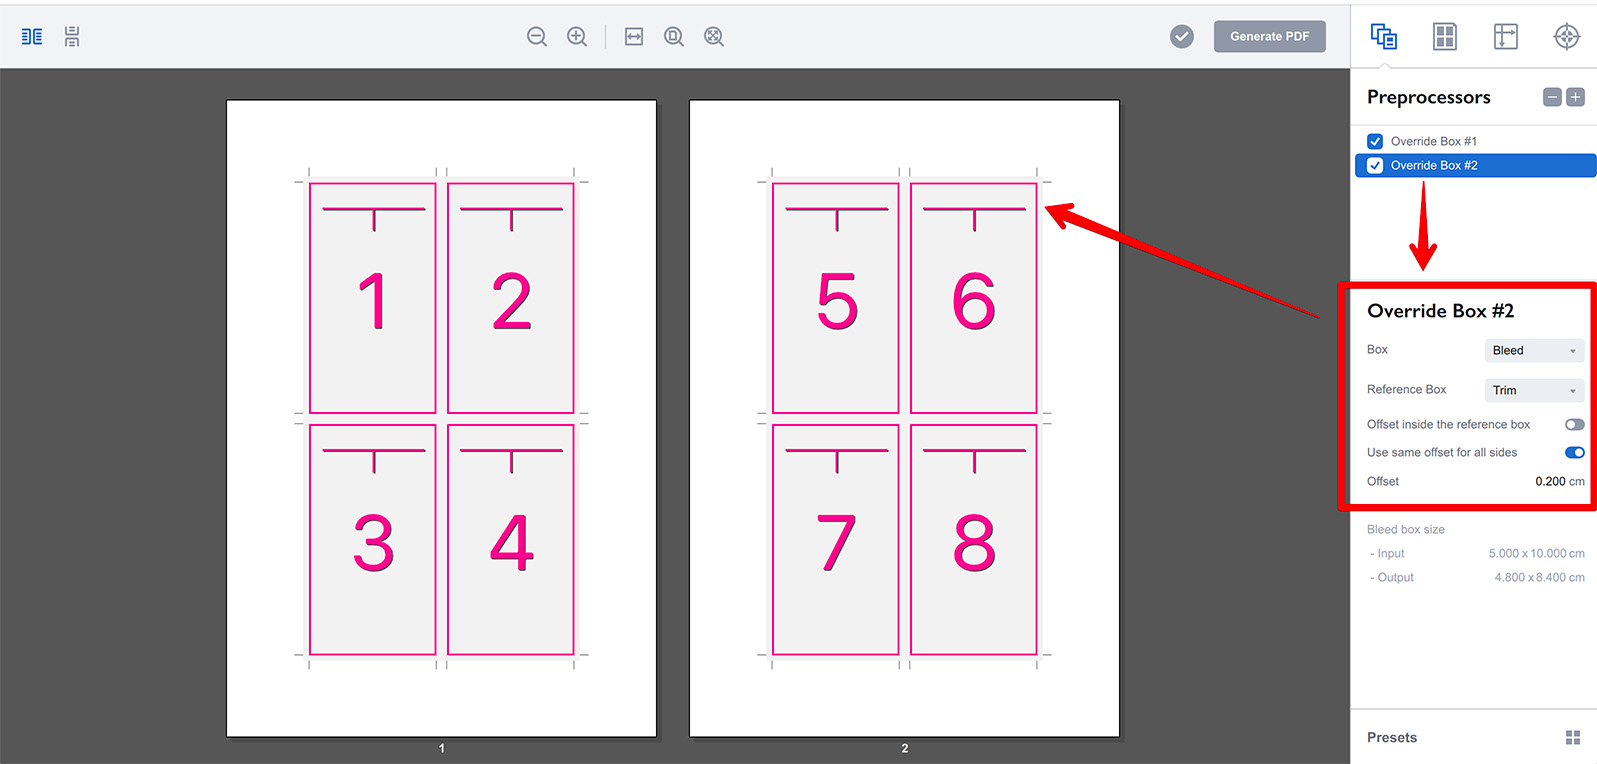
This configuration changes the Bleed Box while using the Trim Box as a reference. The preprocessor is set to expand the box outward by 2 mm, which gives us exactly the same 2 mm bleed we had with the Setup Bleeds preprocessor.
Setup Bleeds vs Override Box
Ultimately, Setup Bleeds is a purpose-built, time-saving shortcut. When in Around Trim Box mode, it functions exactly like an Override Box preprocessor that changes the Bleed Box based on the Trim Box. When in Inside Trim Box mode, it functions exactly like an Override Box preprocessor that changes the Trim Box based on its original value, shrinking it down by the offset you specify in Bleeds. It really is that simple.
More Imposition Wizard Tutorials
Installation
- Installation — how to install Imposition Wizard;
- License Activation — how to activate Imposition Wizard with a license key;
- Acrobat Plugin Problems — what to do if the plugin doesn’t work.
Basics
- User Interface — how to run Imposition Wizard and make the first steps;
- Pages Grid — how pages are placed across the sheets in Imposition Wizard;
- Presets — how to save and re–use imposition layouts;
- Preflight — how to check for errors before your print.
Layouts
- N–Up — a very simple, yet customizable layout;
- Step and Repeat — perfect layout for business cards;
- Cut Stack — flexible layout with pages flow options;
- Booklet — lots of options for fine–tuning the imposition process;
- Shuffle — manual imposition mode where you control the flow;
- Dutch Cut — save paper by printing more pages on the same sheet.
Imposition Parameters
- Preprocessors — change the document before processing it;
- Page Gaps — configuring gaps between pages;
- Sheet Panel — output sheet size, content position and more;
- Duplex Printing — duplex printing support;
- Registration Marks — adding and configuring marks, custom texts etc;
- Bleeds — configuring bleeds;
- Flipping Rules — how to flip pages in most layouts.
Registration Marks
- Angle Mark — angle mark for image drift compensation;
- Barcode — encoding job details with barcodes;
- Bull Eye — placing bull eye marks around the pages;
- Color Bar — adding color bars to imposed files;
- Crop Marks — configuring crop marks for easier trimming;
- Custom Mark — adding ad–hoc graphics where needed;
- Custom Text — adding text elements with imposition details;
- Gap Crop Marks — adding crop marks in the middle of the page gaps;
- Folding Marks — marking the middle of booklet spreads;
- Perforation Marks — make complex perforation or folding marks;
- Star Target — placing star target marks around the pages;
- Trim Line — marking page boundaries to simplify trimming;
Automation
- Batch Processing — impose multiple files at once;
- Hot Folders — monitor folders and run imposition on changes.
Command Line
- Basic Imposition — basic command line imposition example.
Advanced
- Custom Sheet Sizes — how to extend the built–in list;
- Output File Names — configuring paths and names of imposed files;
- Translation — translate Imposition Wizard to your language.