Making Asset Tags
Ticket Wizard lets you easily make asset tags by using a pre-designed PDF template for background artwork and dynamic text and barcode data from an Excel file or any other spreadsheet. This tutorial provides step by step instructions to make nice inventory tags from scratch.
Preparing Inventory Data
You need a spreadsheet with data for your asset tags. Each row should contain data for a single inventory item like the asset number, assigned name, department, floor etc. You could probably export such data from your asset management system or type them manually to get something like this as a result:
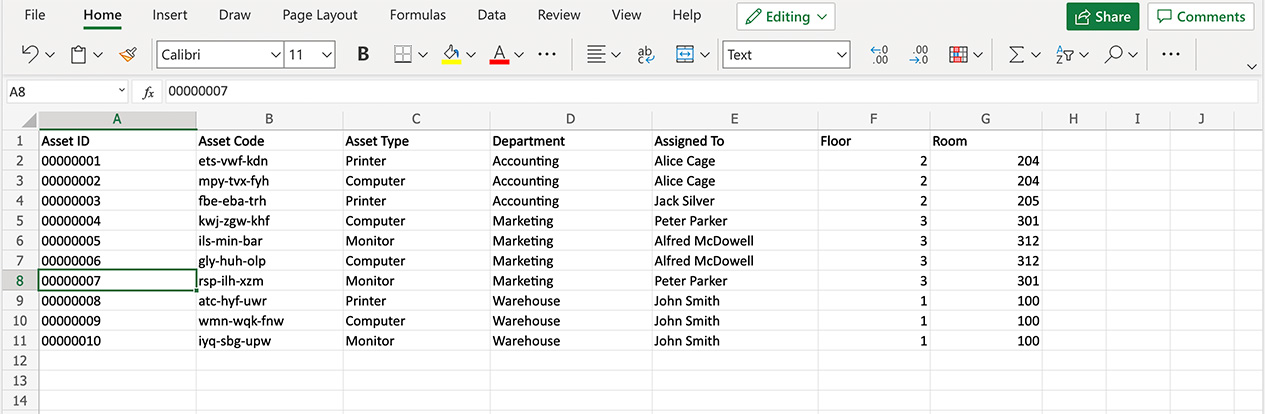
The first row should contain column titles that will be used by Ticket Wizard to assign data to dynamic elements. The other rows should contain the data. Here you can download the file above.
Once done, save or export the spreadsheet to Excel (XLSX) or CSV format and run Ticket Wizard.
Preparing PDF Template
Now you need a PDF artwork file for your asset tag. It should have the proper dimension for your needs and contain all the static artwork and texts your inventory tags need to have. You can get a sample one here if needed. Drag and drop it to Ticket Wizard application, or use its File → New Project command in the menu to load the PDF template:
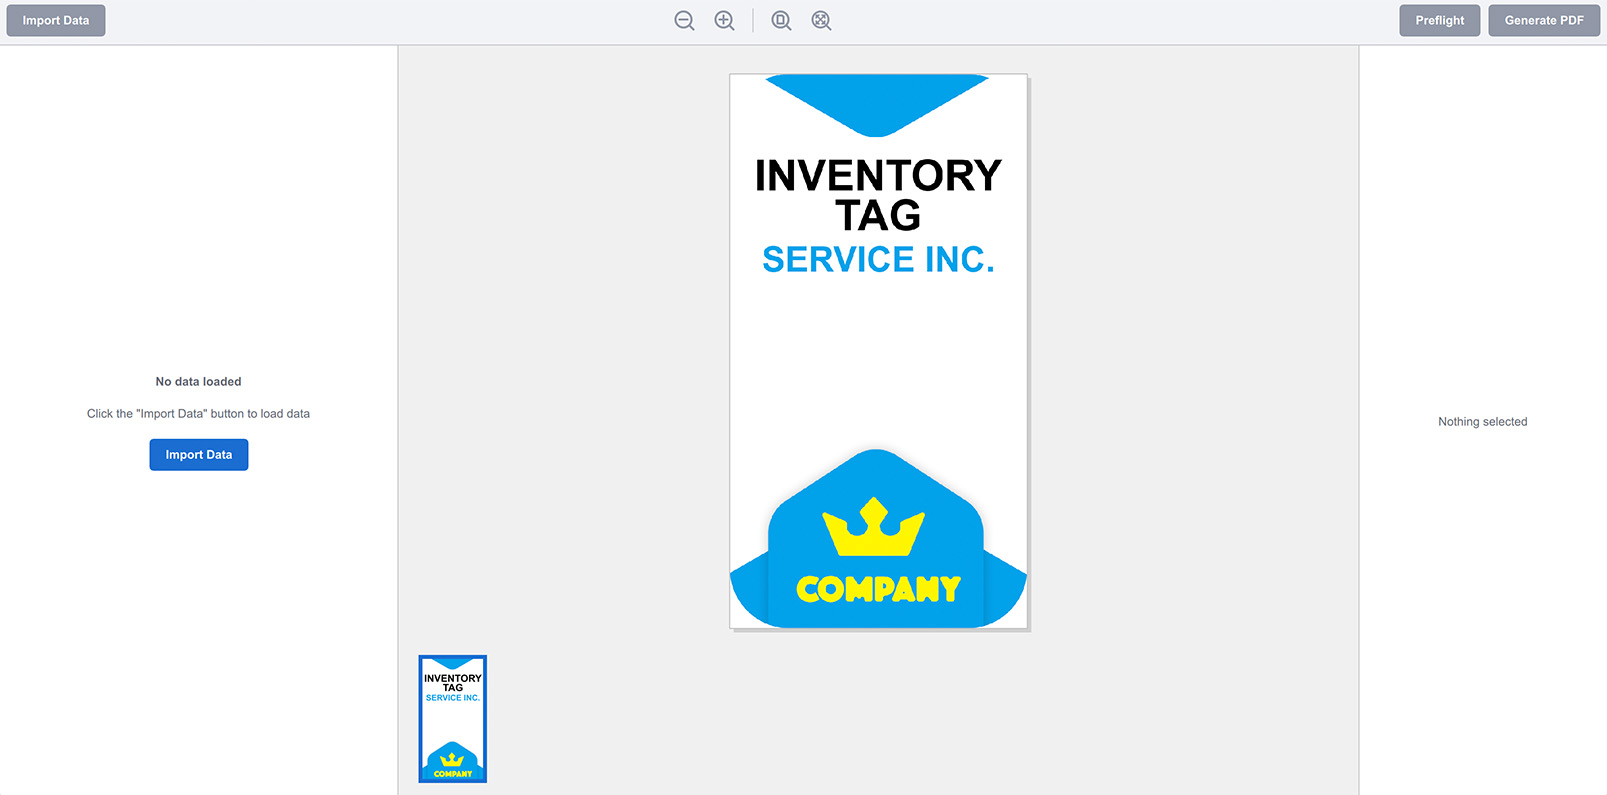
Once the artwork is loaded, you can continue with importing data.
Loading Asset Data
Click the Import button at the top left corner of the window to bring up the data import panel. It will ask you for the data file to use, point it to the Excel file you’ve just exported. Once done you should see the inventory data:
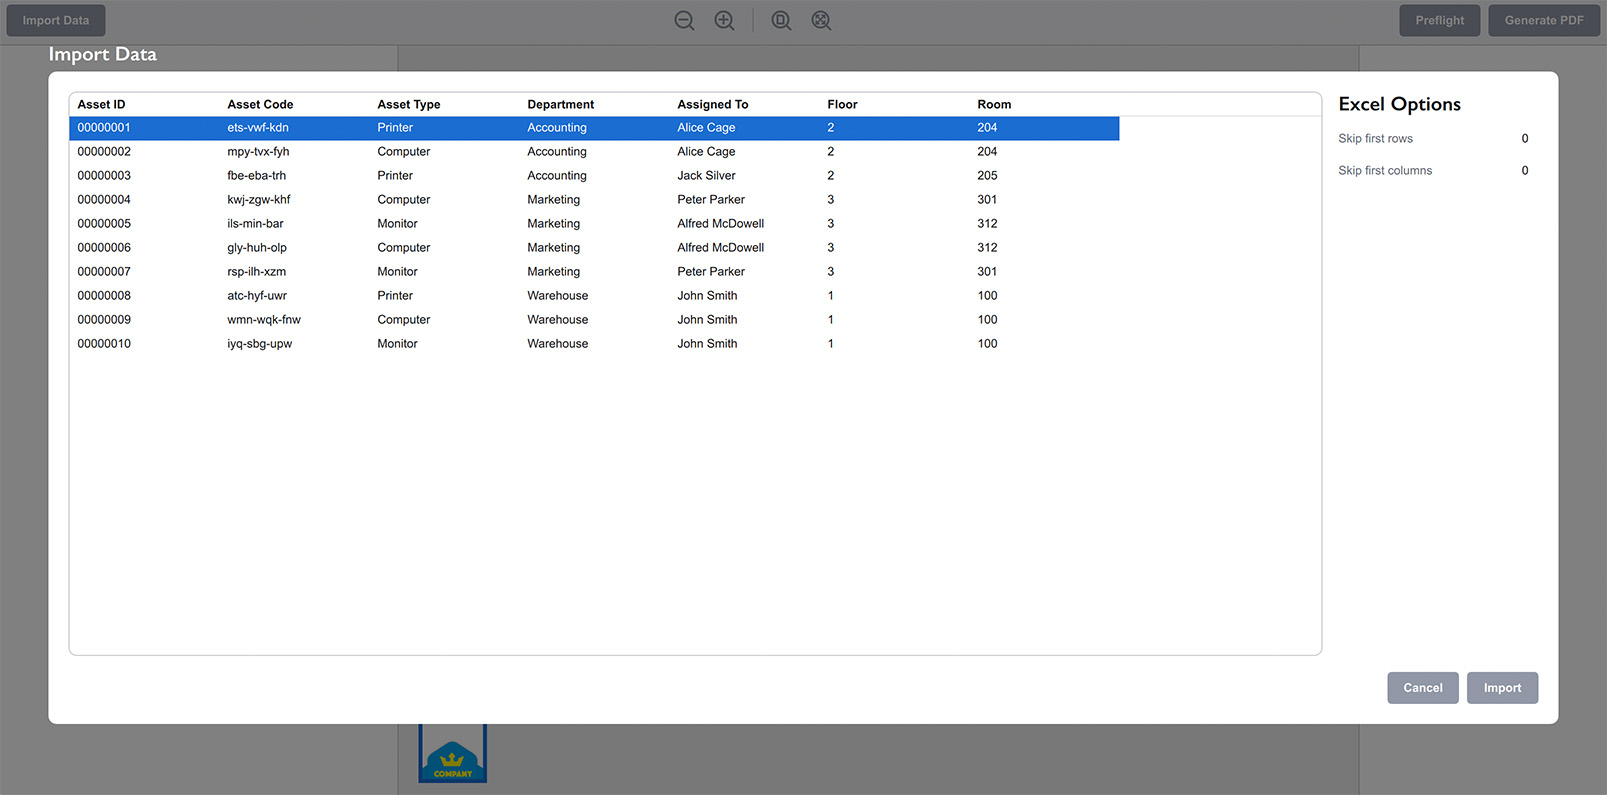
You may use the options panel on the right to adjust the imported data in case they have some extra empty lines or columns. Once done, click the Import button at the bottom right corner and get the data loaded to the software:

The data is on the left, the artwork is in the middle and we are now ready to add dynamic data to the template.
Adding Dynamic Elements
To add the data as a dynamic element to the artwork you can simply grab the data element in the left panel with your mouse and drag it to the artwork in the middle. You will see a popup menu asking if you want to add the element as text or barcode, you can select the text option for now. Here I dragged the text from the “Asset ID” column and dropped it as text element to the design template:
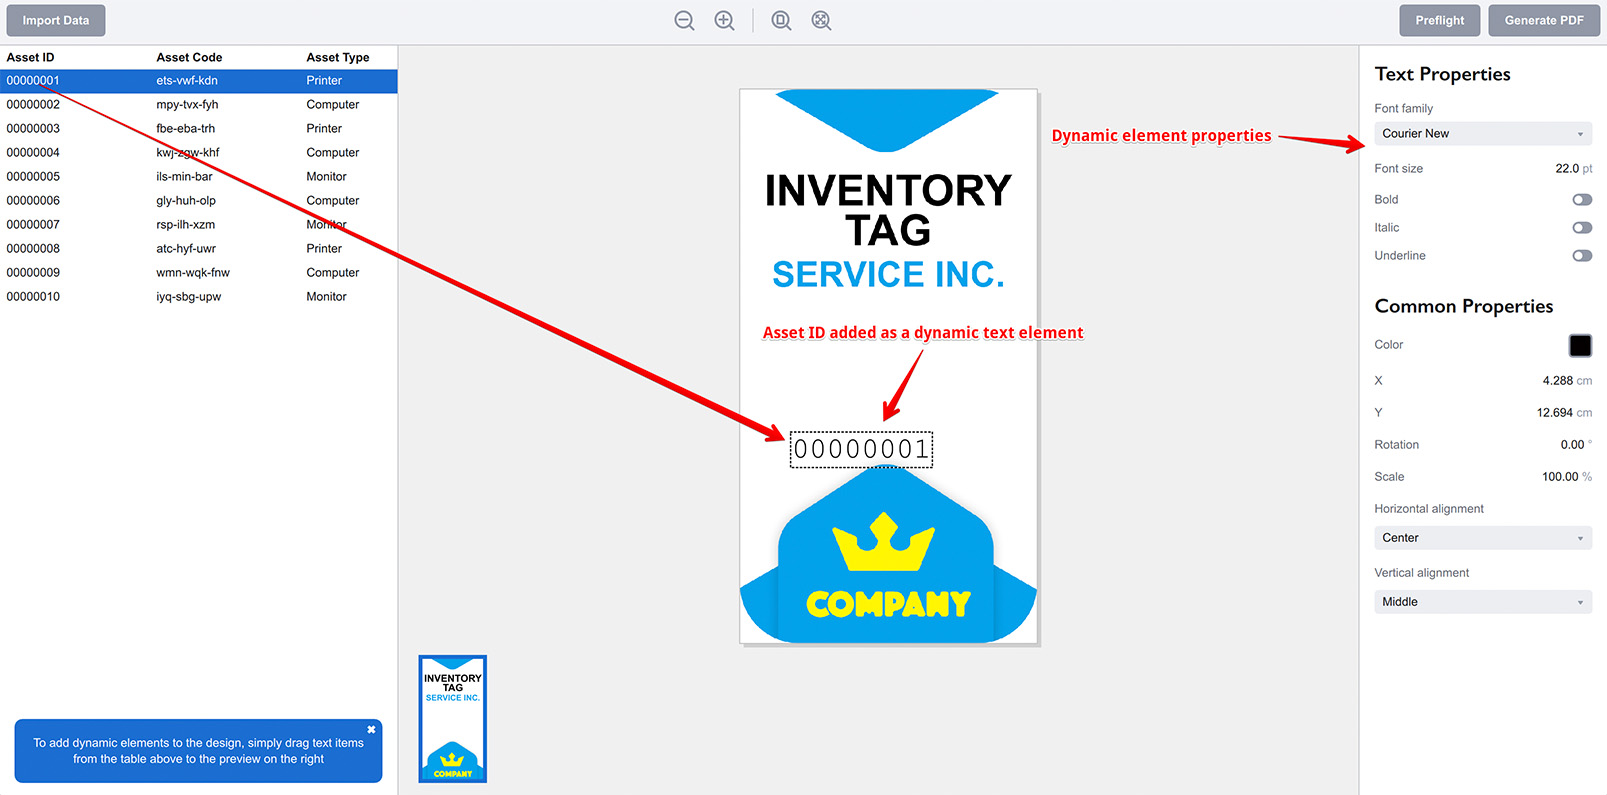
Now if you click the different rows on the left you will see that the text element you’ve just added gets updated with the data of the row you selected. That’s pretty much how Ticket Wizard works: you add dynamic elements to the design template and Ticket Wizard generates a copy of the design and data for all the data rows you have imported. Simple!
Here I added some more text elements using the data from the left panel:

Now let’s add the Asset Code field as a barcode. Drag it to the template and select Barcode from the popup menu. You should get something like this:
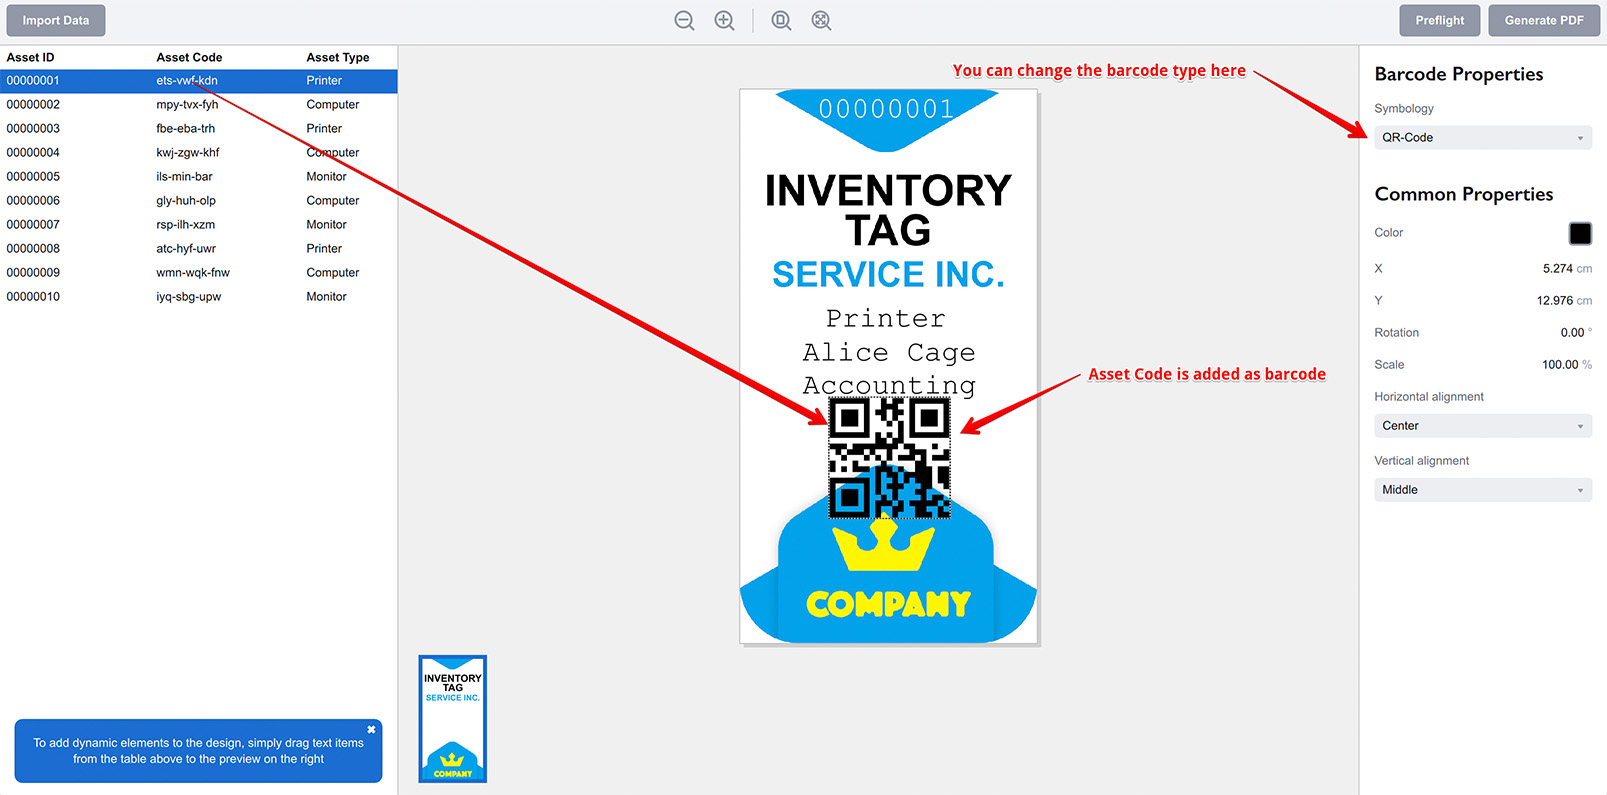
Barcodes are added as QR-codes by default, but you can change its type to a more obvious Code 128 or any other using the property panel on the right:

Here I change the barcode symbology to Code 128 and adjusted its scale to fit the design template.
Editing Dynamic Elements
You can select dynamic elements by clicking them and move them around by dragging them with your mouse. The other properties of the selected item are displayed on the right.
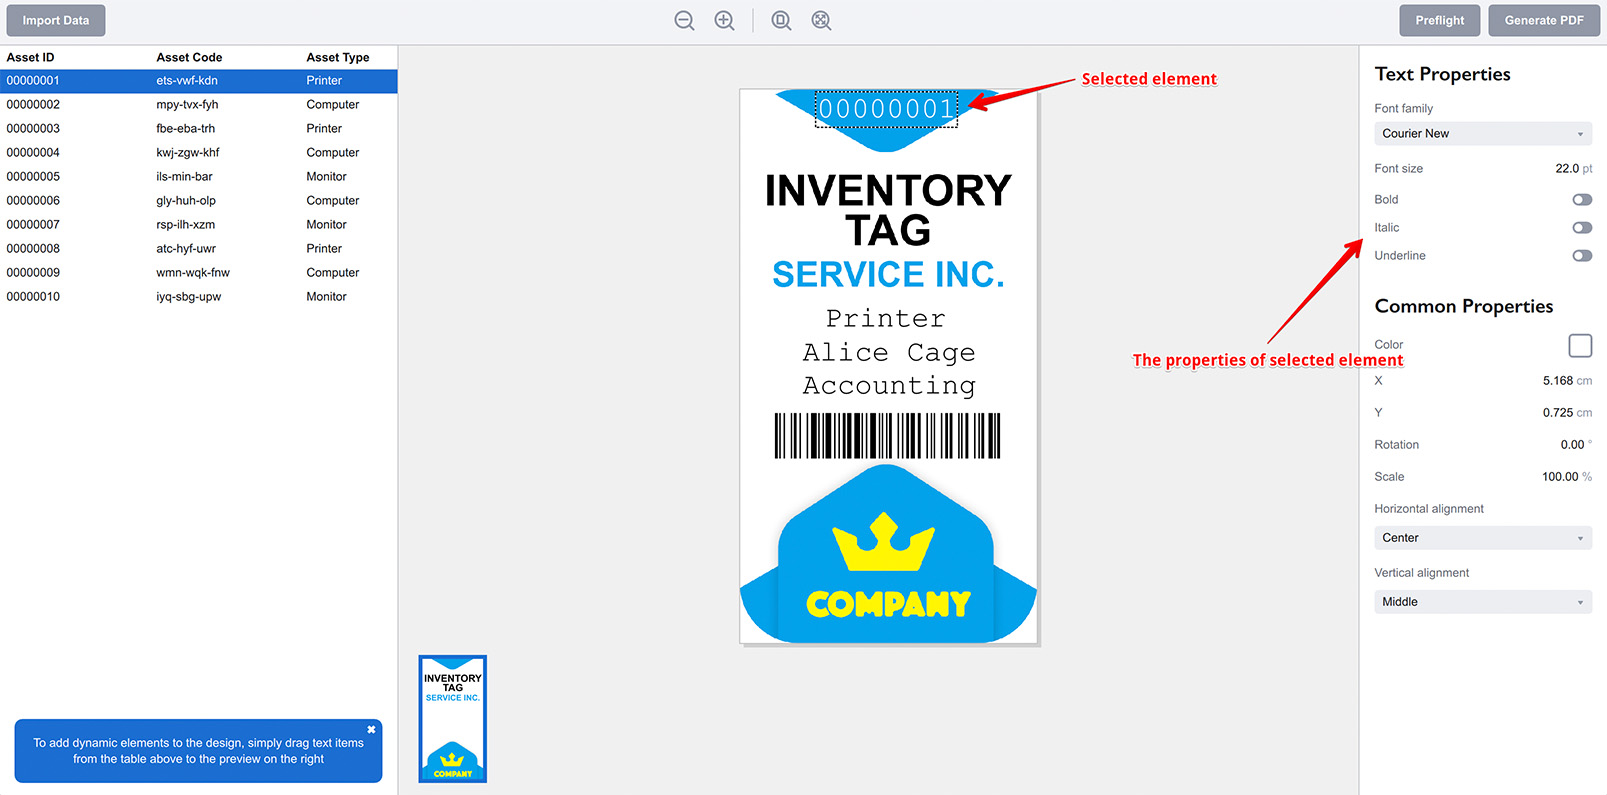
The properties are pretty standard and self-explanatory, except for probably alignment options at the bottom. Alignment helps with formatting text data of different length placing them at the center or aligning to the left or right side, as configured.
Preflight Check
Once everything is configured it is a good idea to perform a preflight check of your project that runs through all the data you imported and places them into the template you configured. If any data is missed or have any other issues you will have a report about that and can fix the problem.
If everything is fine you will see this:

Which means no issues were found in the project and it is safe to export and print it. Ticket Wizard also performs extra preflight checking before exporting and warns you in case of any problems detected.
Exporting Asset Tags
Once done, you can click the Generate PDF button at the top right corner of the window to generate a PDF file with artwork page copies filled with data for each data row you have on the left. When you click the button Ticket Wizard asks if you want to simply export pages to a PDF file or make a more complex output by placing multiple inventory tags to the same page:
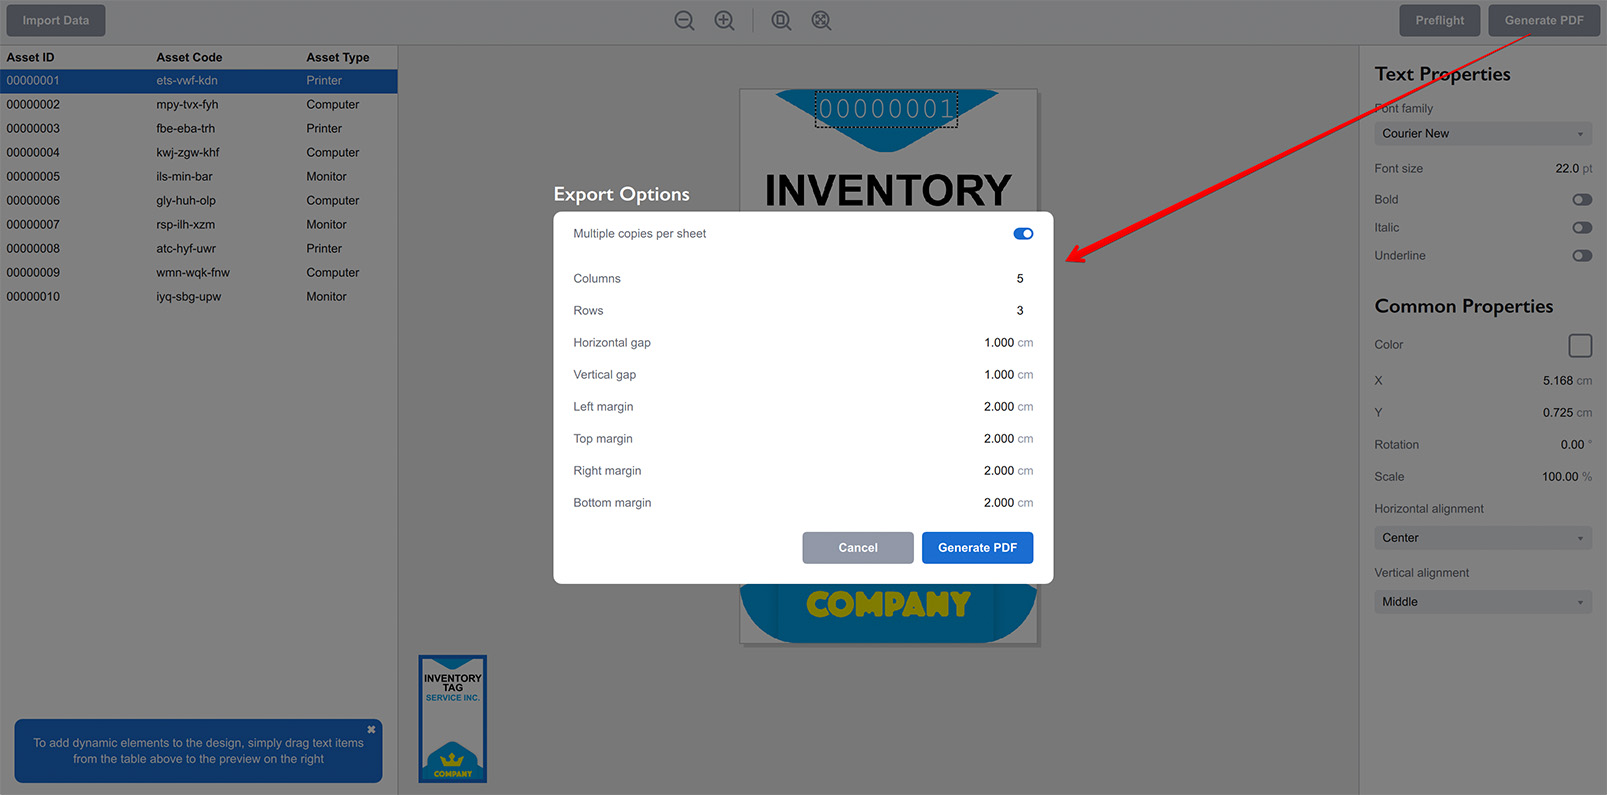
Here I configured a 5x3 grid with 1cm gap between copies and 2cm margins. Once done you can click the Generate PDF button at the bottom and get the asset tags exported to a PDF file:
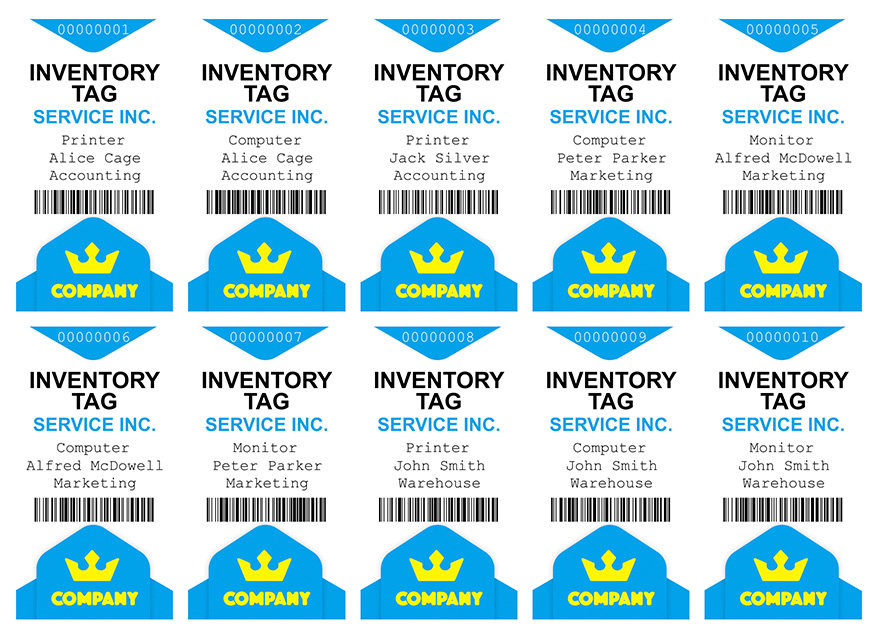
Here you can see two rows of inventory tags exported to the same page. There are just two rows instead of requested three as there were just 10 data rows in the imported file. Each copy has the same background artwork and different text and barcode data from the Excel spreadsheet you made.
Now you can print that PDF file and put the stickers onto the inventory. Job done :)
More Ticket Wizard Tutorials
Installation
- Installation — how to install Ticket Wizard;
- License Activation — how to activate Ticket Wizard with a license key.
Basics
- User Interface — the user interface of Ticket Wizard;
- Basic Project — making a basic project from scratch.
More Specific Examples
- Making Asset Tags — making inventory tags from Excel files and PDF artwork;
- Making Raffle Tickets — generating raffle tickets using PDF artwork template and spreadsheet data;
- Making Business Cards — batch–making business cards using Excel data and PDF template;
- Making Price Tags — making price tags using PDF template and spreadsheet.