Basic Project from Scratch
Let’s make a simple Ticket Wizard project from scratch to see the main steps of doing this. Every Ticket Wizard project is based on a PDF file that acts as a background. It may have one or multiple pages, Ticket Wizard will let you place dynamic content on all the pages and will make as many copies of the whole PDF as you have data rows.
Artwork Template
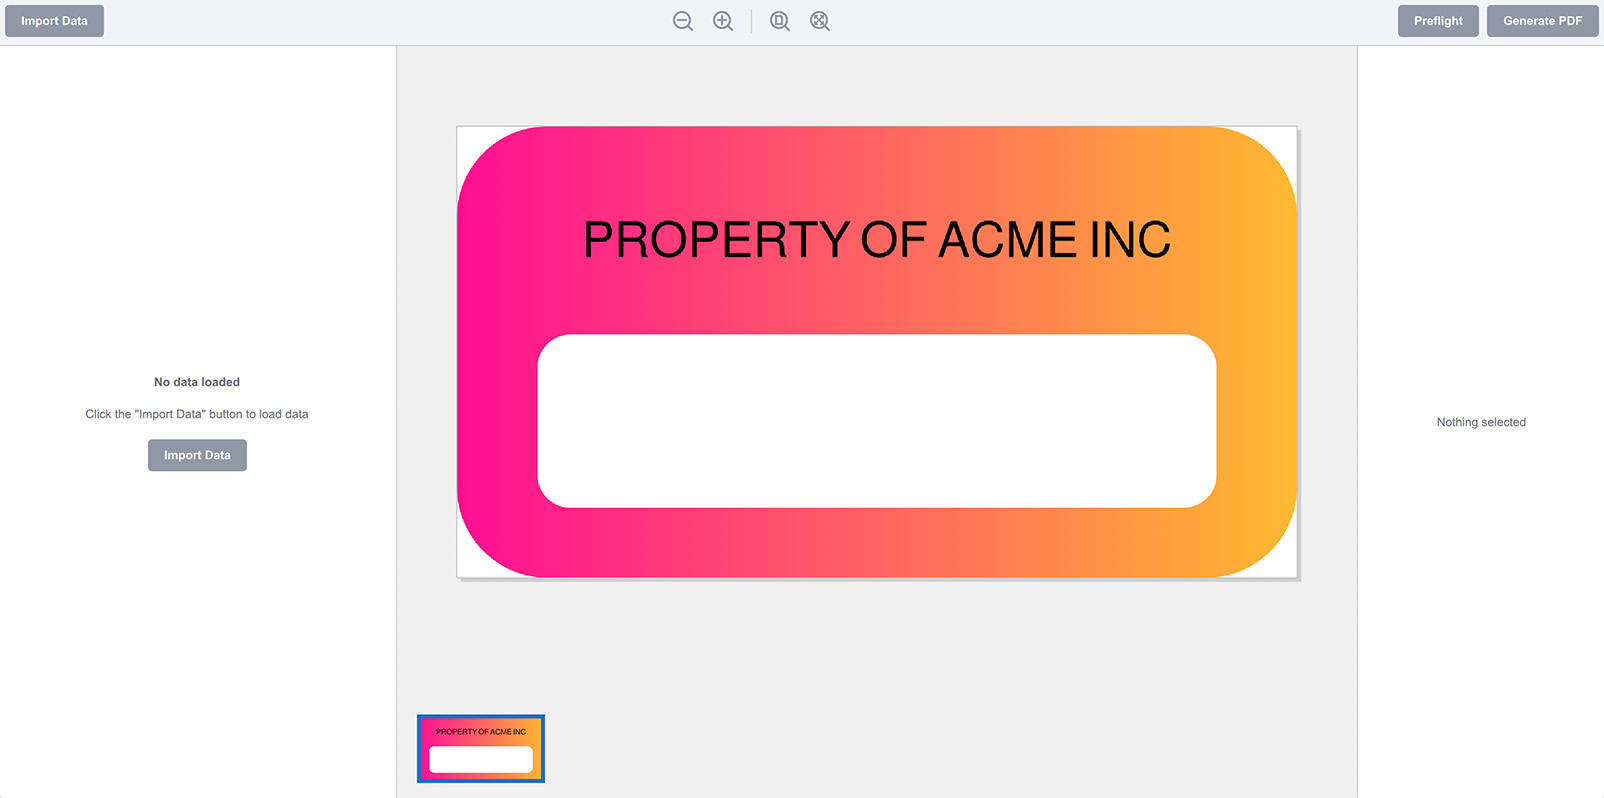
To start with something, download this sample PDF template or use your own, if you like. Once you get the PDF file ready, run Ticket Wizard and drop the PDF file there. You should see it loaded:
Now let’s make a list of codes to fill the template.
Sample Data
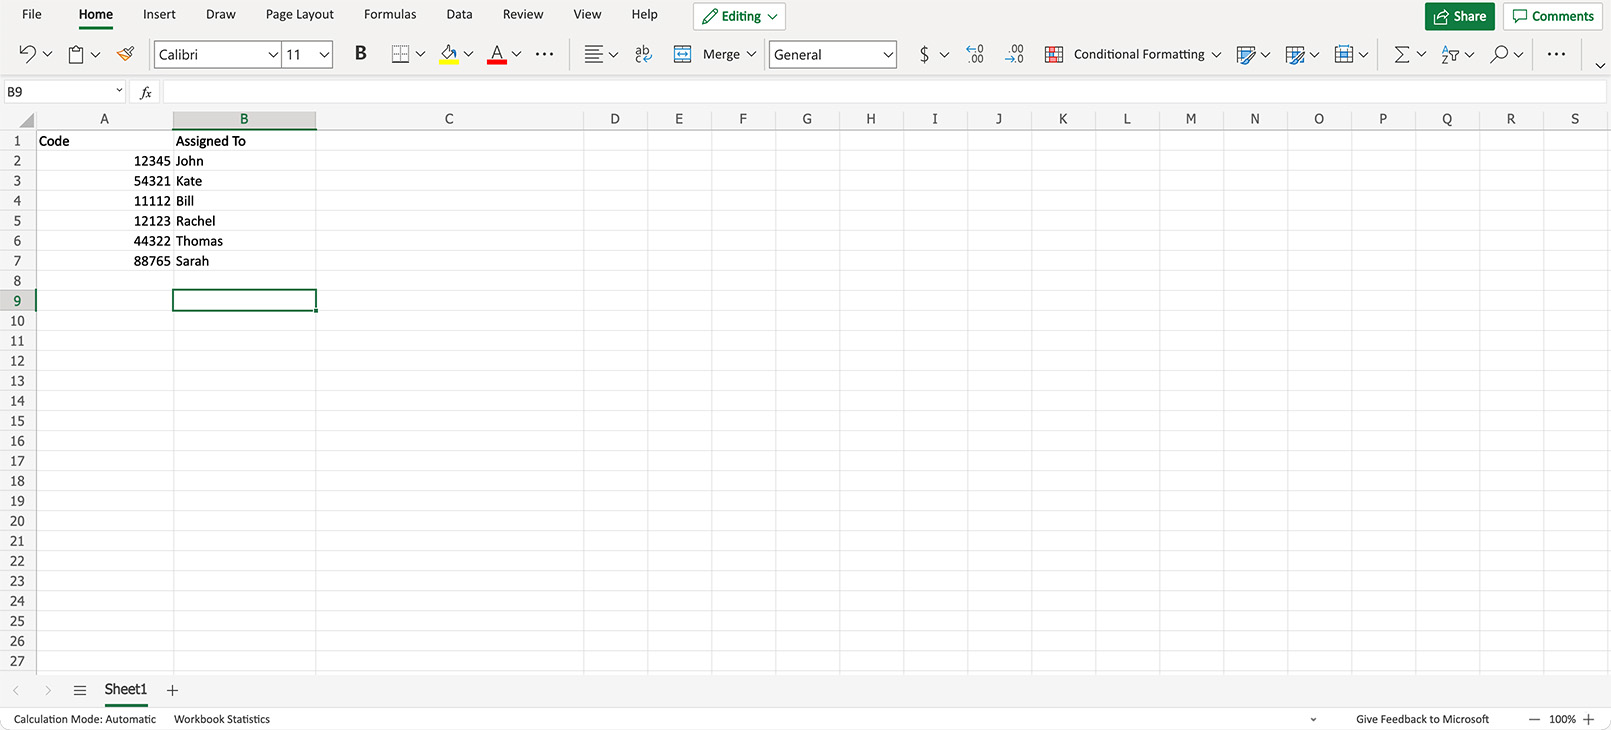
Let’s make a simple spreadsheet with two columns: “code” and “assigned to” so we can fill the template with something. You can use any spreadsheet editor you want, as long as it can export to Excel or CSV format. Here’s the one I made:
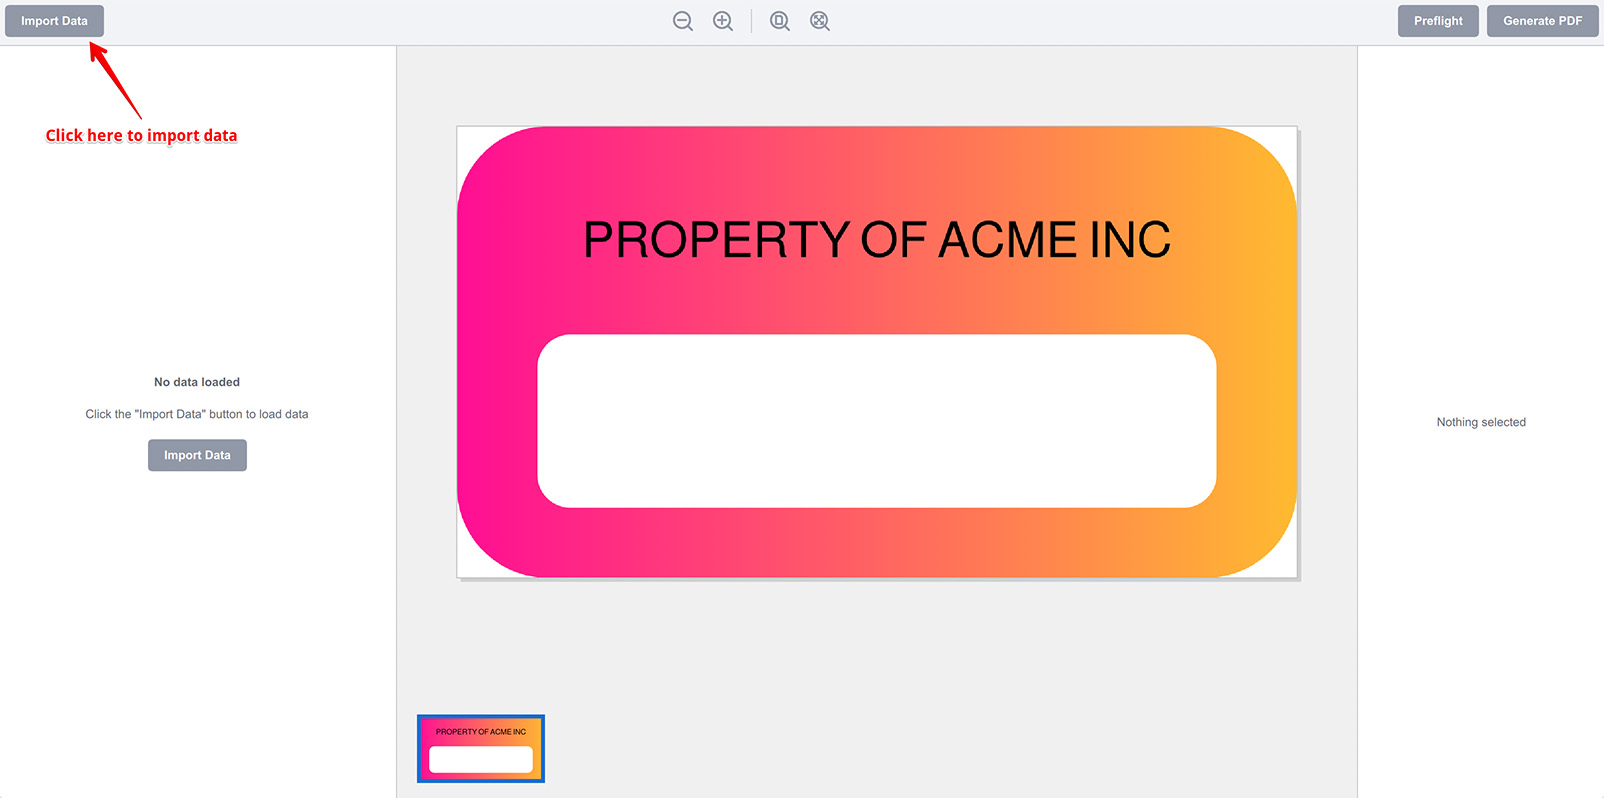
Export it to Excel (or download the one I made), then switch back to Ticket Wizard and click the Import Data button at the top left corner of the window:
Ticket Wizard will ask you for the file name, point it to the Excel file you imported. You should see your spreadsheet loaded in a moment:
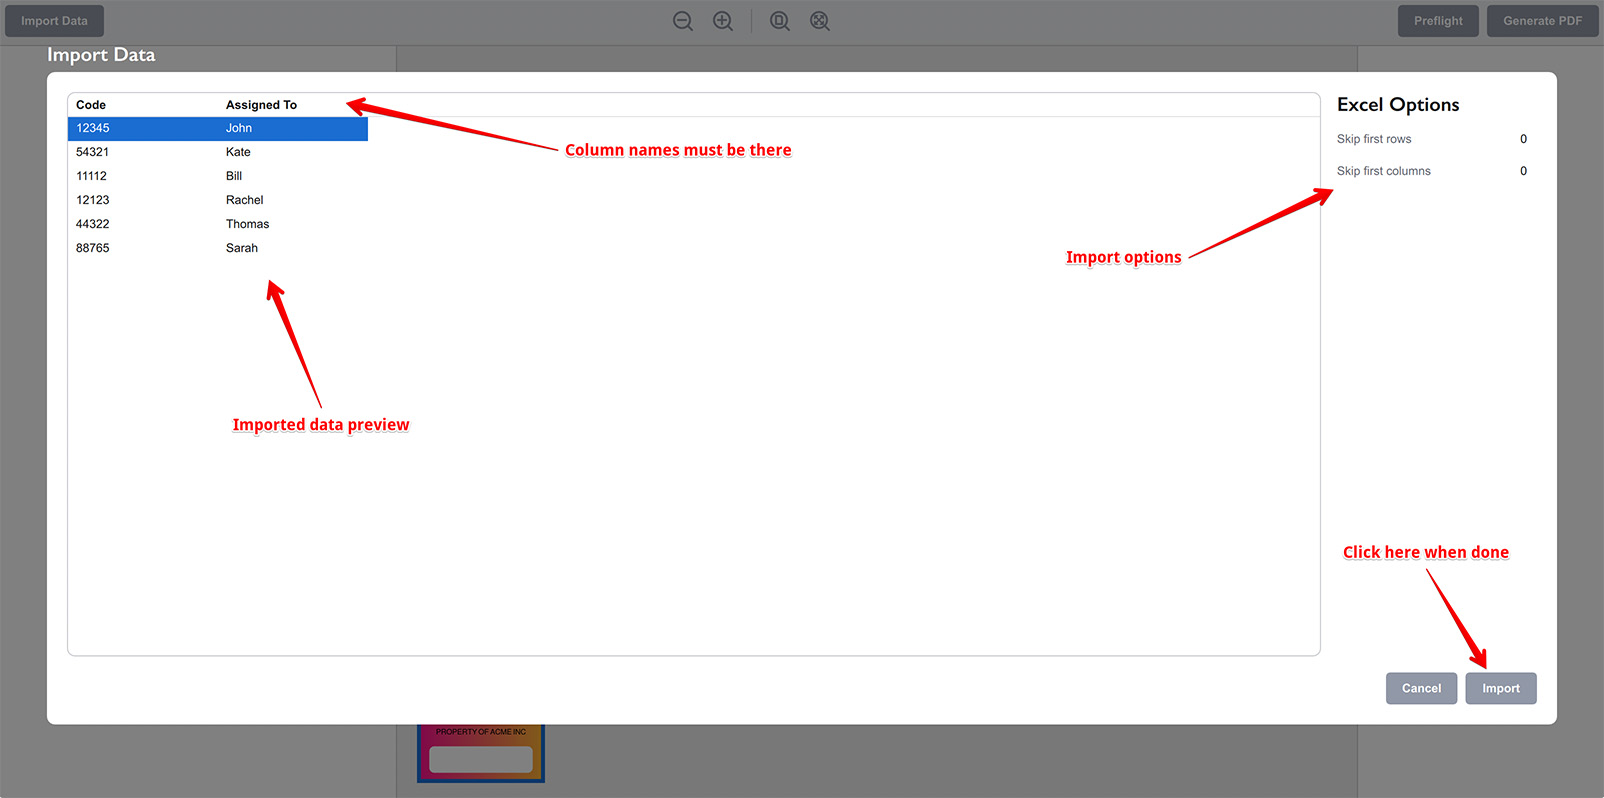
You should see your data imported, the column names picked up by Ticket Wizard and highlighted with bold font. If it doesn’t happen or something went wrong, you can adjust the import options on the right, for instance you might want to skip some top rows or left columns in order to import exactly the data you need.
Once everything looks right, click the Import button at the bottom right corner of the popup panel. You will see the data loaded to the spreadsheet on the left:
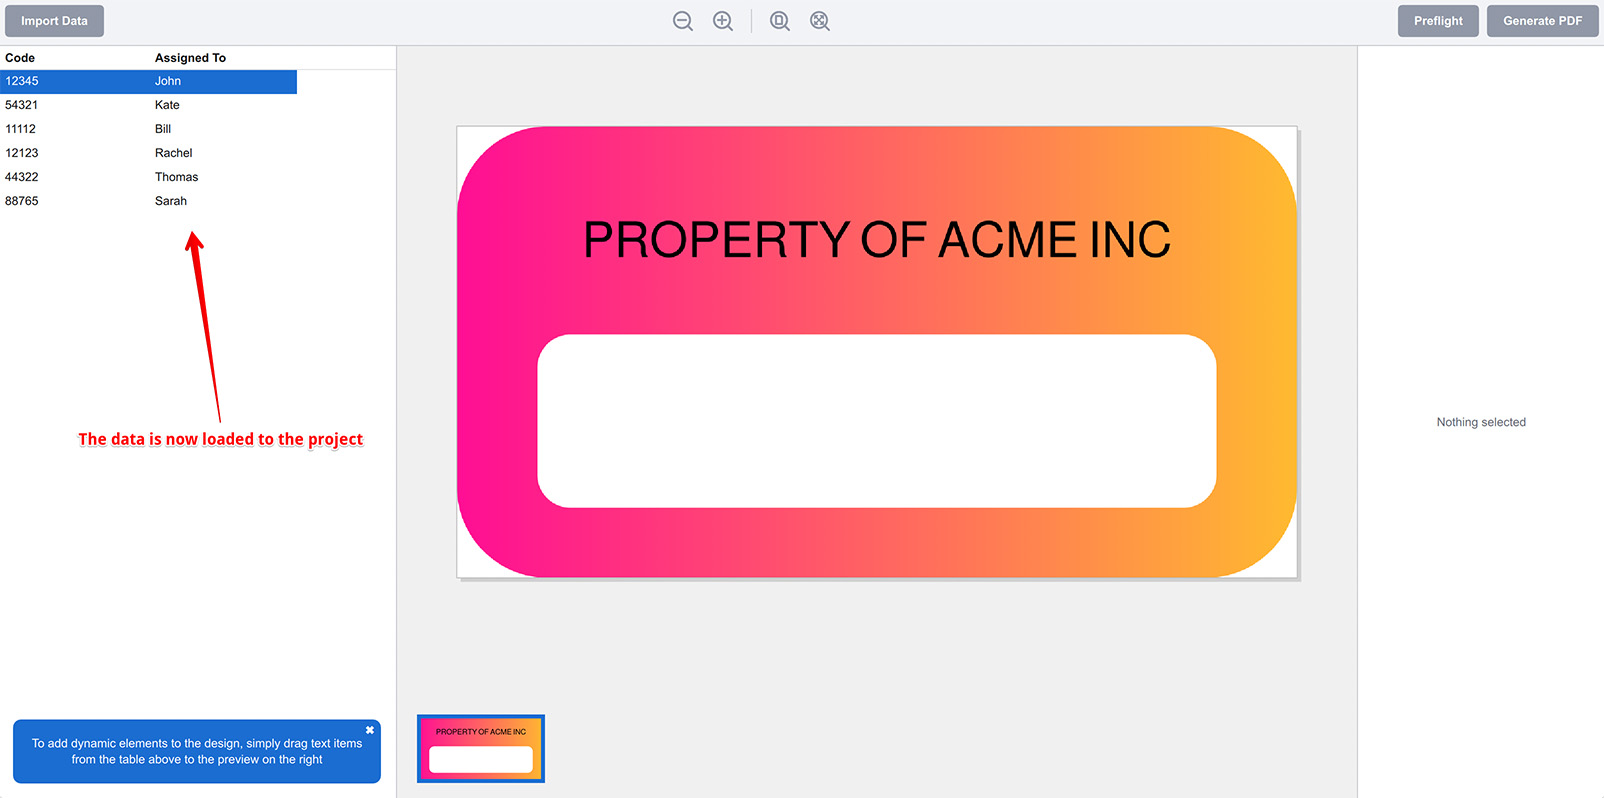
Done. The data is now loaded and we can start adding dynamic elements.
Adding Dynamic Elements
As the hint at the bottom left of the window suggests, we can simply drag a data item from the table on the left to the artwork in the middle in order to add them. Click any cell in the Code column and drag that cell onto the white area of the artwork. The popup menu will ask you if you want to add it as a text or barcode element, select text. You should end up with something like this:
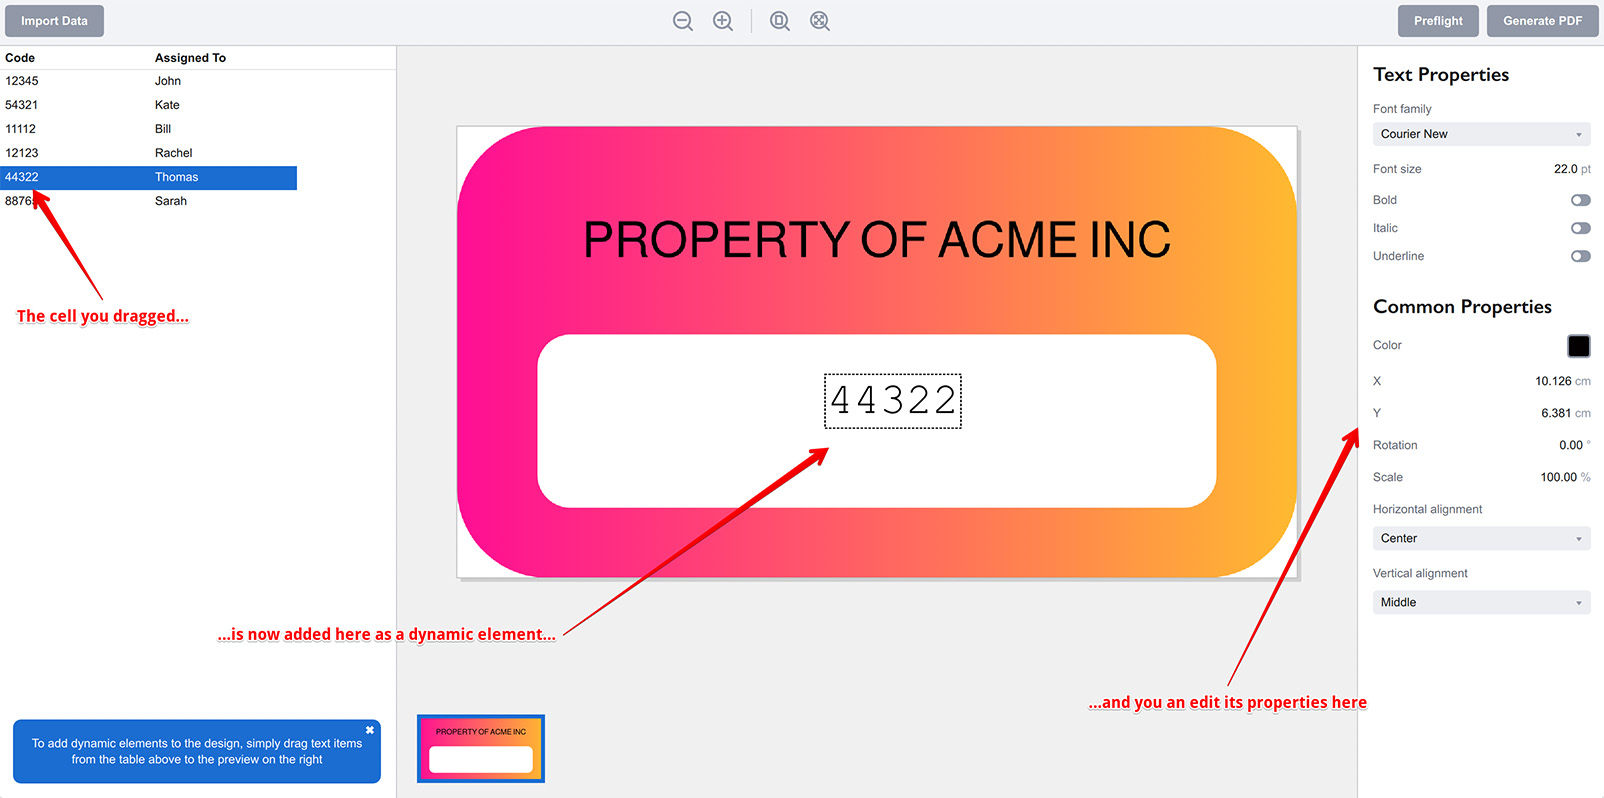
Now if you select different rows on the left, you will see the number in the middle is changed to reflect the selected row data. That’s pretty much how Ticket Wizard works: you add dynamic elements to the design and the software runs through the data table and makes a copy of the design with the data of each row.
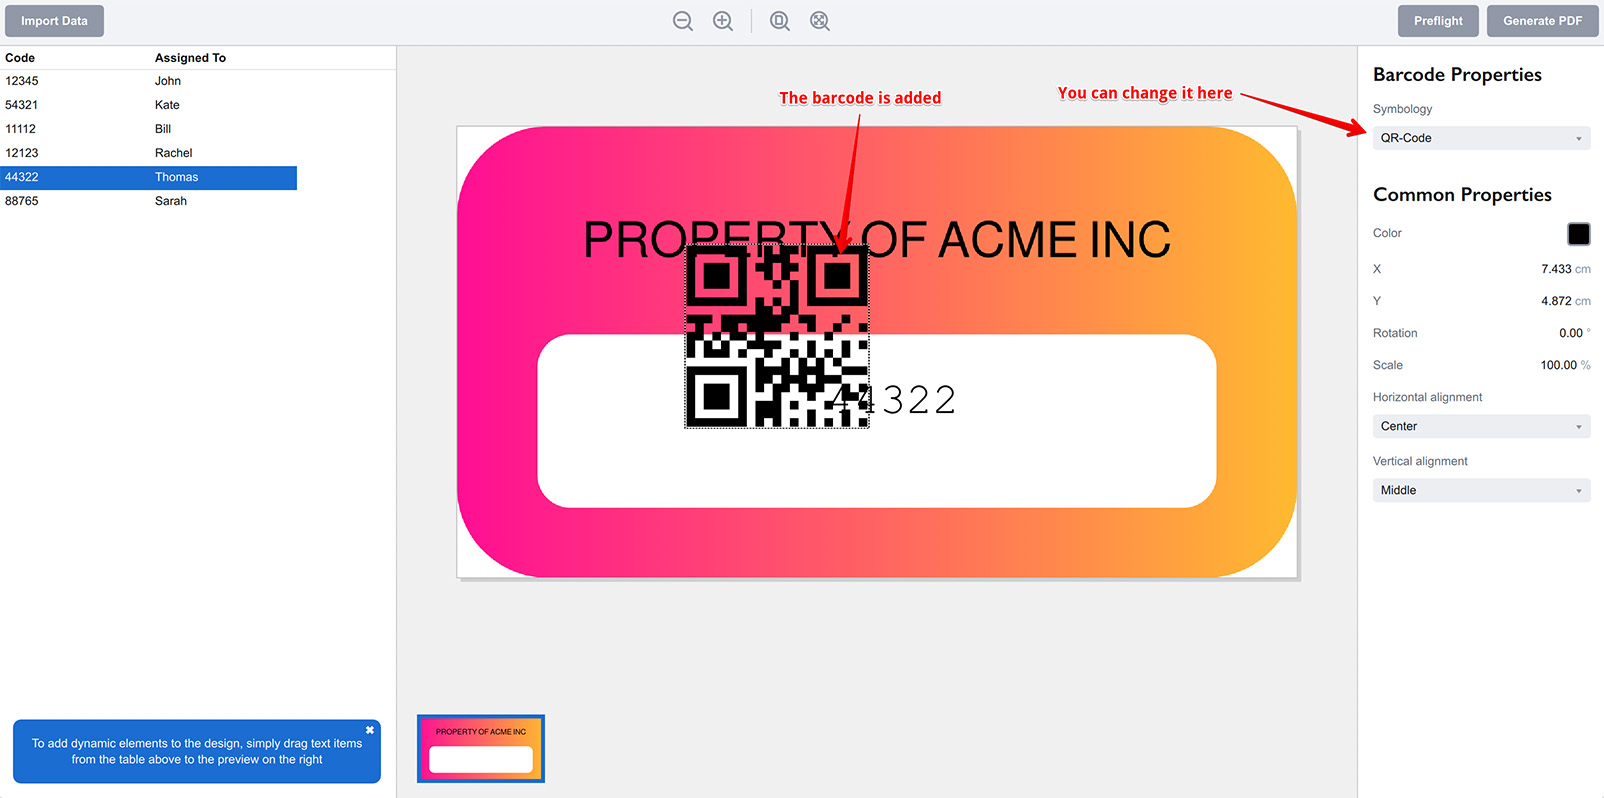
Let’s place the same data as a barcode for easier scanning. This time right-click the empty area of the artwork and check the popup menu you’ll get. It will list all the elements of the left spreadsheet and suggest adding them as either text or barcode elements. Select Add “Code” → As Barcode Element and you will get this:
Now use the right panel to change the barcode symbology to “Code 39” or any other you’ll find useful, adjust its scale to fill the empty area and arrange both barcode and text to look nice. You should end up with this:
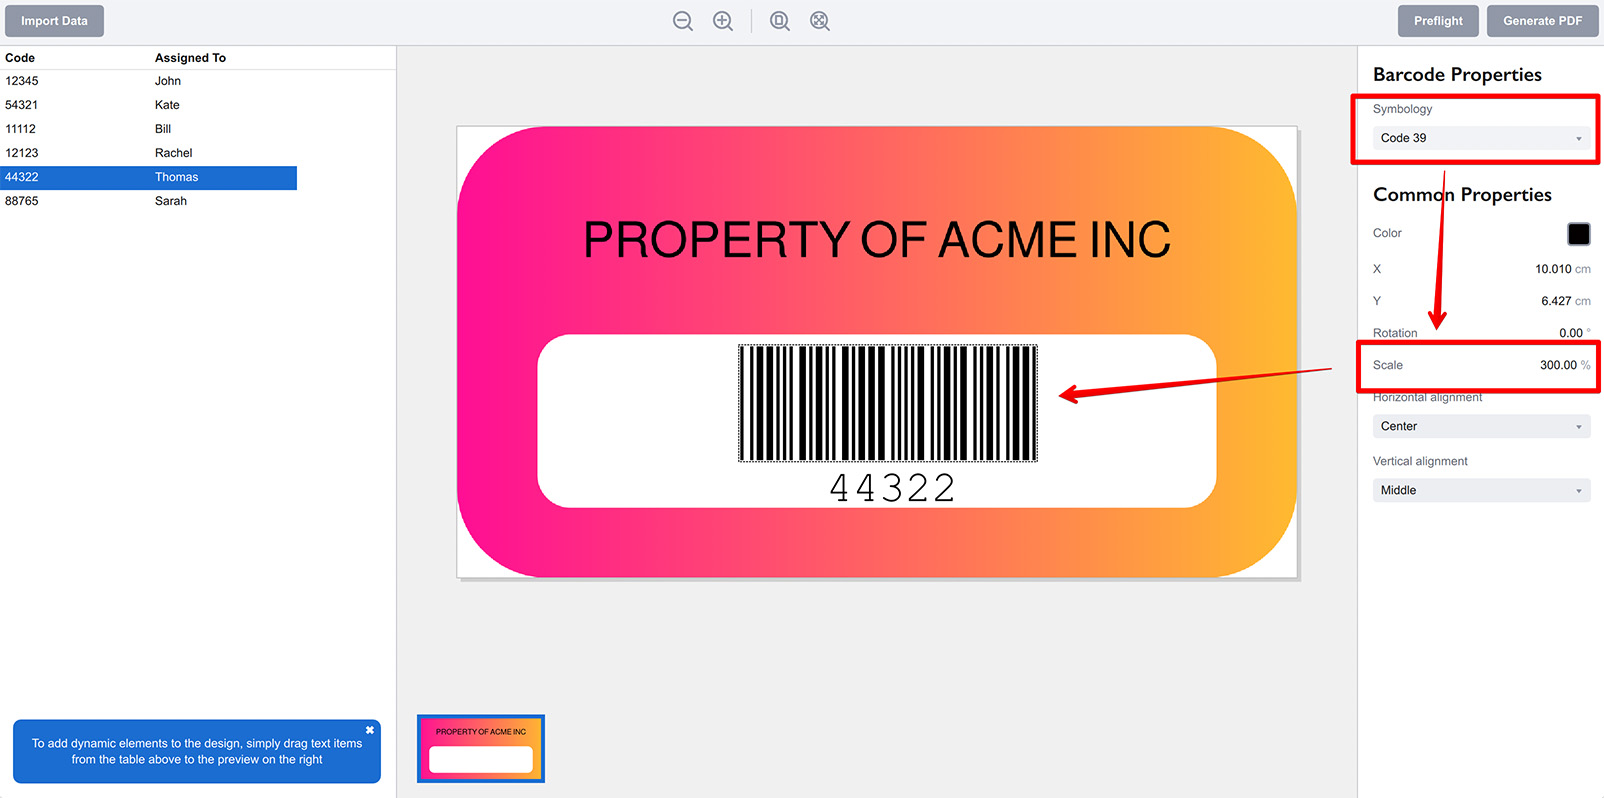
Scroll through the data on the left and see that both elements are changed to reflect the currently selected row. You can add an element for the second column, if you like:
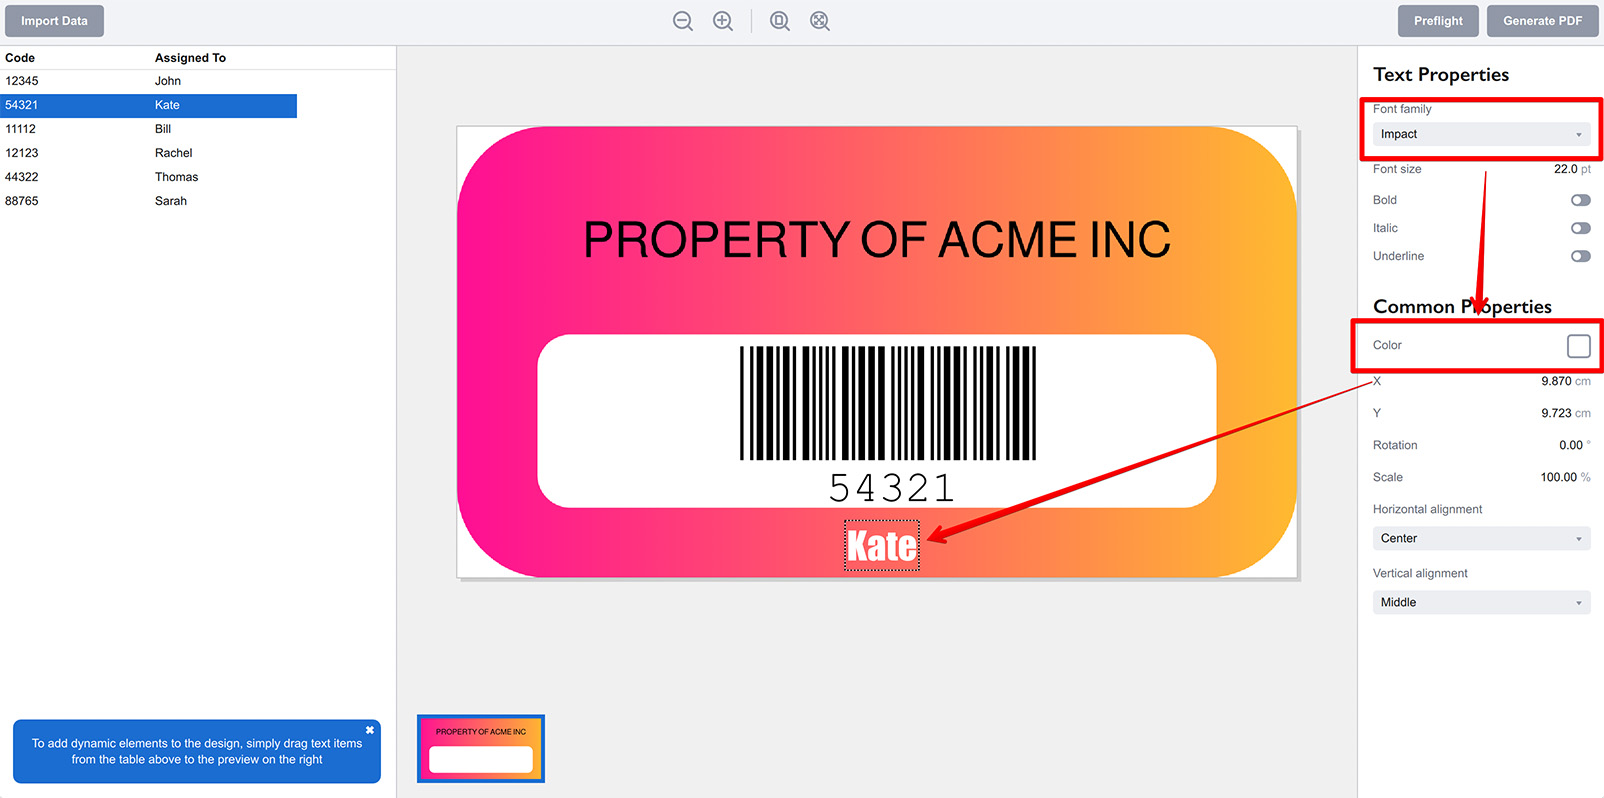
If you want a more detailed text like “This item is assigned to Person Name”, you can adjust the input data and re-import them to Ticket Wizard.
Exporting Results
Once everything is configured, you can click the Generate PDF button at the top right corner of the window to generate the output file. Ticket Wizard will ask you for the output file name and makes a file that contains a number of copies of your initial design, one for each row of the spreadsheet you have on the left.
You can now save the project if you plan to return to it later and make another batch.
More Ticket Wizard Tutorials
Installation
- Installation — how to install Ticket Wizard;
- License Activation — how to activate Ticket Wizard with a license key.
Basics
- User Interface — the user interface of Ticket Wizard;
- Basic Project — making a basic project from scratch.
More Specific Examples
- Making Asset Tags — making inventory tags from Excel files and PDF artwork;
- Making Raffle Tickets — generating raffle tickets using PDF artwork template and spreadsheet data;
- Making Business Cards — batch–making business cards using Excel data and PDF template;
- Making Price Tags — making price tags using PDF template and spreadsheet.