Batch Making Business Cards
Say you have a business card design template like this and want to generate multiple business cards using the data from Excel file:

Here is a sample Excel file with business card data you might also have:
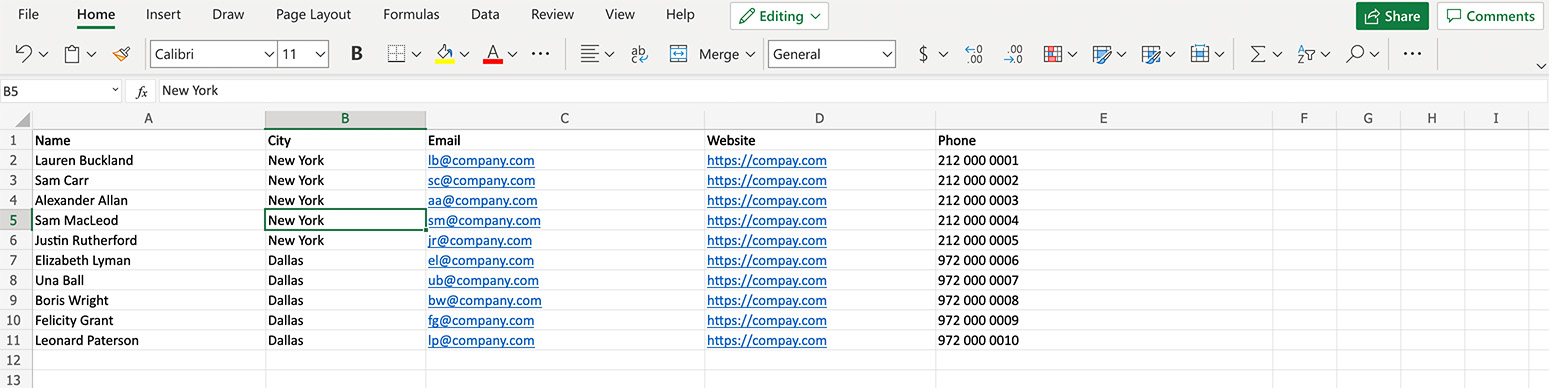
Each row contains data for a single person’s business card and the columns defining their names, emails and other parameters. Now you can use Ticket Wizard to batch generate business cards using the PDF template and the Excel file you have. Let’s start!
Loading Artwork and Data
Start Ticket Wizard and load the PDF artwork file there. You should see the first page preview and the thumbnails of both pages at the bottom:
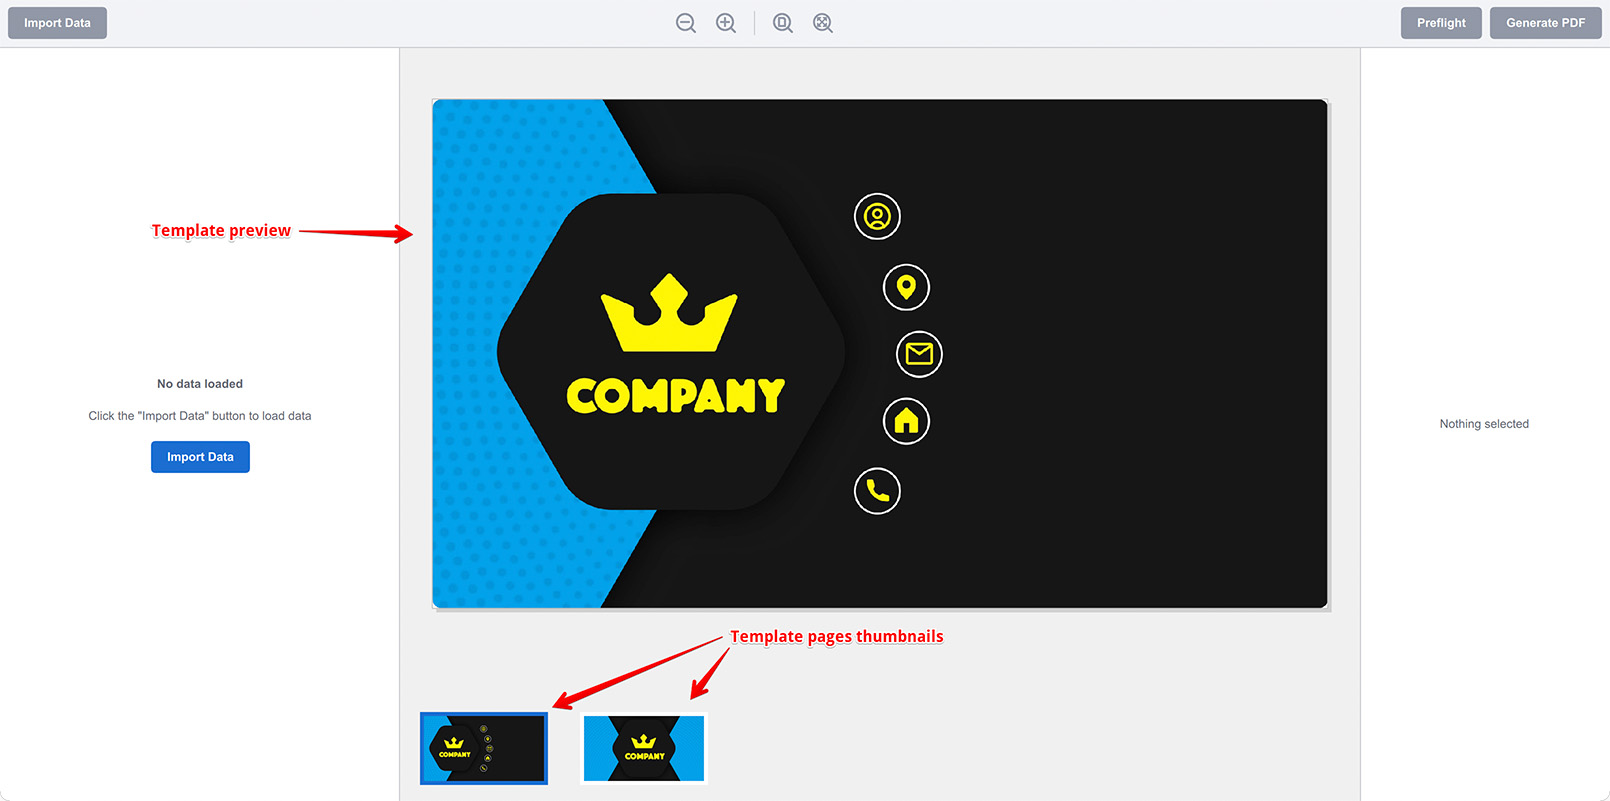
You can switch between the template’s pages by clicking the thumbnails at the bottom. Once you checked the pages and everything looks right, you can continue with importing the data.
Click the Import Data button at the top left corner of the window and select the Excel file with the data. You will see the data importing panel:
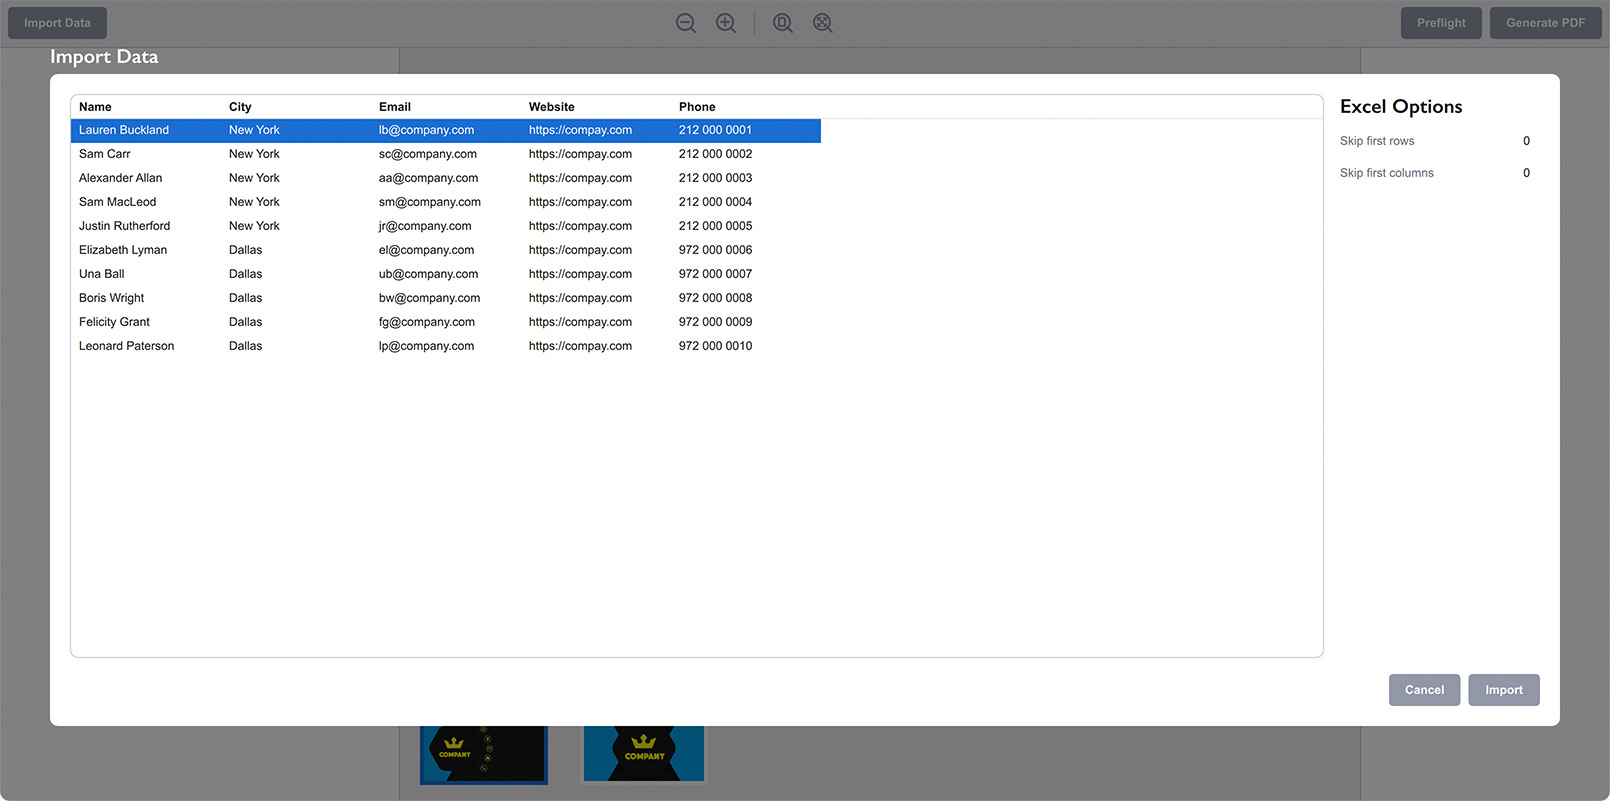
The panel displays the same data as you had in the Excel file. If something goes wrong you can use the parameters on the right to adjust the importer and get the data loaded. Once done click the Import button at the bottom to complete the process. Here’s what you should have as a result:
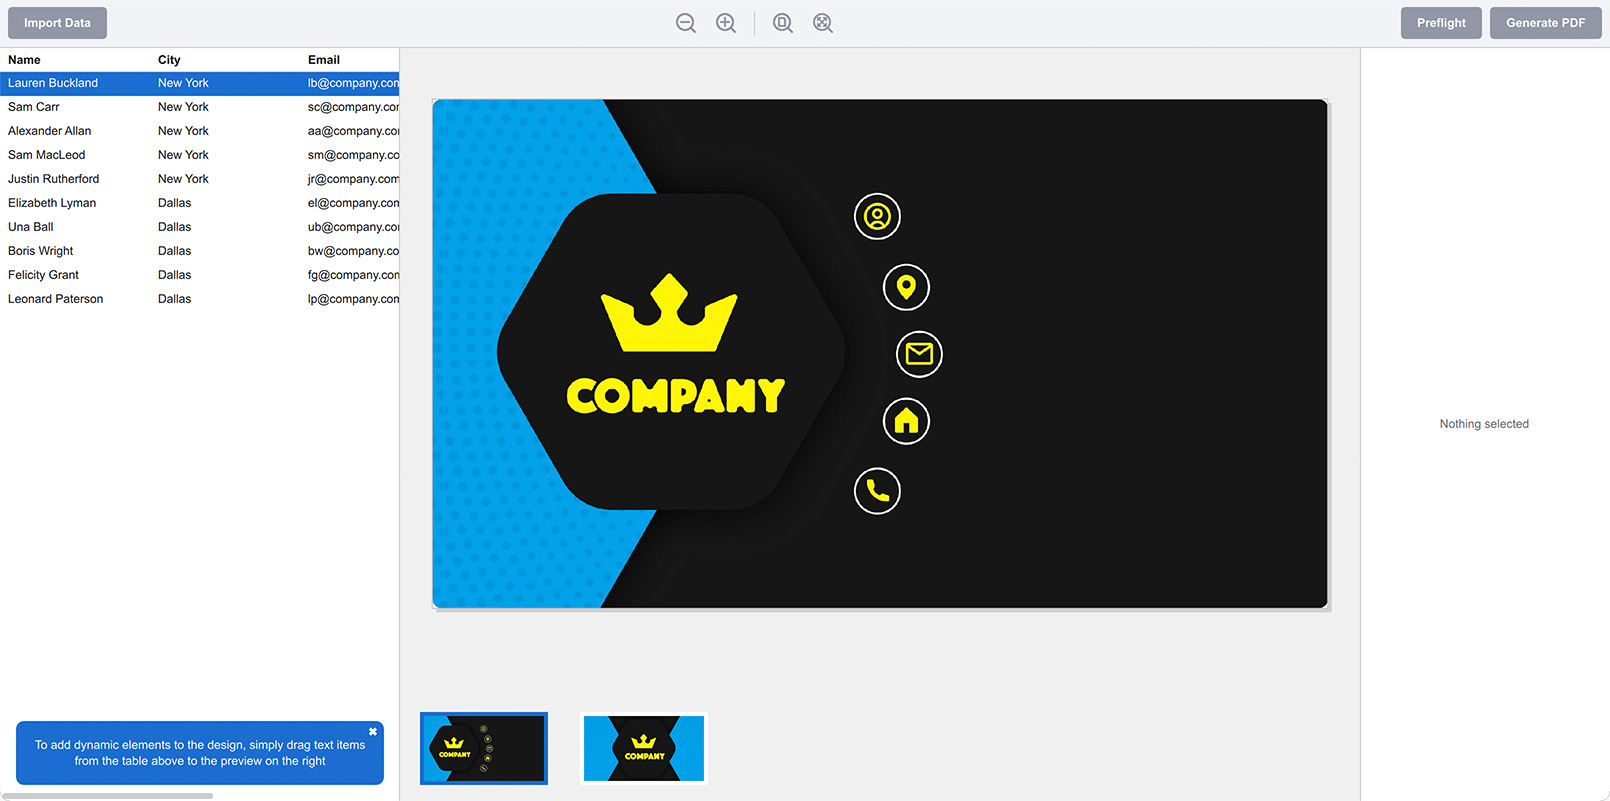
The imported data is on the left, the artwork template is in the middle and everything is now ready for placing the data onto the artwork.
Adding Dynamic Element
To add a dynamic data element onto the artwork you need to grab the text you want on the left, drag it onto the design and drop it where needed. A popup menu will be displayed asking if you want a text or barcode element. Select the text option in the menu and you should end up with this:
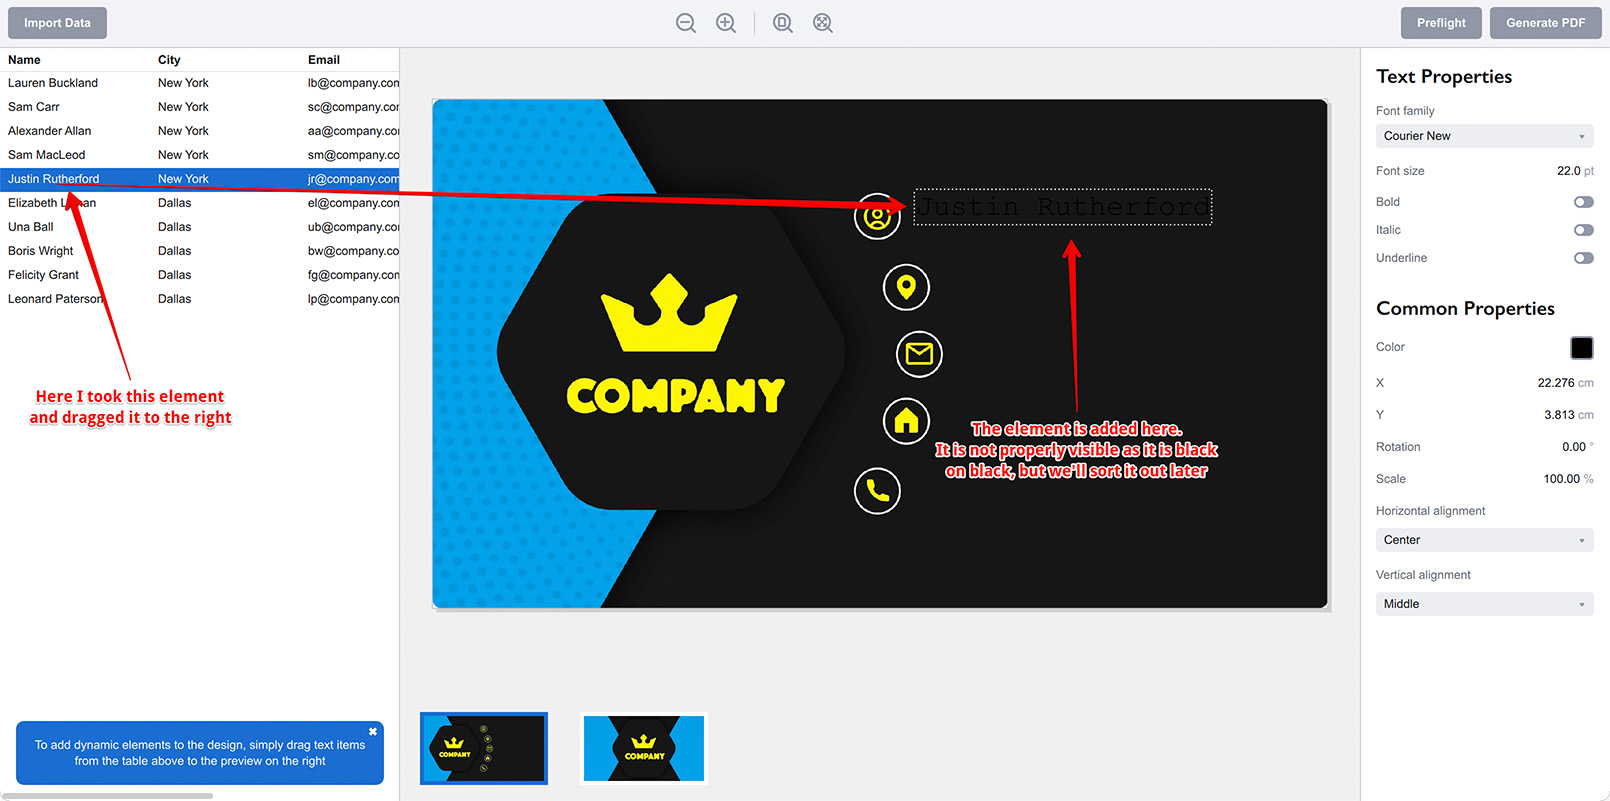
Once you dropped the name field onto the artwork you will see it added as a text element. The screenshot above doesn’t show it really well as the text elements are black by default, so barely visible on the dark background. Let’s fix that by editing the element properties on the right:
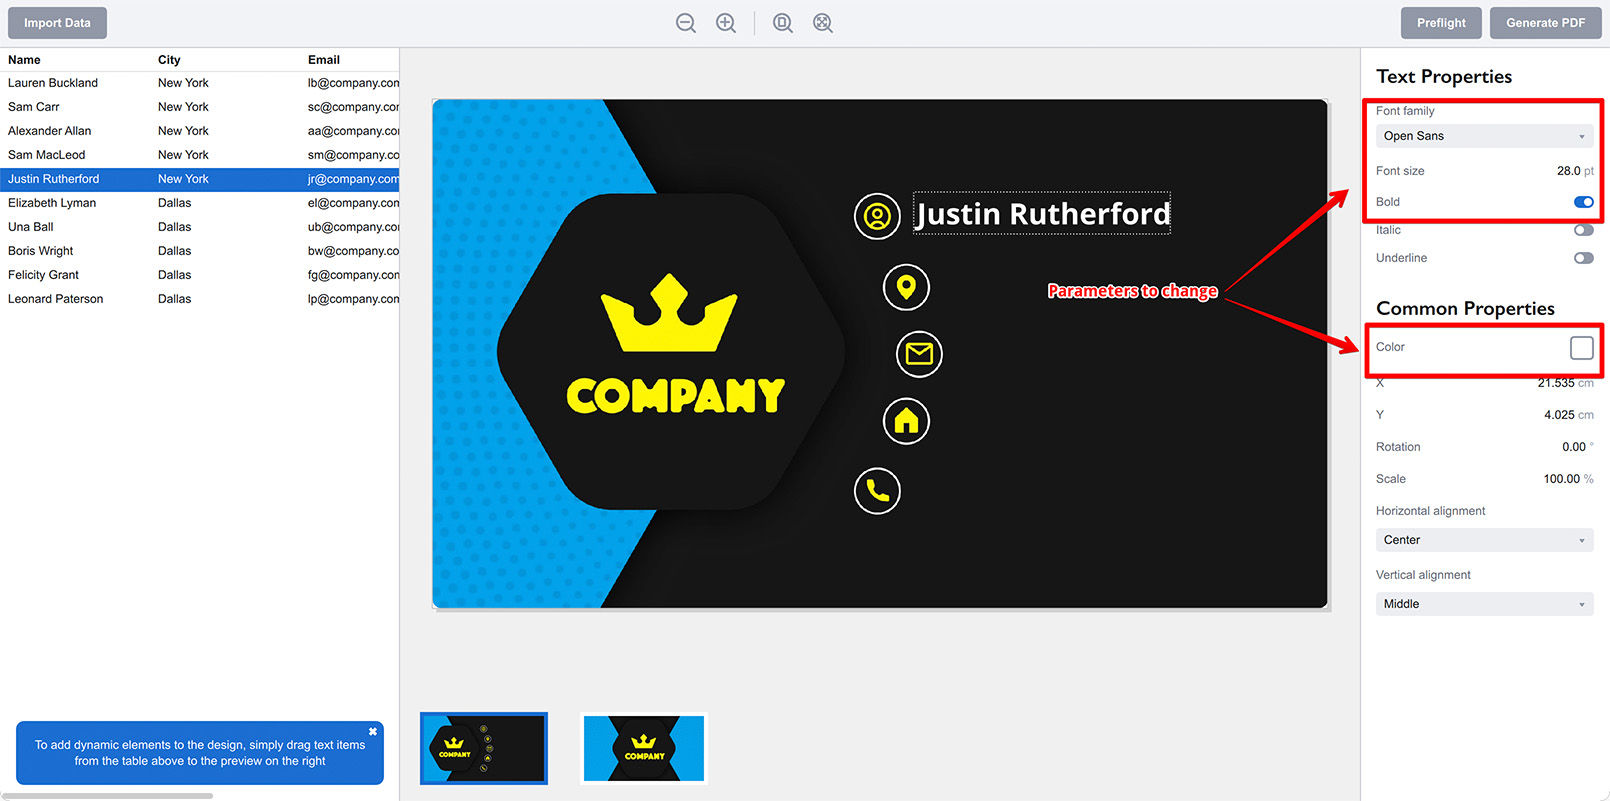
Here I changed the font family, size and color so the text element is visible and matches the design.
Now you can click various rows on the left and see that the text element you’ve just added gets updated with the data of the row you selected. That’s how Ticket Wizard works: you place dynamic elements onto the artwork and the software generates a copy of your design for every data row you have.
Let’s switch to another record and see a subtle difference:
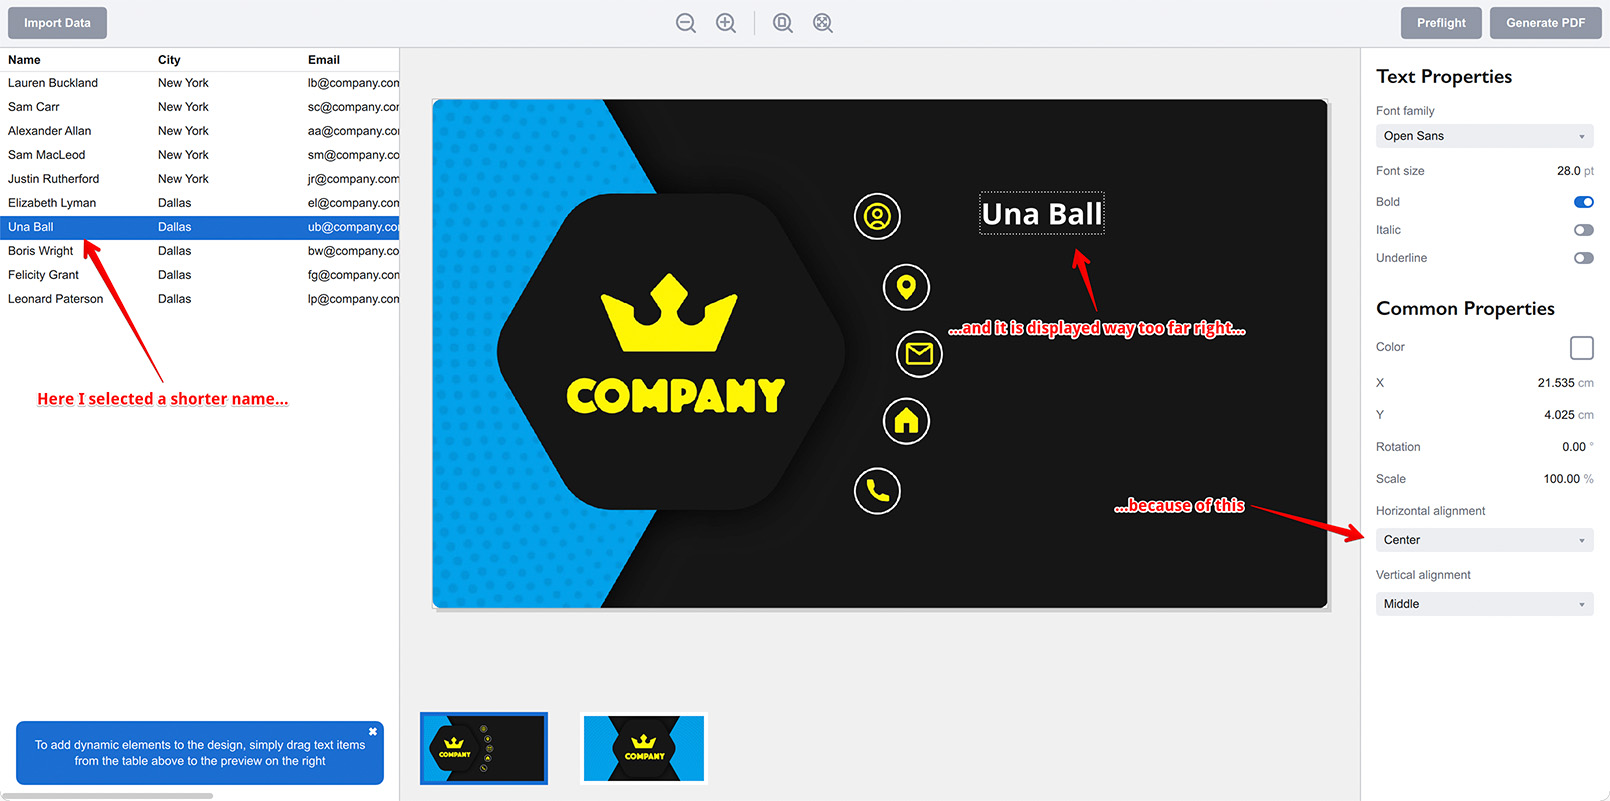
As that particular name is shorter it is now displayed too far right from the marker in the artwork. The reason is that Alignment field at the bottom right highlighted on the screenshot above. We need to change it to the Left so all the texts are aligned by their left side, not by the center. You will need to readjust the element position after that:
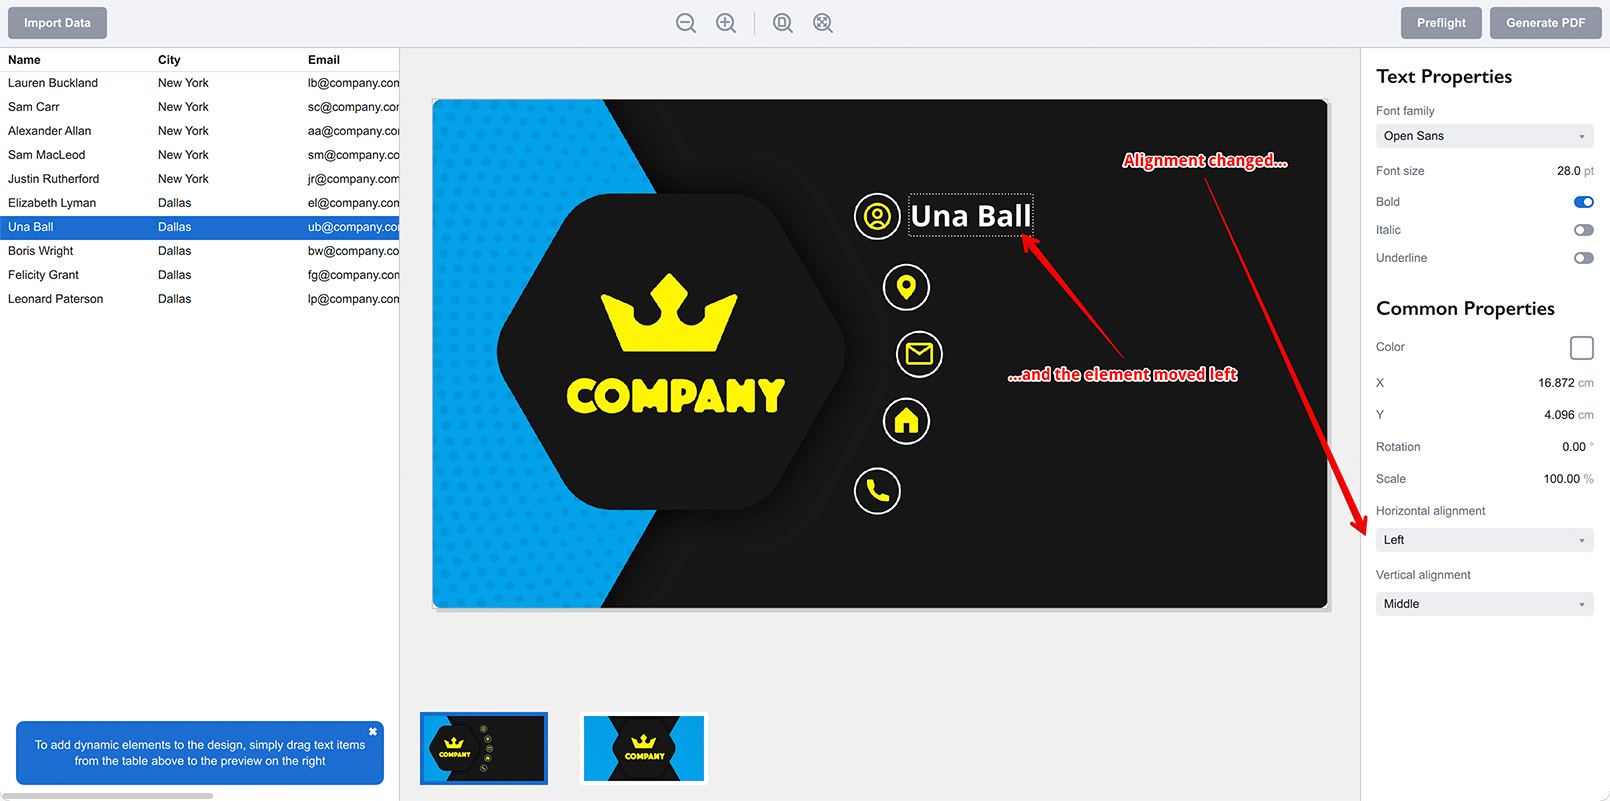
Now you can scroll through the data items again and make sure that all the names are now displayed properly right next to the name marker of the artwork.
Adding Other Elements
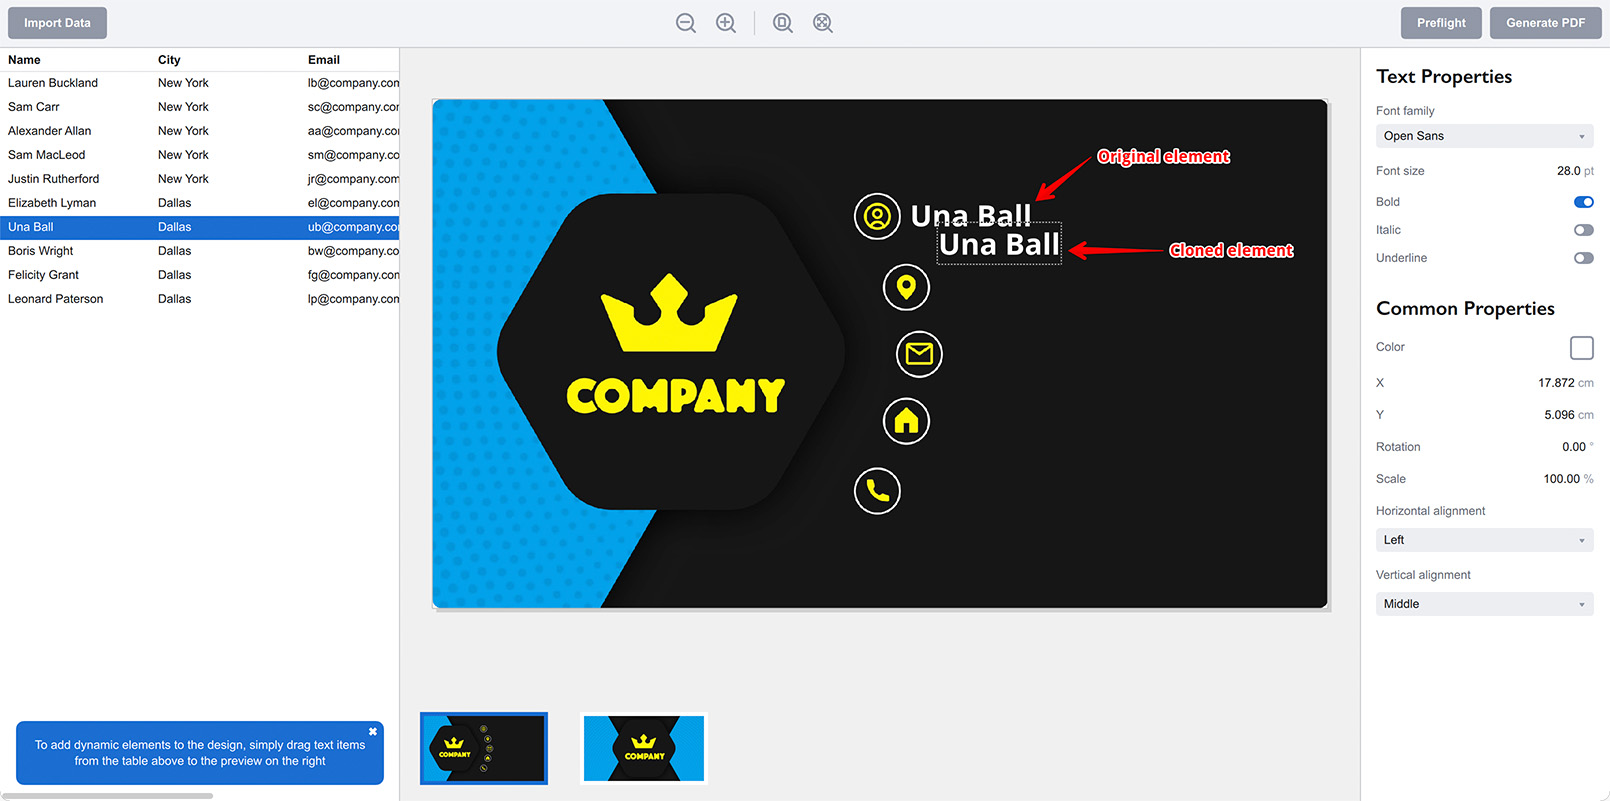
Although you can add other elements to the design exactly the same way as you’ve just done, there is a shortcut that saves you some time: right-click the element you’ve just added and select Copy from the popup menu, then right-click again and select Paste. You should get this:
That second element displays the same information as the first one and you need to edit it to display the data from another column. To do so right-click the item and select Source → City from the popup menu. This will change the data source of the second element and it will start displaying a different column of your data:
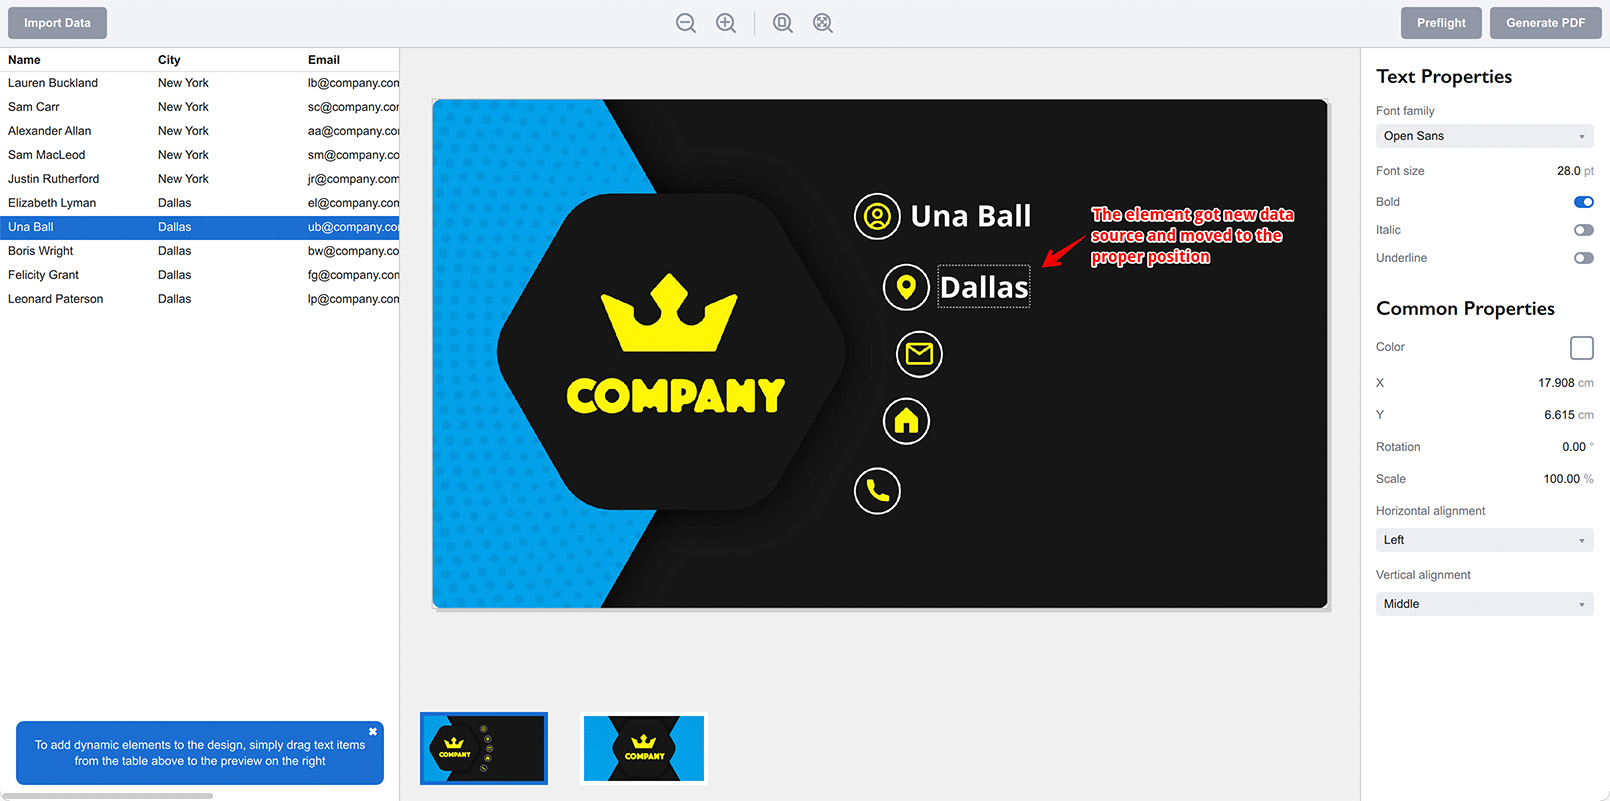
On the screenshot above I changed the data source to “City” and moved the element to the correct place. Now if you scroll through the data items on the left you will see both text fields updated with the data of selected rows.
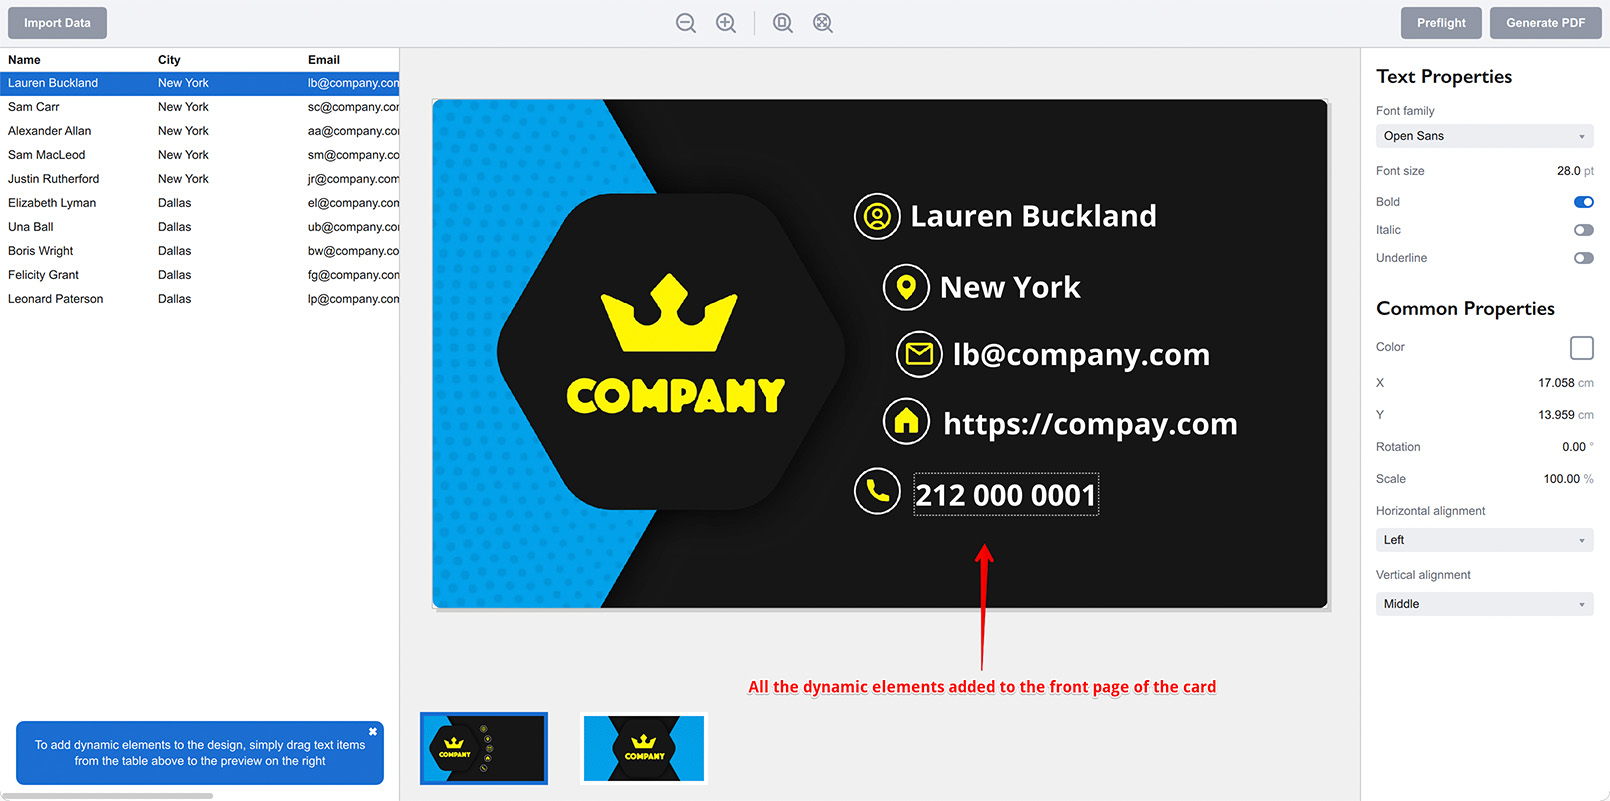
Do the same for other design elements and you should get something like this:
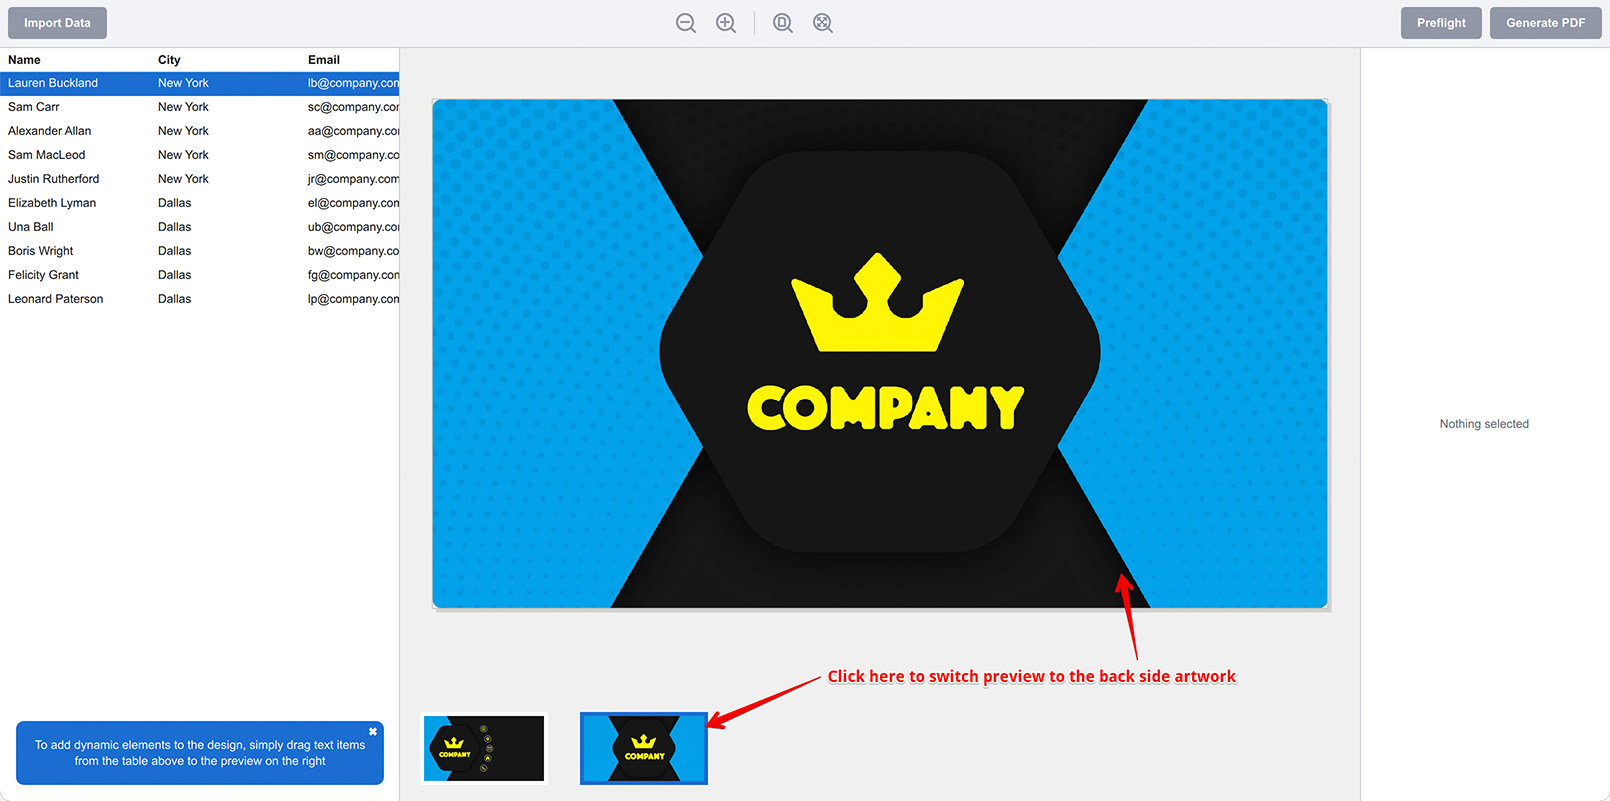
Finally, let’s quickly add the person email to the backside of the card just to show how to do that. Click the backside thumbnail at the bottom to switch to it:
Then drag the email from the left to the artwork to add it there. You should get this as a result:

Same as with the front page we need to adjust the element parameters to match the design:
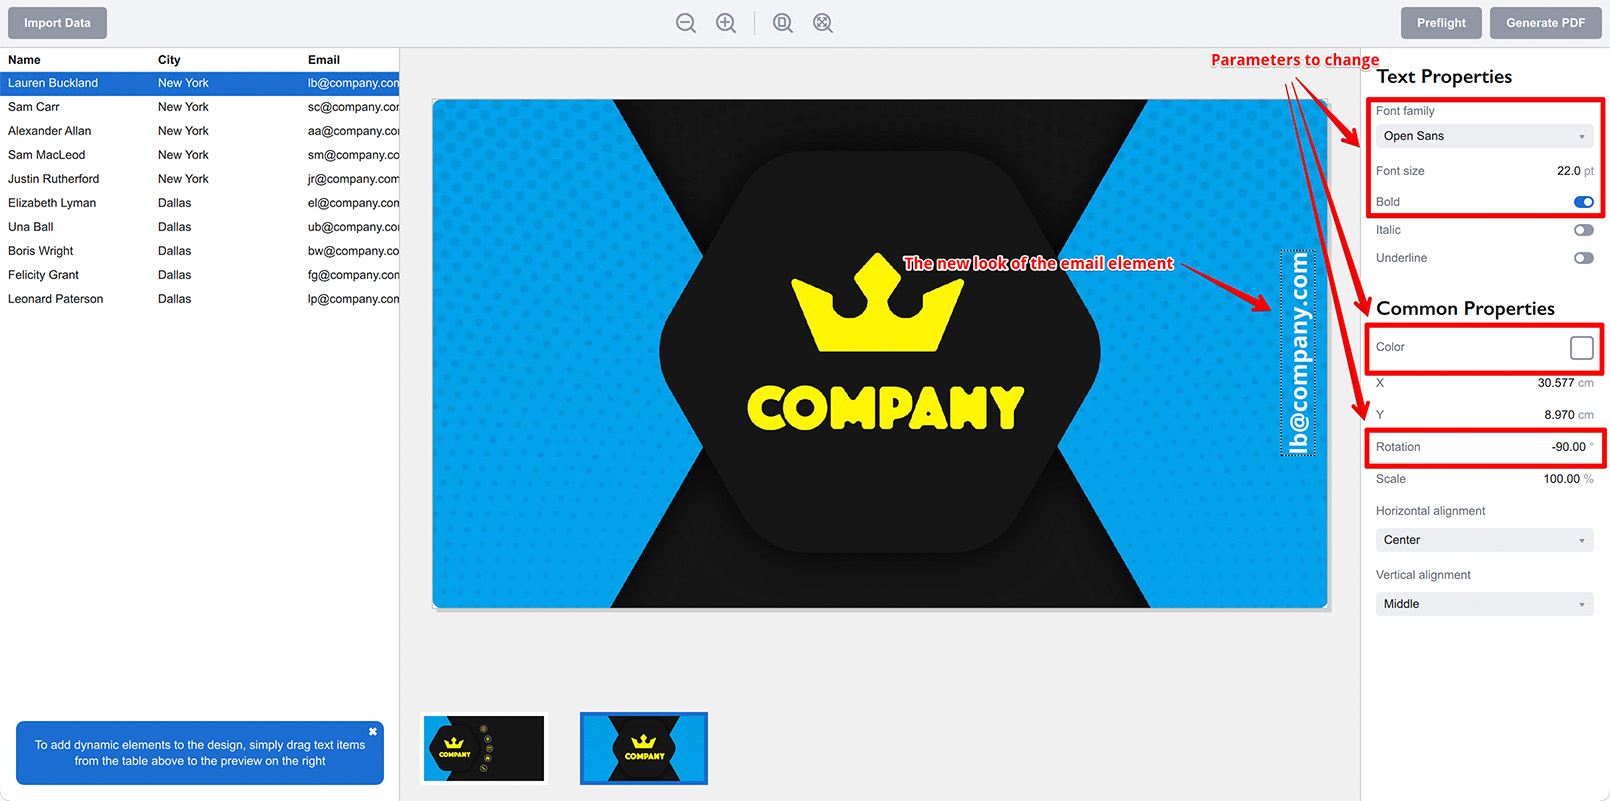
Here I changed font family and size, color and angle to place the email text element vertically. Note that here we use the central alignment as it better fits the design.
Again you can scroll through the data items on the left and see that the element gets updated with the data of selected row.
Generating Business Cards
Once everything is done you click the Generate PDF button at the top right corner of the window. It asks you for the output file name and makes the PDF file with all the business cards:
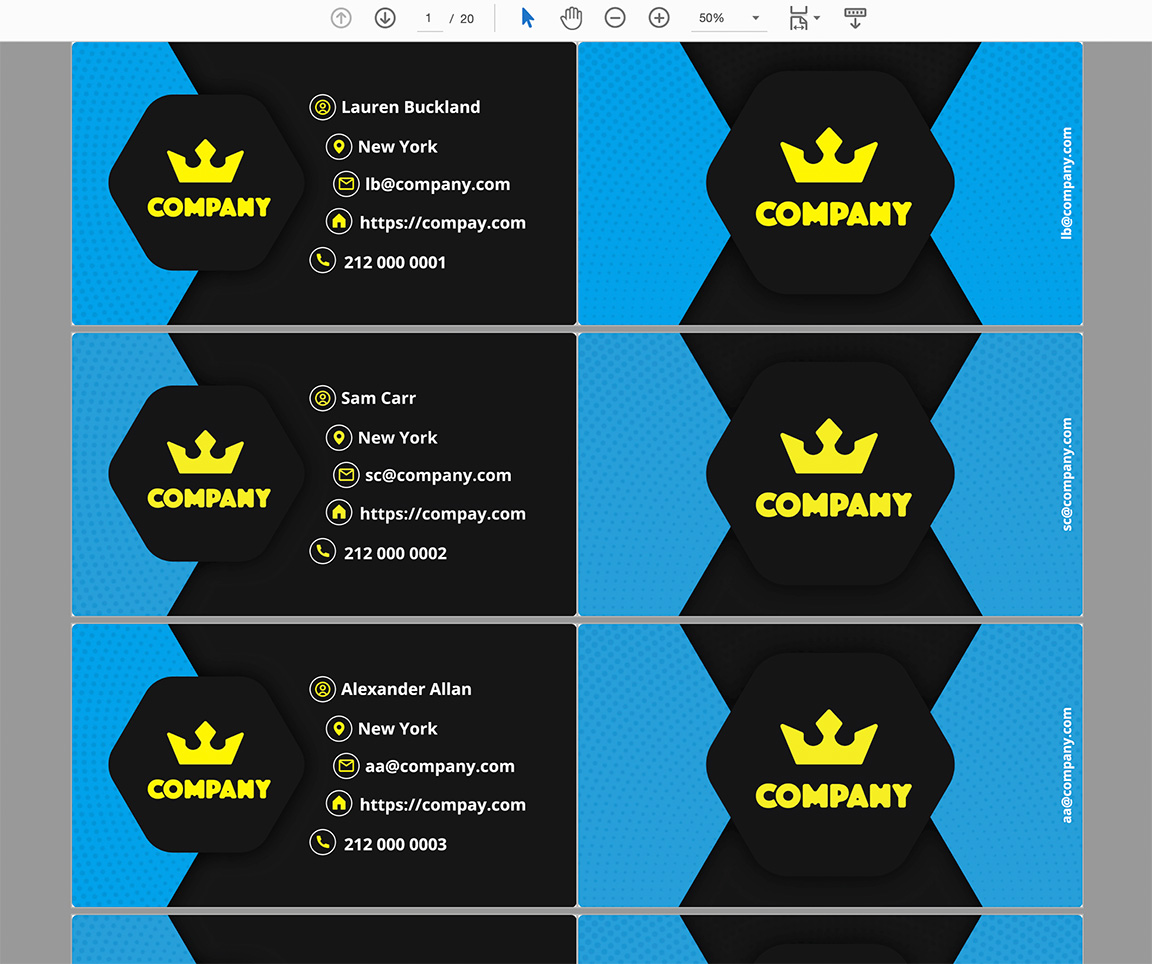
Note that every pair of pages share the base design and the data of your Excel file.
That’s It
Done. You imported the PDF business card artwork template and Excel data, placed dynamic text elements to the artwork and generated the PDF file with all the business cards.
You can now save this project to return to it later, say to generate another batch of business cards with a new set of names.
More Ticket Wizard Tutorials
Installation
- Installation — how to install Ticket Wizard;
- License Activation — how to activate Ticket Wizard with a license key.
Basics
- User Interface — the user interface of Ticket Wizard;
- Basic Project — making a basic project from scratch.
More Specific Examples
- Making Asset Tags — making inventory tags from Excel files and PDF artwork;
- Making Raffle Tickets — generating raffle tickets using PDF artwork template and spreadsheet data;
- Making Business Cards — batch–making business cards using Excel data and PDF template;
- Making Price Tags — making price tags using PDF template and spreadsheet.