Making Price Tags
You can make price tags with Ticket Wizard by populating a PDF artwork template with pricing data from Excel or any other spreadsheet.
Preparing Pricing Data
First of all you will need a spreadsheet with your pricing information. In this tutorial we will use a randomly filled Excel file as an example:
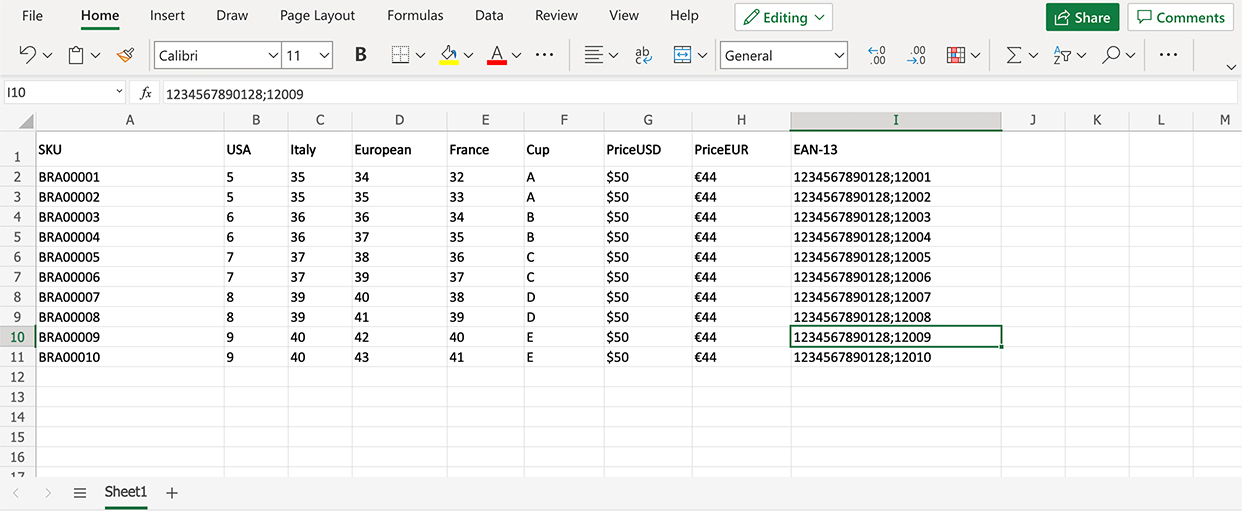
It is important to put the column names into the first row as they are used to link spreadsheet data to dynamic text and barcode elements in Ticket Wizard.
Once you get the spreadsheet ready, save it to Excel (XLSX) or CSV format and run Ticket Wizard.
Preparing PDF Artwork
The next thing you need is a PDF artwork for your price tag that will act as a “background” or “canvas” for the dynamic elements with your spreadsheet data. Drag and drop that PDF into Ticket Wizard, or click File → New Project in its main menu to browse for the file.
Once done you should see your PDF template loaded:
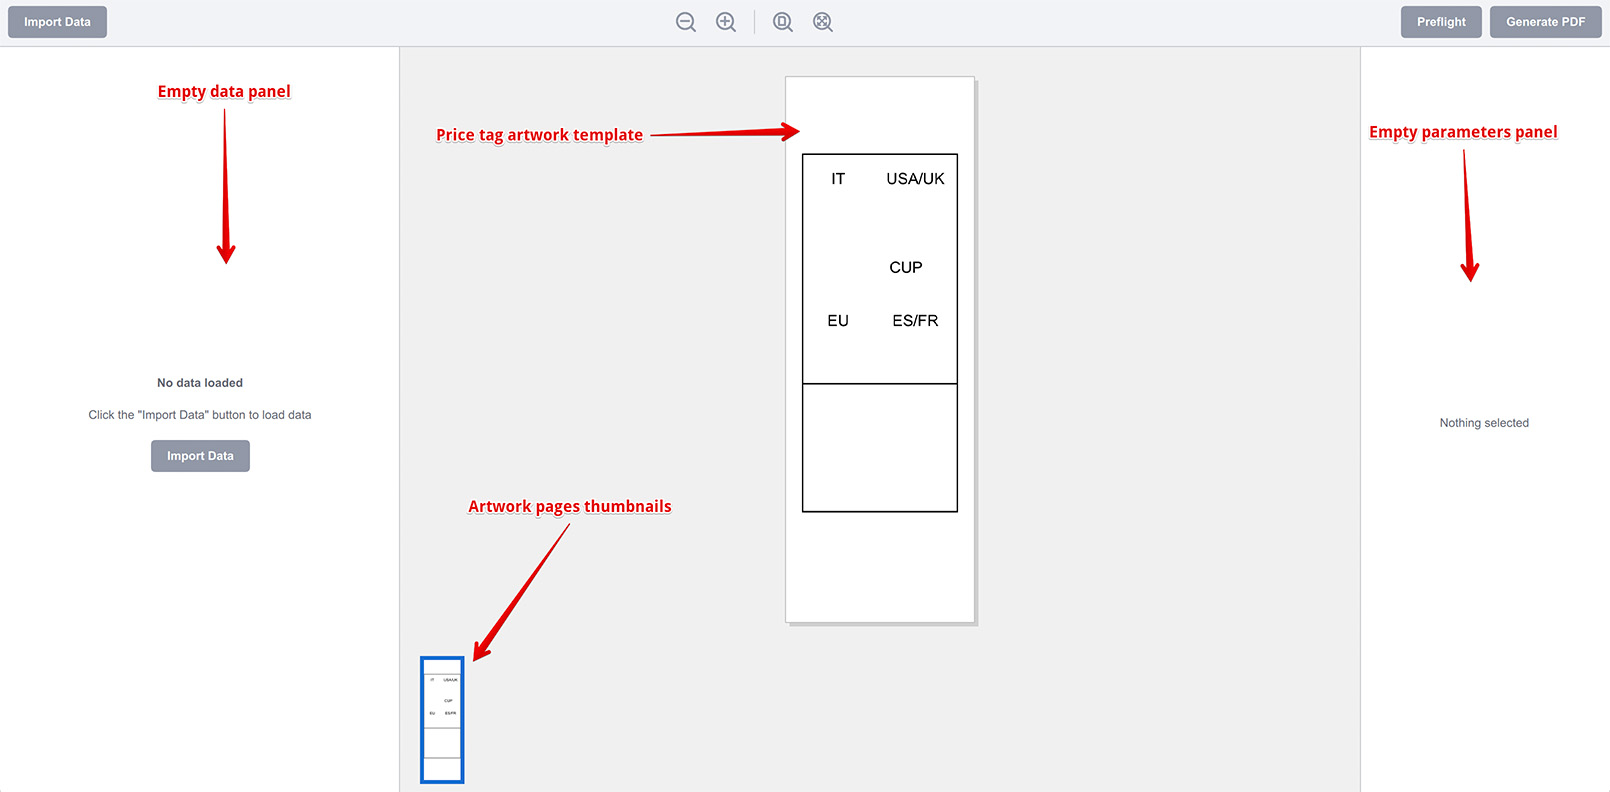
The price tag artwork should be displayed in the middle. If your artwork has multiple pages (say front and back) you will see the thumbnails at the bottom. The panels on the left and right should be empty.
Now we are ready to load the spreadsheet data.
Loading Pricing Data
To load the spreadsheet we created above click the Import button at the top left corner of the window and pick the spreadsheet file you created. It then will be imported, so you can see the pricing data in Ticket Wizard:

Note that the columns are named after the first row elements of your Excel file. If something is wrong, you can adjust the importing parameters using the right panel. Once done you can click the Import button at the bottom right corner of the panel and get the data imported into the software:
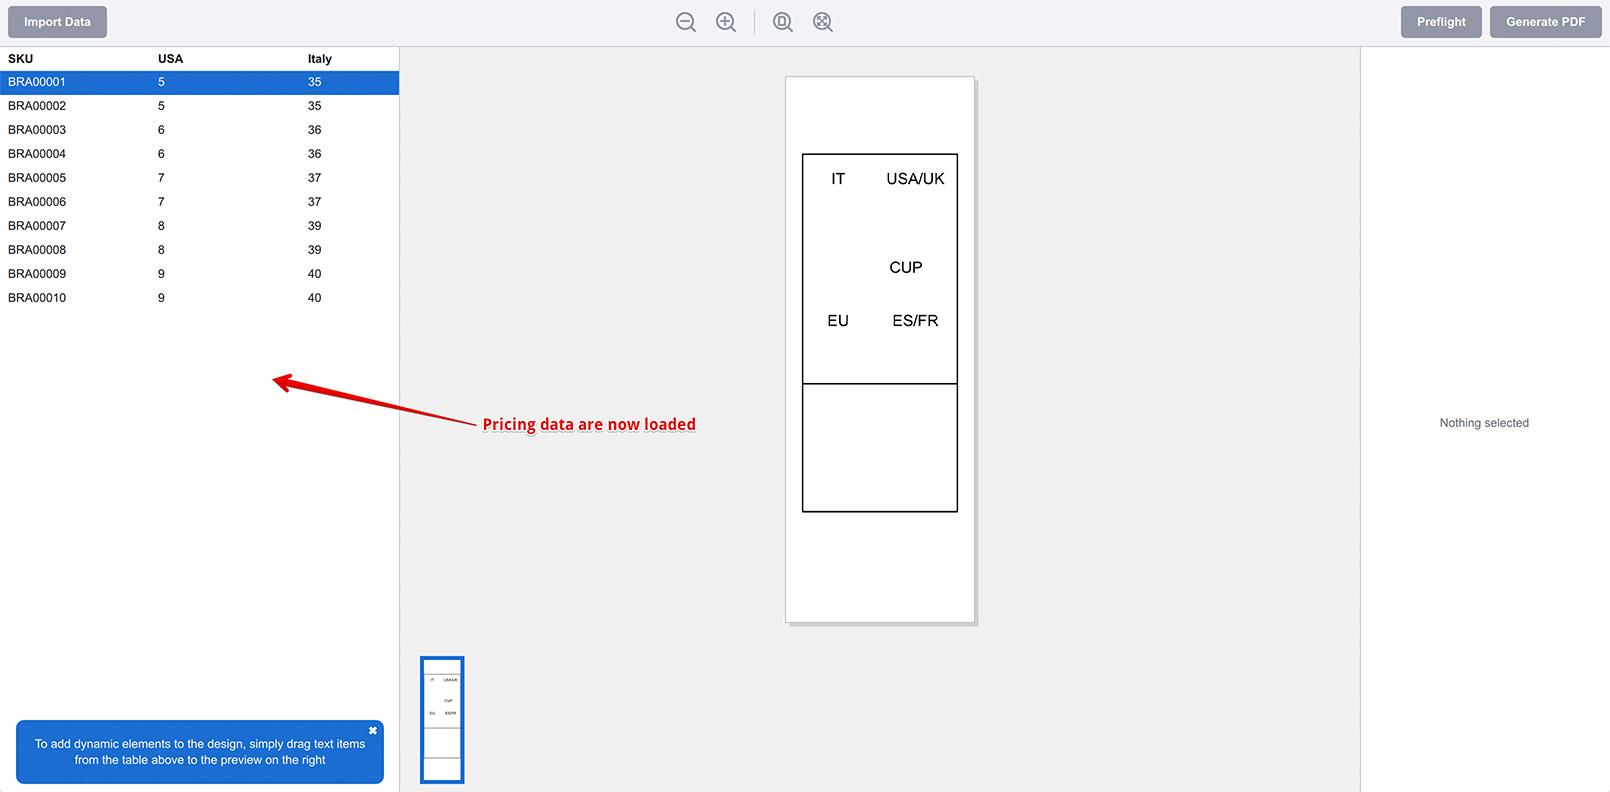
The pricing data is now displayed on the left, ready to use. Let’s continue to adding the dynamic elements to the template.
Adding Text Elements
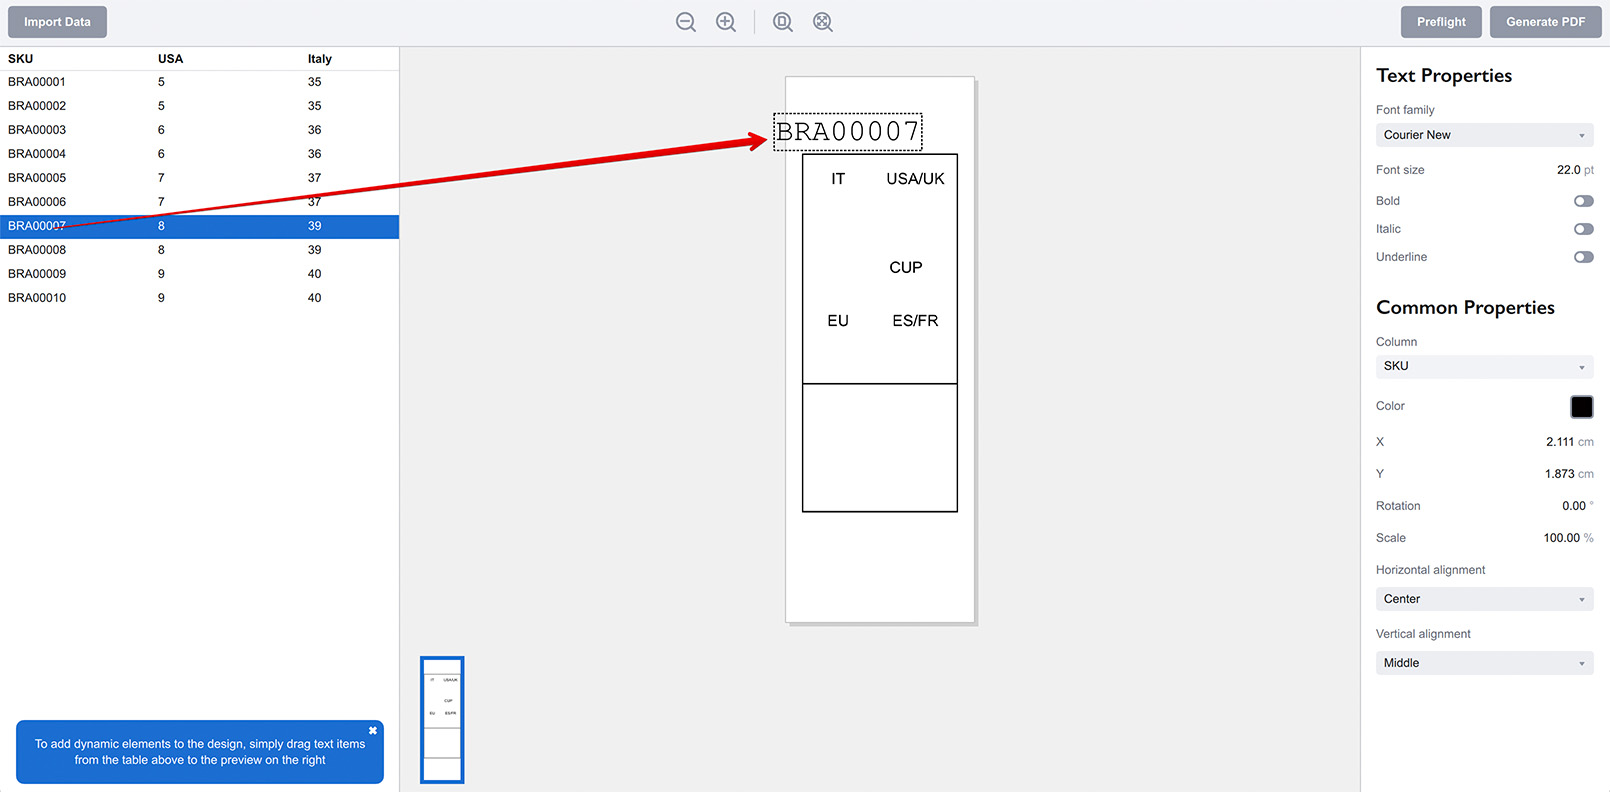
To add the pricing data to the artwork you can simply drag a text from the left panel onto the artwork in the middle. Let’s drag the SKU field into the top part of the template. When you drop the text the software will ask you if you want to add a text element or a barcode. Choose the text element and get the new dynamic text element with SKU data added to the template:
Now if you click through the pricing table on the left, you’ll notice that the text gets updated with the data of the currently selected row. That’s how the software works: you create dynamic texts and barcodes on top of the artwork and link them to the input data. Then the software runs through the data and makes a separate filled page for each row of the spreadsheet, which is then saved to a PDF file. It’s that simple!
Let’s adjust the text element look a bit using the right panel:
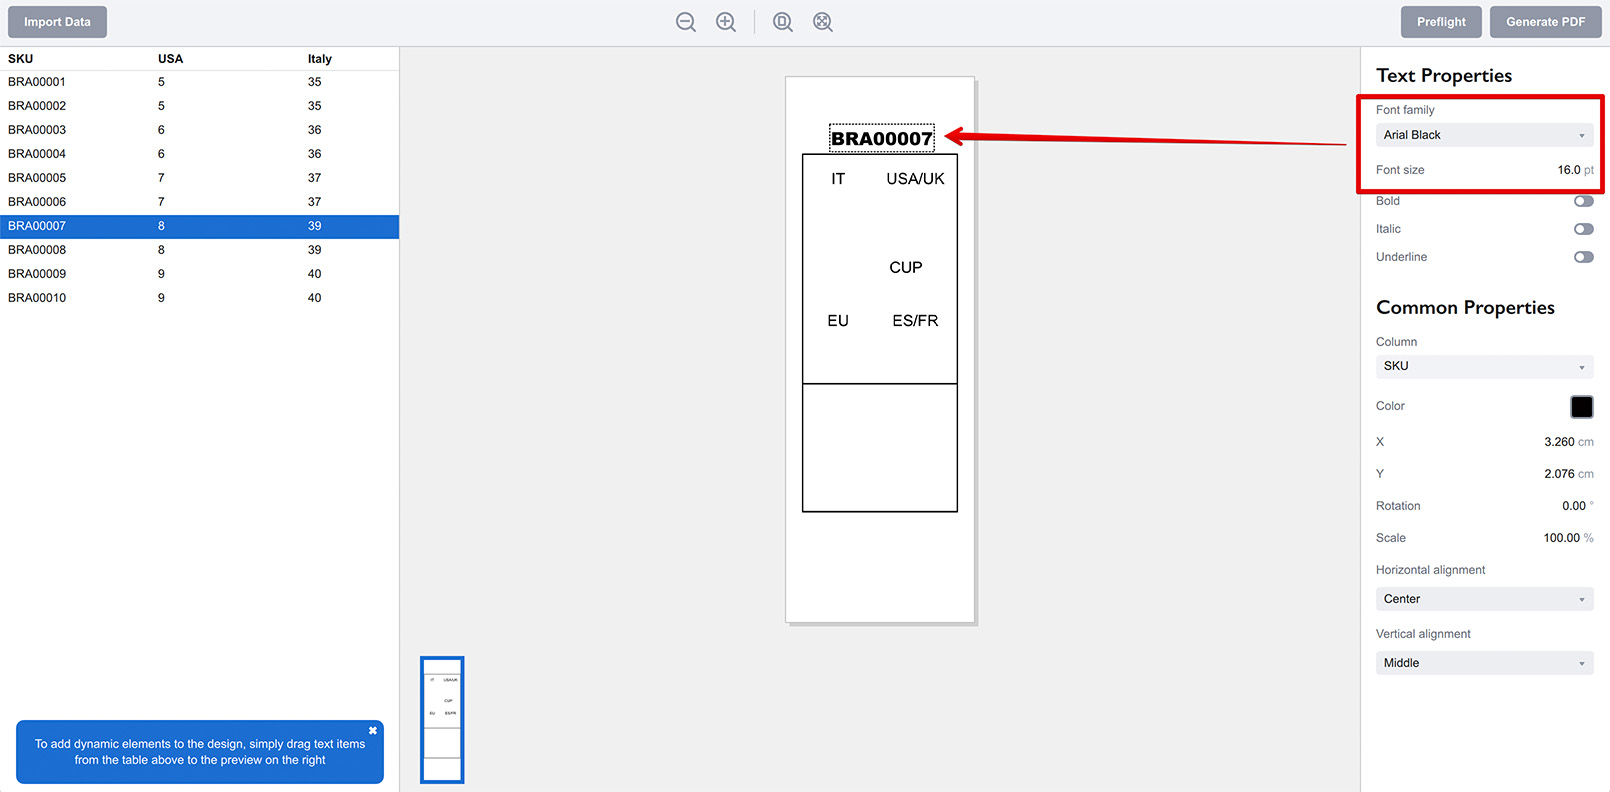
Here I changed the font family and size and placed the SKU text field right in the middle of the label. Note that you can adjust the element alignment against the anchor point using the Alignment controls at the bottom of the right panel.
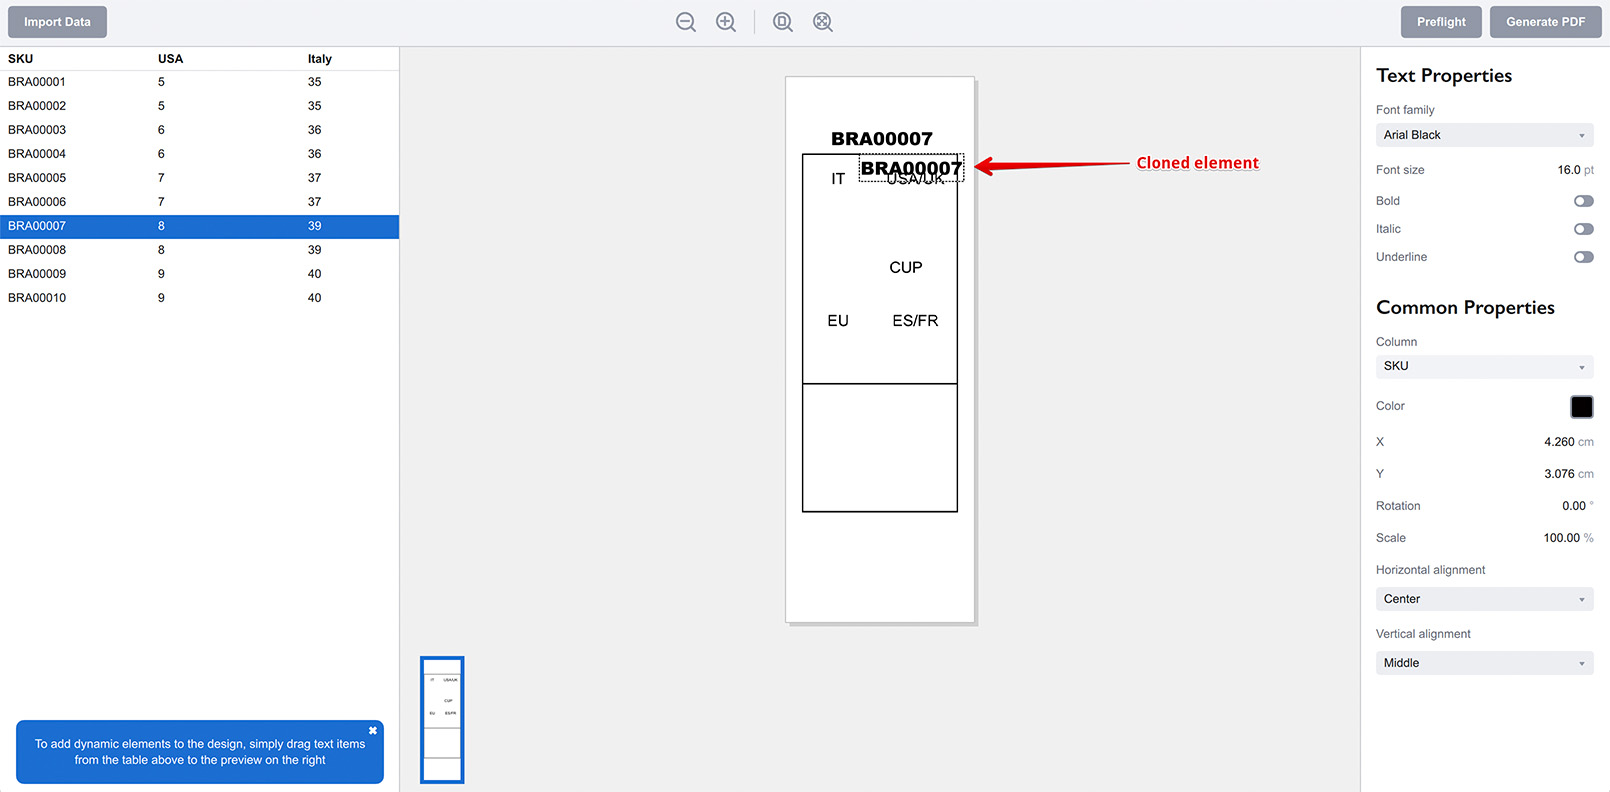
Now we need to add more dynamic elements for other input data, but instead of dragging and adjusting them one by one we can right-click the existing element and select Copy in the popup menu, then right-click again and select Paste, or use the standard copy/paste keyboard shortcuts.
You should end up with two dynamic text elements displaying the same SKU data:
Move the new element to its place on the canvas and change the data source column in the right panel:
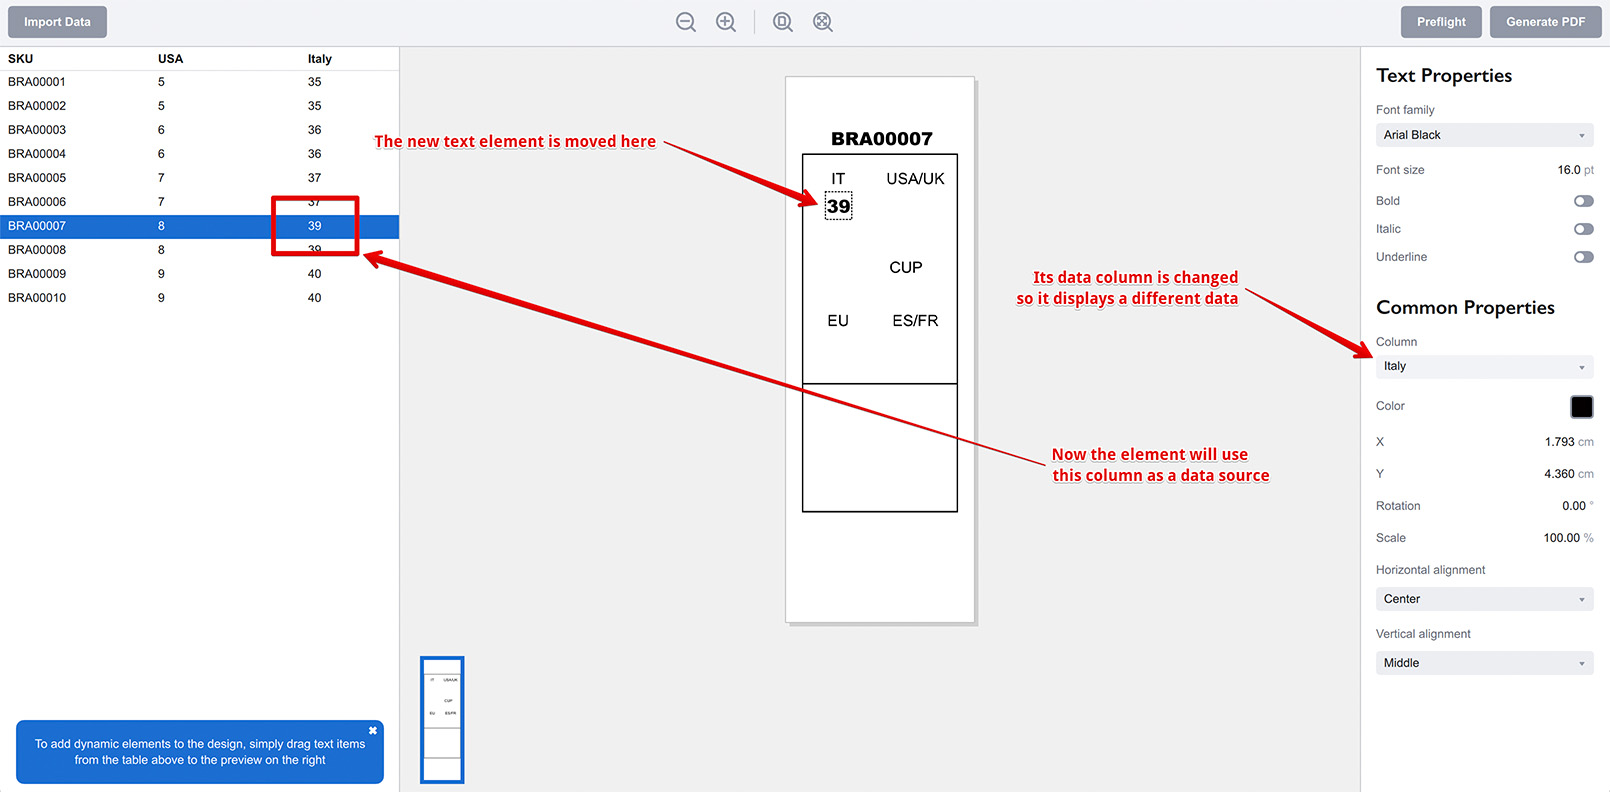
Here I moved the text element below the IT text on the canvas and changed its data column to Italy in the right panel, so it displays the data from the “Italy” column of my spreadsheet.
Repeat the same for all the other spreadsheet columns and you end up with something like this:
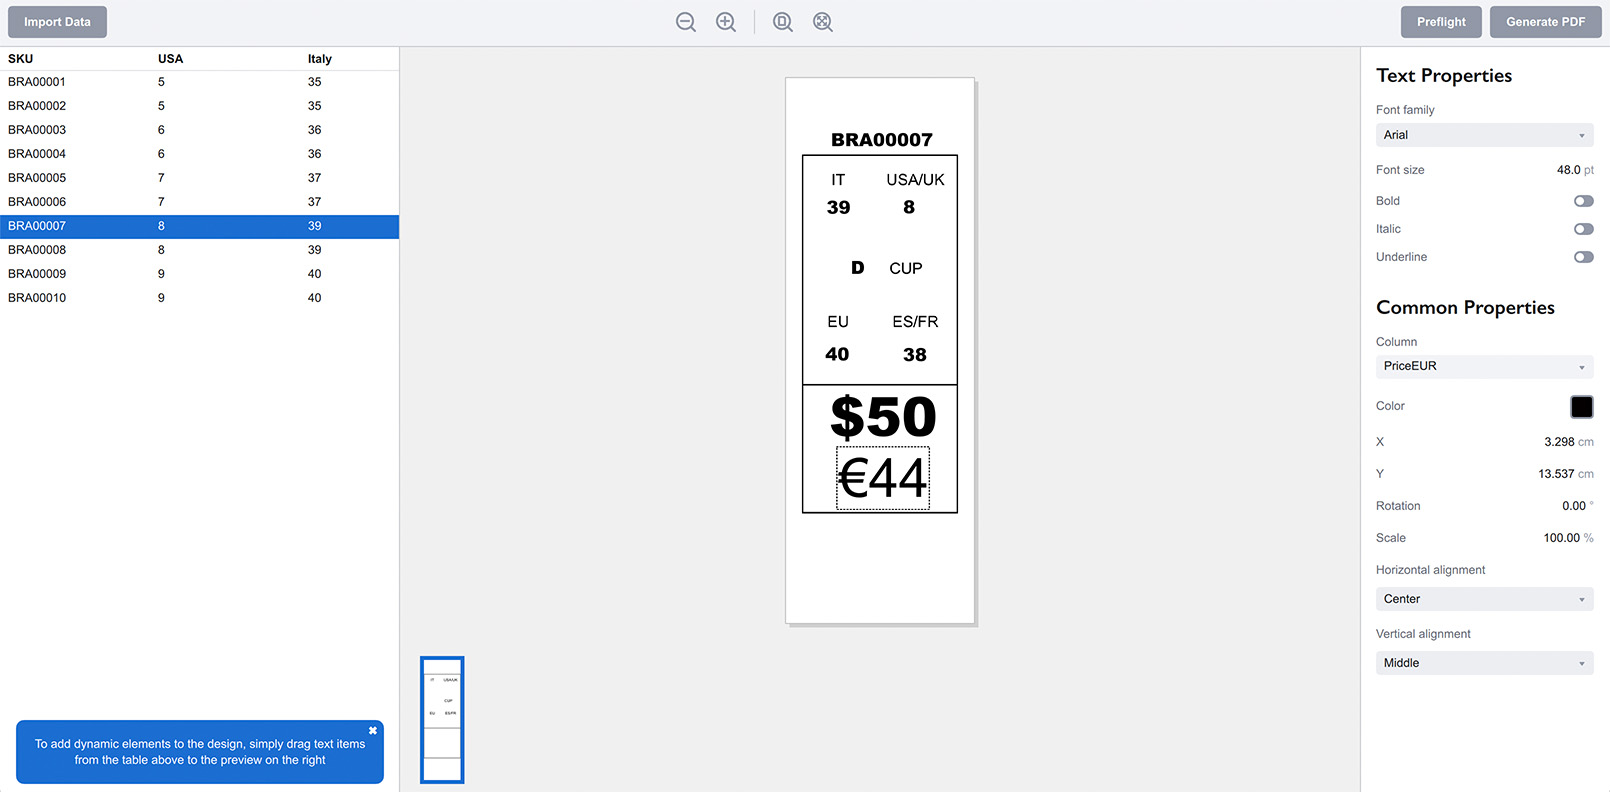
Almost all the elements have the same appearance except for the prices that have different fonts and size. All the project is done by copying, pasting and adjusting the positions and data sources, then the font was adjusted for the price elements.
You can now select different data rows on the left and see the dynamic elements get updated with the data of the selected row.
Adding Barcode Elements
Now let’s add a barcode to the bottom of the price tag. Drag the EAN-13 column to the canvas and select to add a barcode in the popup menu. You will get this:
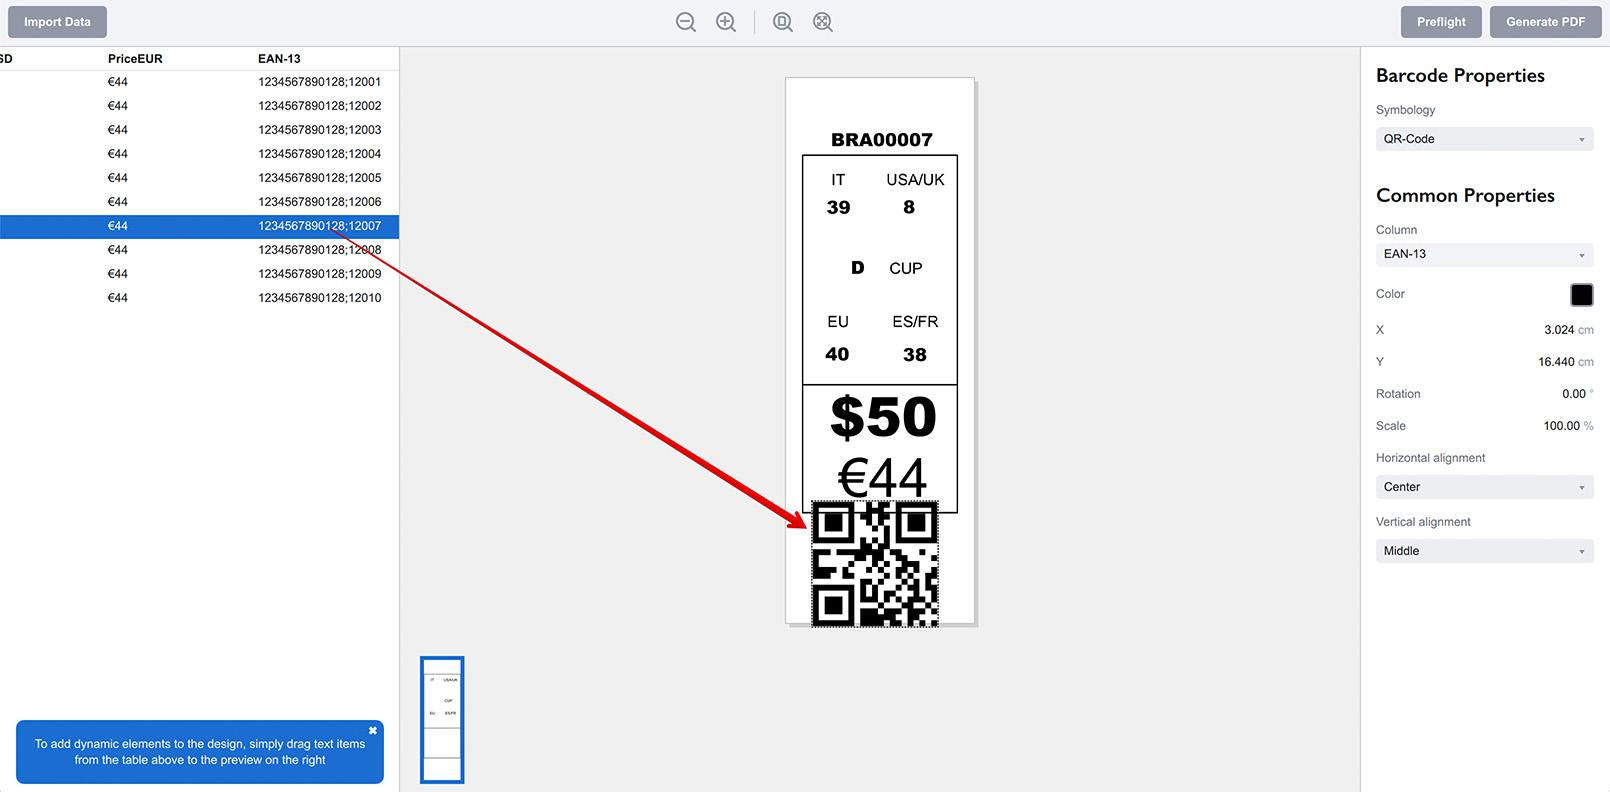
Ticket Wizard uses QR Code by default, but you can change that in the right panel by changing the Symbology field to EAN-13:
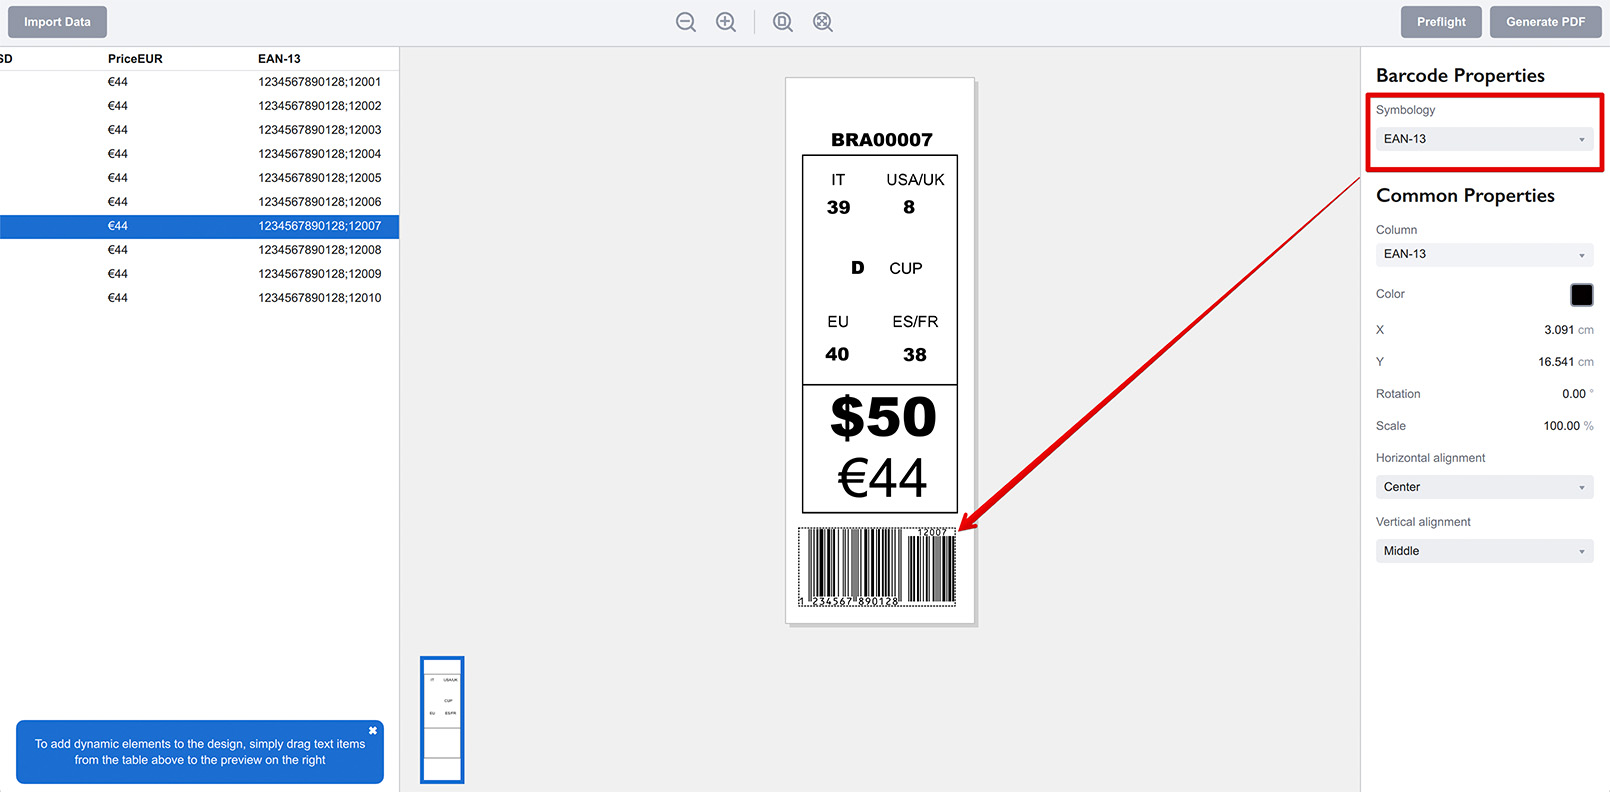
Done! The barcode is now EAN-13, and as the source data contains a semicolon, the second part is used for EAN-13 addon. Adjust the barcode position and scale, if needed and the price tag is finished.
Exporting Price Tags
Once the price tag is ready, you can click the Generate PDF button at the top right corner of the window. The software will check the input data and your elements for errors and if everything is fine, you will be asked to enter the output file name for the PDF file.
The Export Options popup may appear after you enter the file name, where you can configure a simple N-Up imposition if you want more than one price tag per output page. Here I selected a simple 5x2 layout with 1cm gaps:

Now you can print the PDF file, cut it up and use the tags. Job done :)
More Ticket Wizard Tutorials
Installation
- Installation — how to install Ticket Wizard;
- License Activation — how to activate Ticket Wizard with a license key.
Basics
- User Interface — the user interface of Ticket Wizard;
- Basic Project — making a basic project from scratch.
More Specific Examples
- Making Asset Tags — making inventory tags from Excel files and PDF artwork;
- Making Raffle Tickets — generating raffle tickets using PDF artwork template and spreadsheet data;
- Making Business Cards — batch–making business cards using Excel data and PDF template;
- Making Price Tags — making price tags using PDF template and spreadsheet.