User Interface
When you start Ticket Wizard the first time you will see the welcome screen like this:
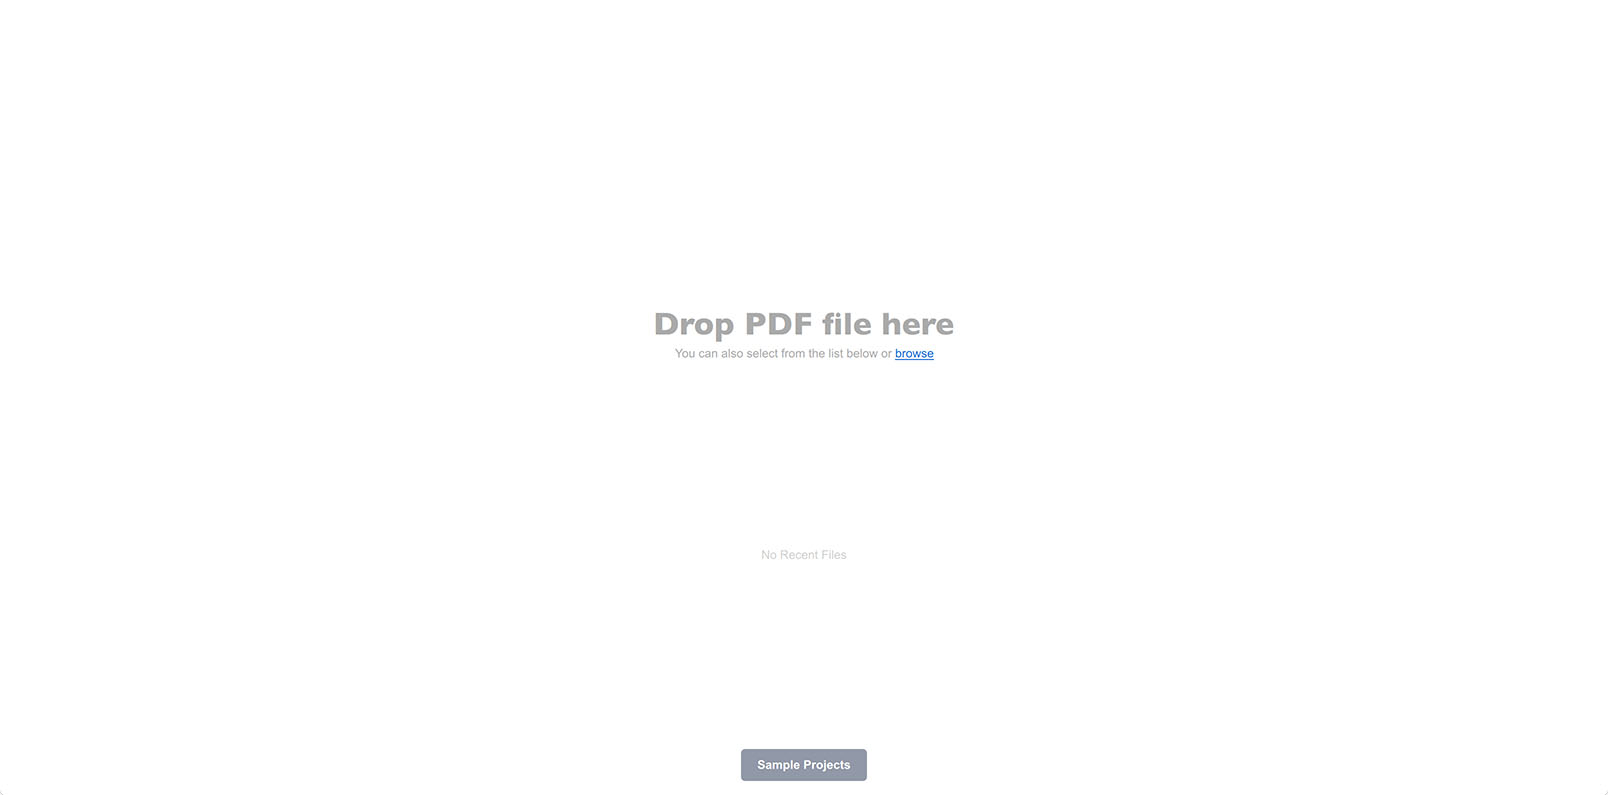
You may have some recently used projects listed at the bottom, but overall the start screen welcomes you and suggests you drop a PDF file to begin. You can do that, or click the browse link and select it manually. You can also browse for a Ticket Wizard project instead of PDF file.
The Samples button at the bottom lets you quickly load a pre-configured project that showcases the software features. Let’s do that, click the Samples button and select one of the projects to continue:
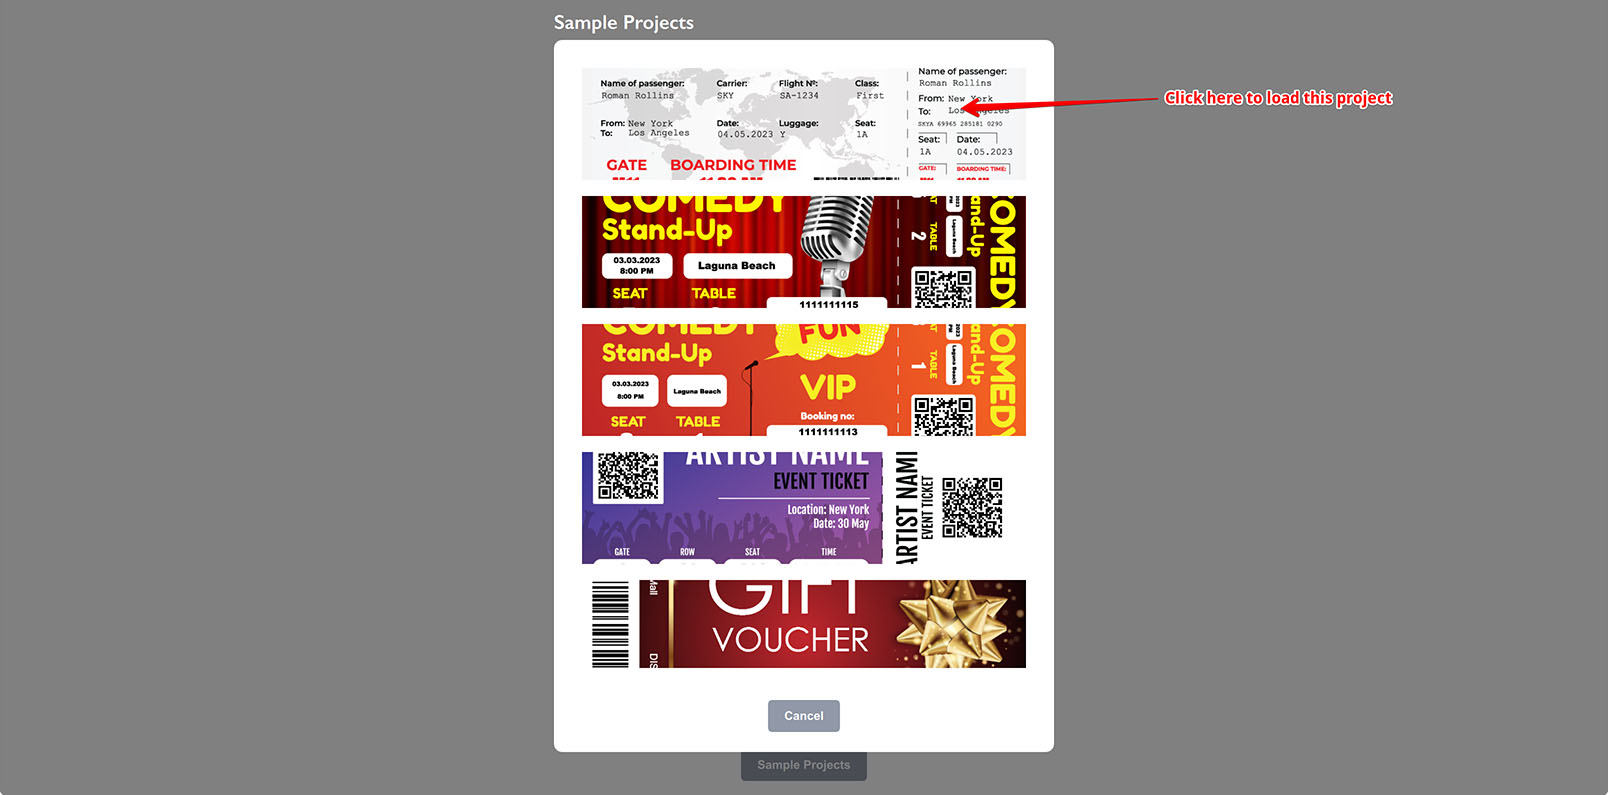
Click the top project in the list if you want to follow the tutorial.
Template Editor
Once the project is loaded you will see the template editor:
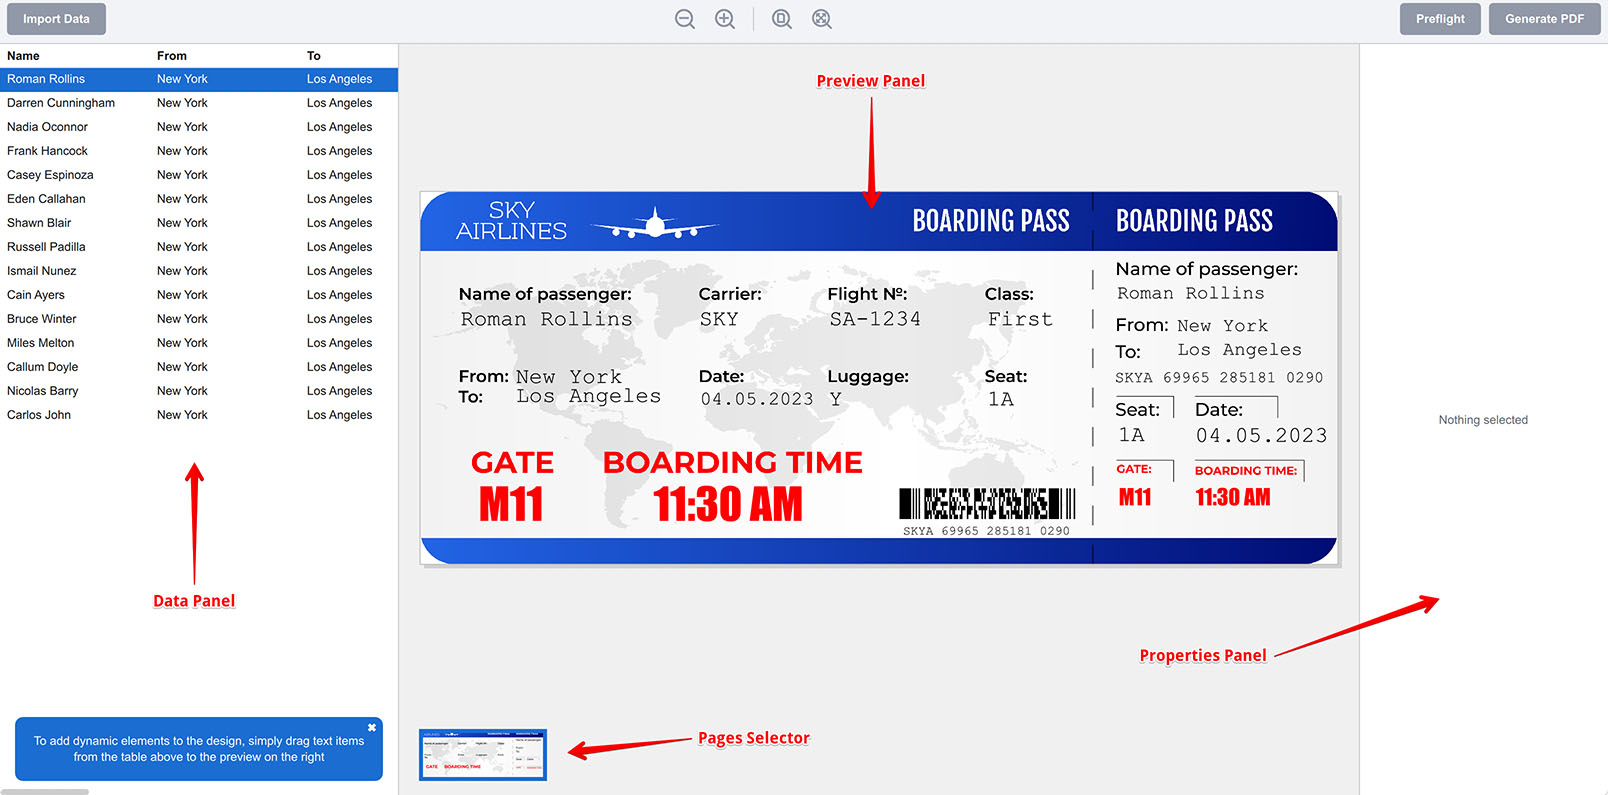
The panel on the left shows the data that will be used to populate and multiply the template. The panel on the right shows the properties of the selected element of the template (nothing is selected so it is empty). Finally, there is a template preview area in the middle.
If you click the data rows in the left panel, you’ll notice that the template in the middle changes to reflect the data of the selected row:
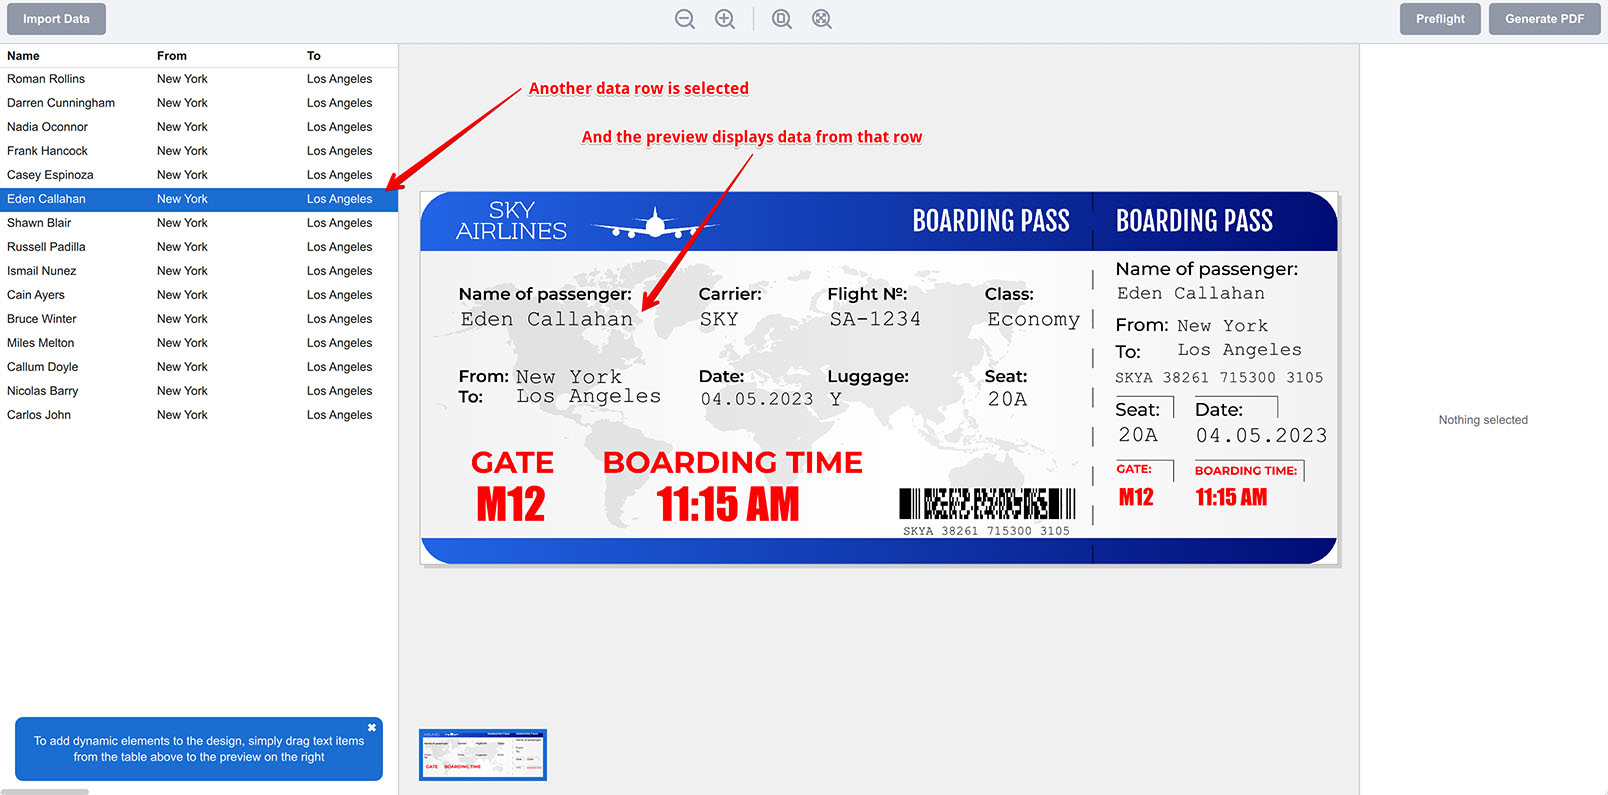
It does so by using the dynamic elements on top of the static artwork. When you make a Ticket Wizard project, you first load a PDF artwork for background, then place some dynamic elements on top and assign them to data columns. Those elements then keep tracking the selected row in the data table and update accordingly.
Click the passenger name in the top left part of the boarding pass template to select it and see the right panel changed:
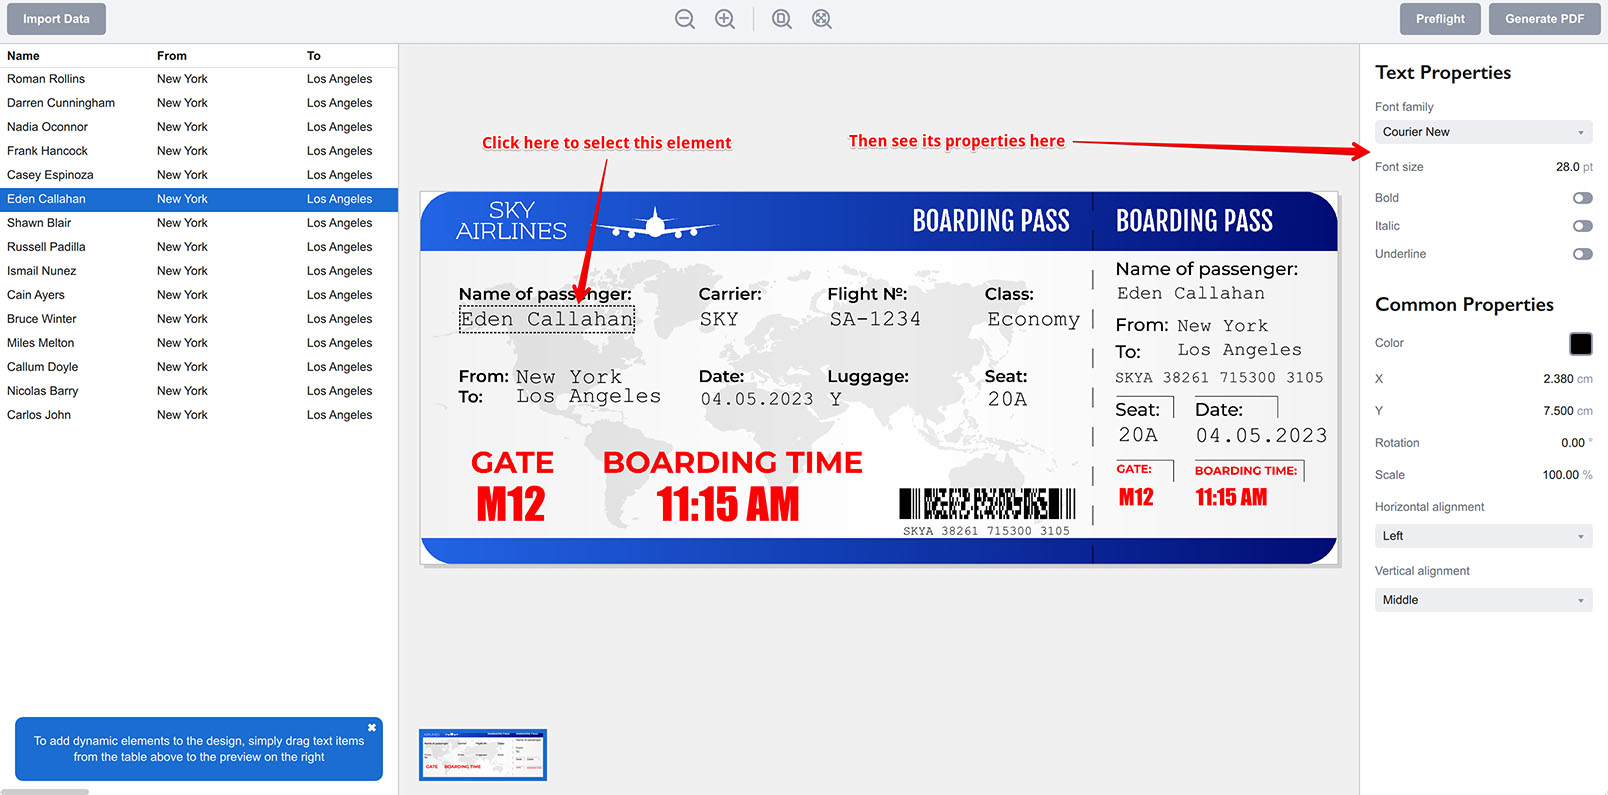
Ticket Wizard displays the properties of the selected element on the right. For text objects this includes font parameters, color, position, rotation, scale etc. For barcodes the symbology selector is displayed. You can also get some error messages there in case of any problems with the data.
You can change properties on the right and the selected element will reflect the changes. You can also drag the element with your mouse to move it:
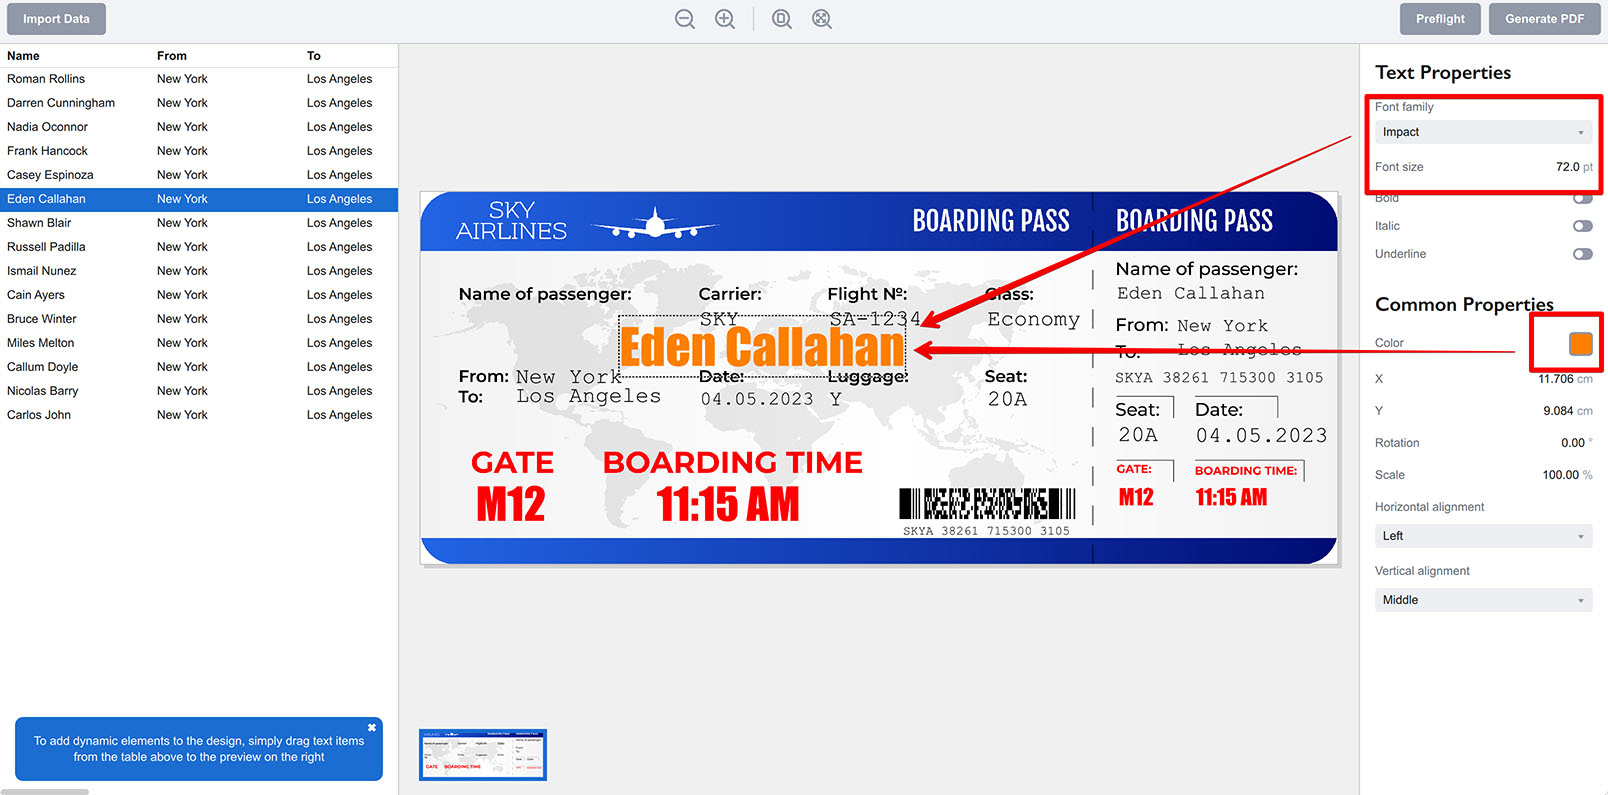
You can also assign another column to the element by right-clicking it and selecting a different column from the Source menu.
To add a new dynamic element to the template, simply drag its column from the table on the left to the preview area. A popup menu will be shown where you can select what type of element to add. Another option is to simply right-click the empty area of the template and use the popup menu to add a new element.
Linking Data To Elements
Each element is linked to the data column by using the column name. The element stores the column name and each time the new row is selected on the left, all the elements get their new data from the cells of their columns.
This is essential when you update the data on the left. You need to make sure that the spreadsheet you import has proper column names and that they are recognized by Ticket Wizard on import. Here I imported a completely different spreadsheet so no column name matches the design:
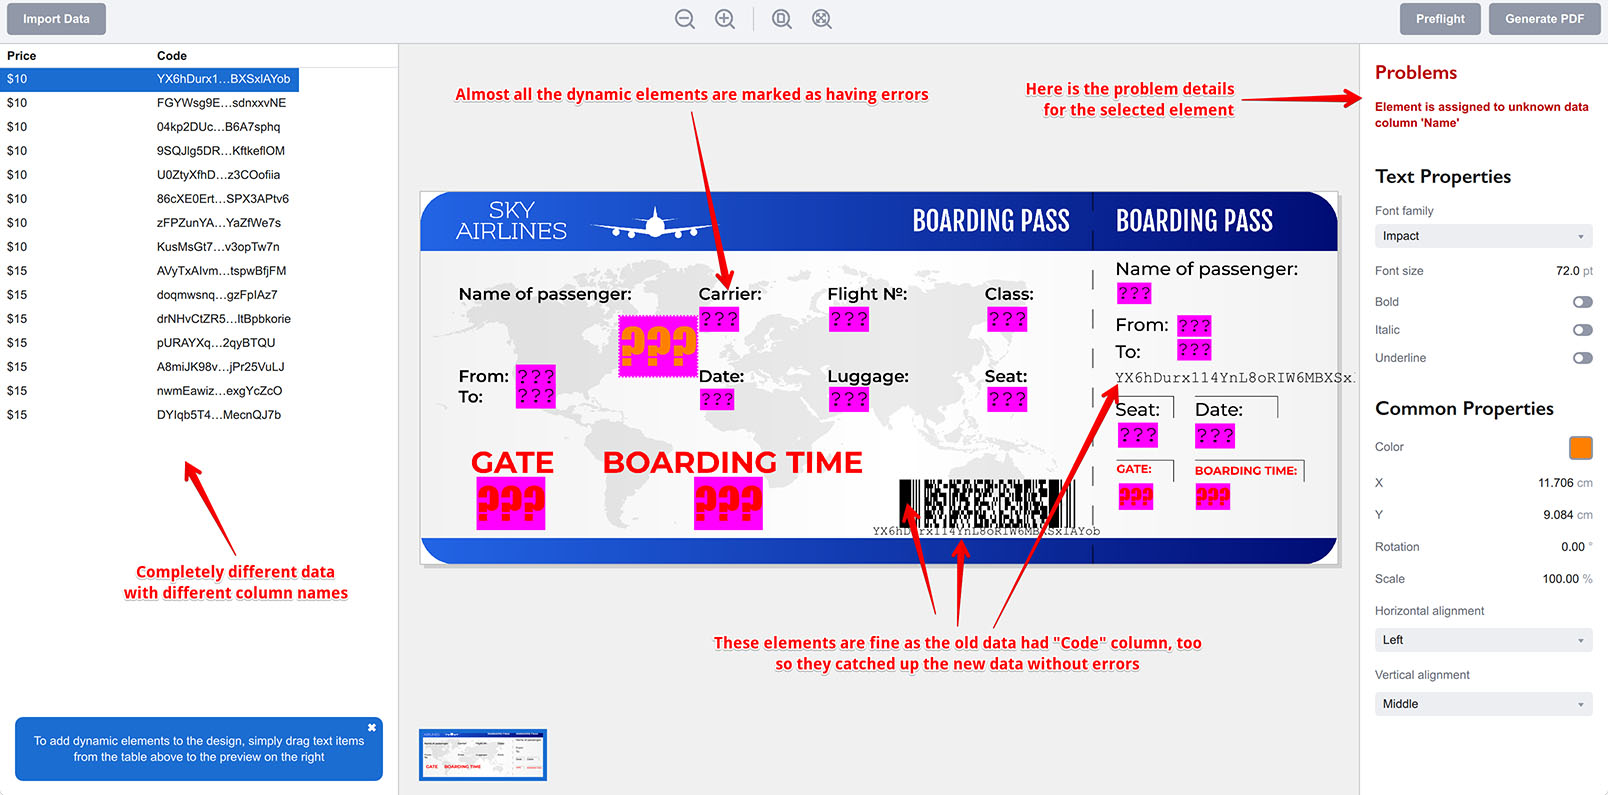
You can see that almost all the elements are marked with pink, which means they have issues. To see what exactly is wrong you can select the problem element and check the problem description on the right. On the image above the problem is pretty obvious: the element has been assigned to the “Name” column which is not there anymore. Note that some elements look fine, like the barcode at the bottom. That’s because it is linked to the column named “Code” and the newly imported data has that column.
So if you end up with incorrectly linked dynamic elements, you can always right-click them and assign to a proper column using the popup menu. Or simply delete them and create a new one instead.
Preflight — Checking Templates For Errors
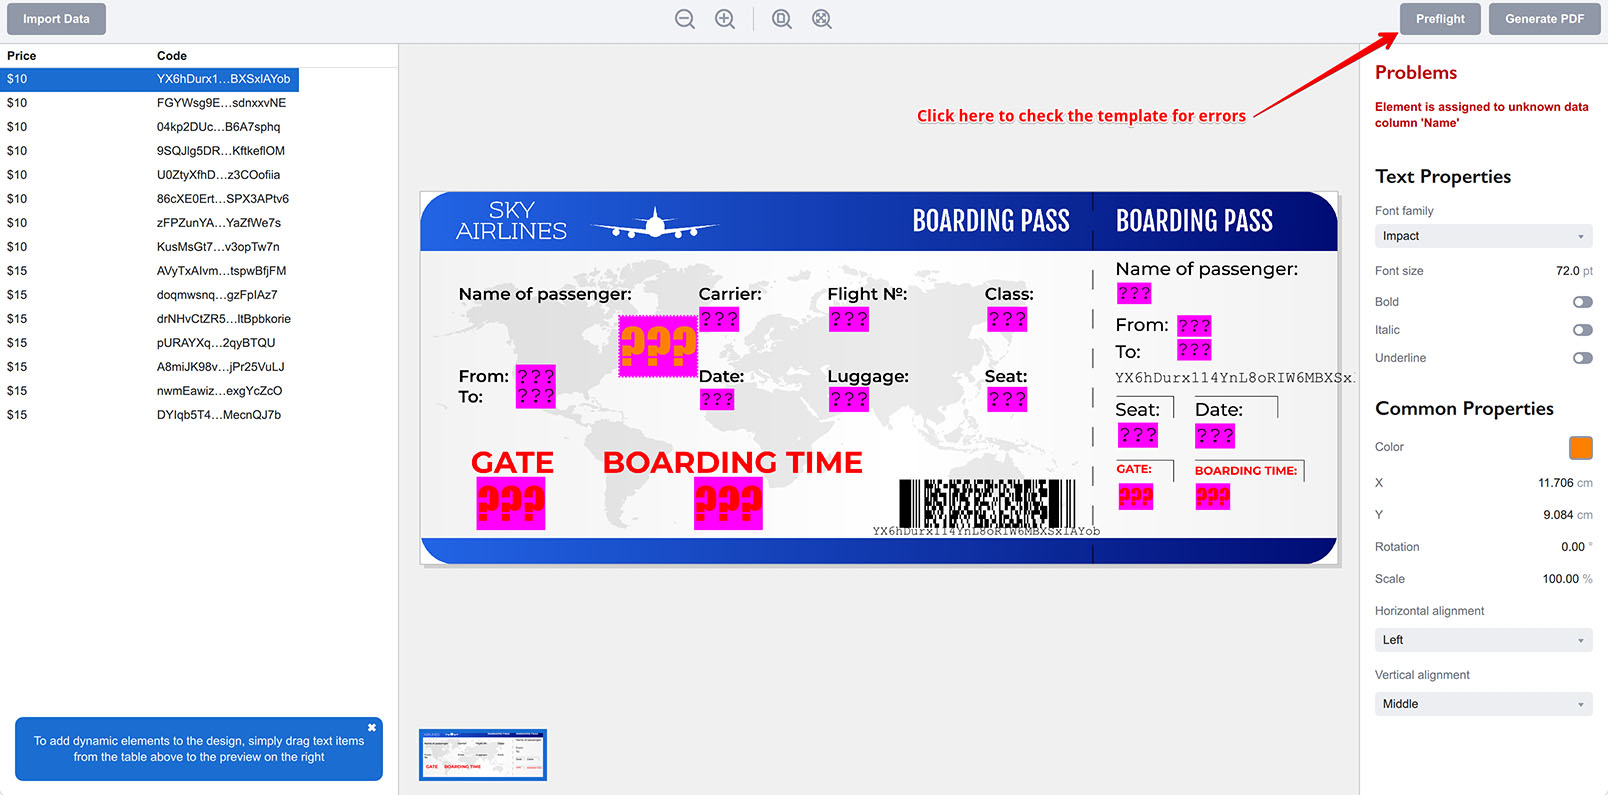
Sometimes the problem is not that obvious and preview may look fine, but somewhere at row 137 there could be a problem character that is missing in the font you use. In order to avoid surprises Ticket Wizard checks every dynamic element with every data from the assigned column when it generates the output file. If something goes wrong, you will get a list of errors after the generation is finished.
You can run that check manually by clicking the Preflight button at the top right corner of the window:
If you do this with the misconfigured template like we currently have, you’ll get many errors for sure, so this is a nice way to test the feature. Let’s do that:
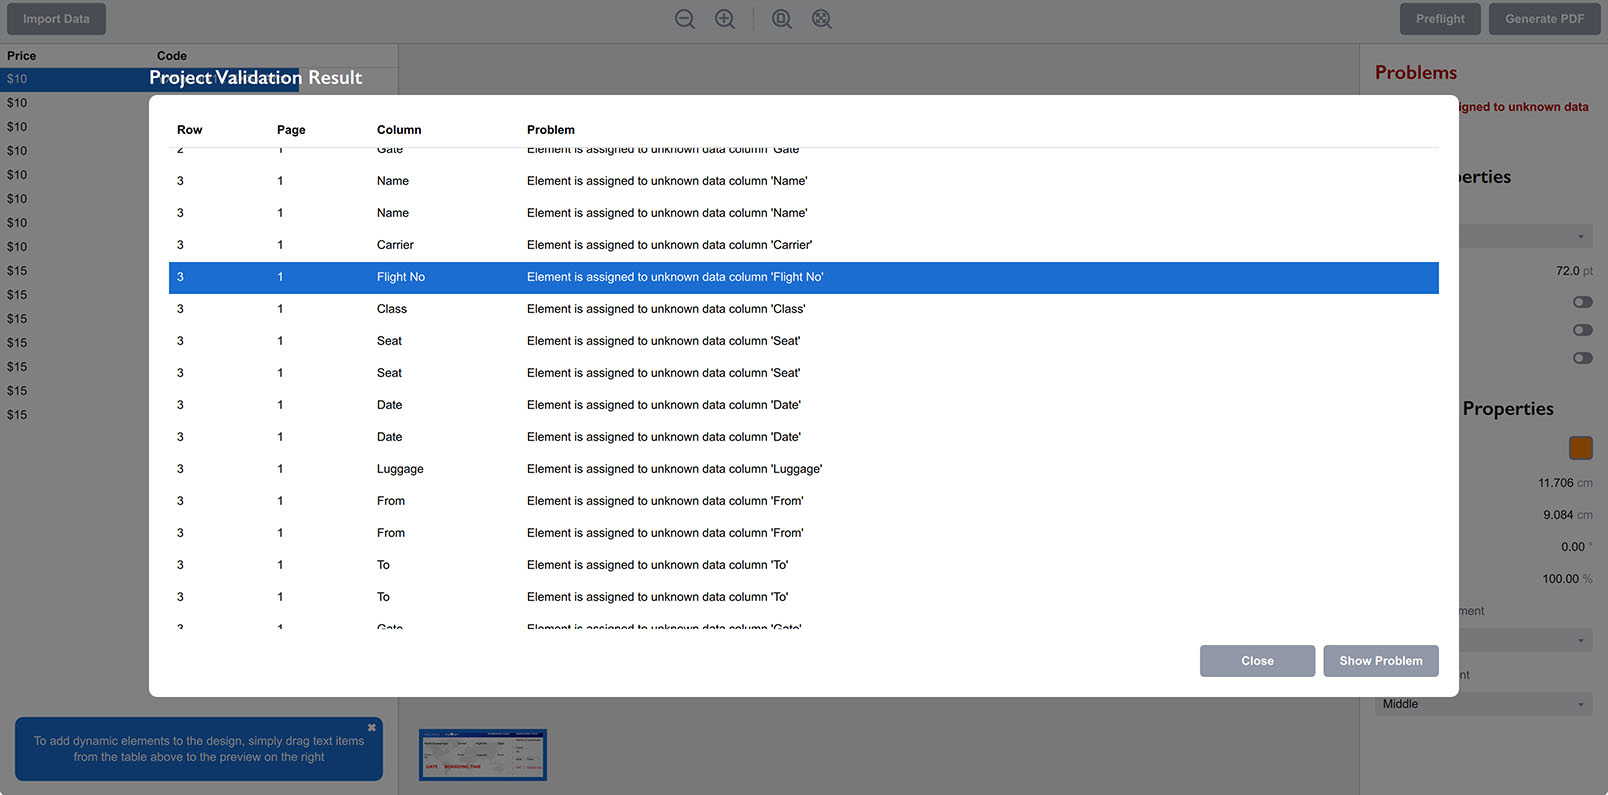
The popup panel shows a long list of problems found in the template. Each problem has a row number to identify which data triggers the problem, the page number which makes sense for multiple pages template, the column name assigned to the dynamic element and the problem description. You can double-click the problem line or select it and click Show Problem button to select the problem row and element and get a better understanding of the issue.
Generating Output PDF
Once everything is configured the way you need, you simply click the Generate PDF button at the top right corner of the window. Ticket Wizard will ask you for the output file name and make the PDF file with your templated copied and filled up with data from every row.
You can then save the template as a project if you plan to return and use it later.
More Ticket Wizard Tutorials
Installation
- Installation — how to install Ticket Wizard;
- License Activation — how to activate Ticket Wizard with a license key.
Basics
- User Interface — the user interface of Ticket Wizard;
- Basic Project — making a basic project from scratch.
More Specific Examples
- Making Asset Tags — making inventory tags from Excel files and PDF artwork;
- Making Raffle Tickets — generating raffle tickets using PDF artwork template and spreadsheet data;
- Making Business Cards — batch–making business cards using Excel data and PDF template;
- Making Price Tags — making price tags using PDF template and spreadsheet.